3-Ingredient Caramel Apple Recipe
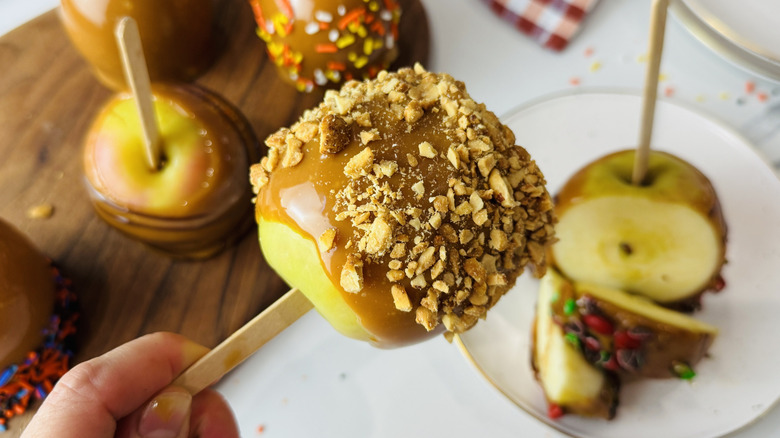
There's little that says fall festivals more than a caramel apple. The combination of buttery, chewy caramel wrapped around a crisp, tart, juicy apple strikes the perfect balance of flavors and textures. Whether you enjoy one plain or dress it up with toppings like chopped nuts, sprinkles, cookie crumbs, or a drizzle of melted chocolate, caramel apples are the kind of nostalgic, seasonal treat that never goes out of style. They're just as welcome at a school fair as they are at a dessert table full of Halloween candy.
Though candy apples are believed to have been invented in the early 1900s, caramel apples came along in the 1950s, when a Kraft Foods employee melted down caramels and dipped in an apple. They were an instant hit, and ever since, they've remained a beloved fall staple.
Recipe developer Katie Rosenhouse says, "If it's been a while since you've had a caramel apple, get ready to be pleasantly surprised. These aren't just delicious for kids and adults alike, they're also customizable and incredibly easy to throw together."
Gather the ingredients for 3-ingredient caramel apples
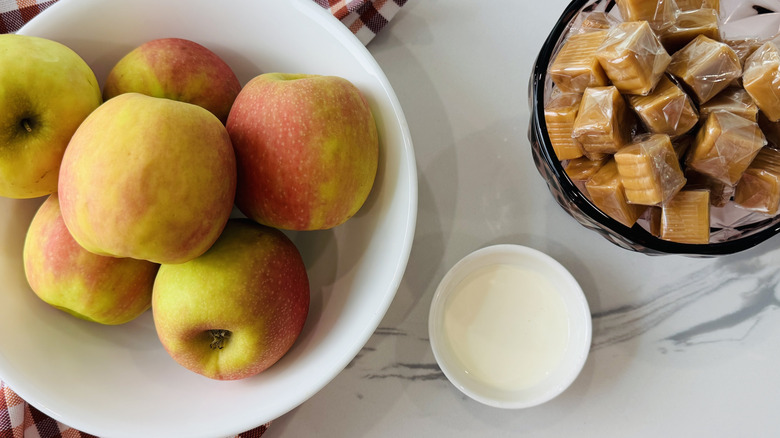
You'll need just three ingredients to prepare these easy, homemade caramel apples — plus any optional toppings you'd like to add as a finishing touch. To start with, you'll want to choose the right apples. Granny Smith is the traditional choice, with a tart flavor that balances the sticky-sweet caramel coating, but we prefer an apple you'd enjoy snacking on, like a Pink Lady or Honeycrisp. No matter what type you choose, make sure to opt for a firm variety that will hold up well to the process of cleaning and dipping. Smaller apples have the benefit of being easier to dip and more manageable to hold and eat.
Soft caramels are a great shortcut ingredient. They're quick and easy to melt, and remove the obstacle of having to cook sugar to a perfect caramel. Heavy cream thins the melted caramel just enough to easily dip the apples, while still keeping the texture thick enough to set.
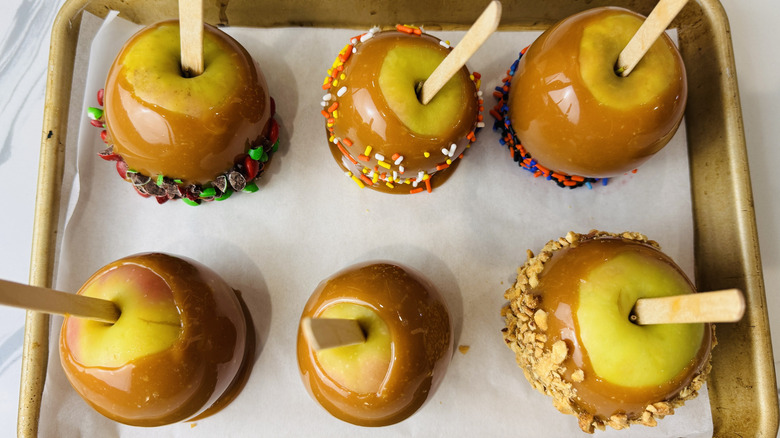
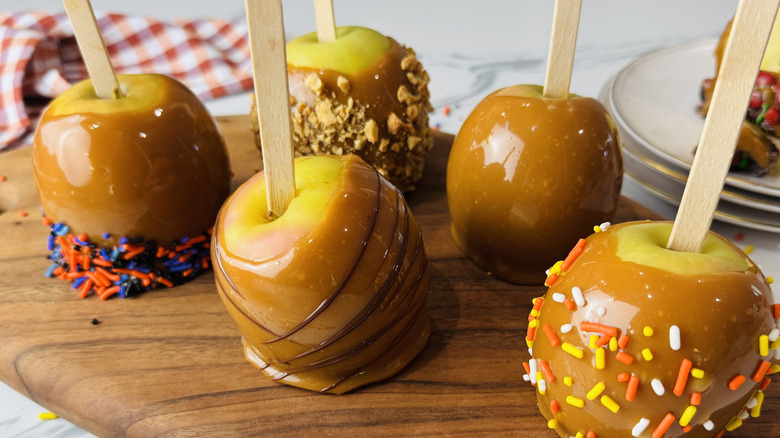
After dipping, you can dip, drizzle, or sprinkle the apples with any number of toppings, from crushed nuts, candies, or cookies, to sprinkles, melted chocolate, and more.
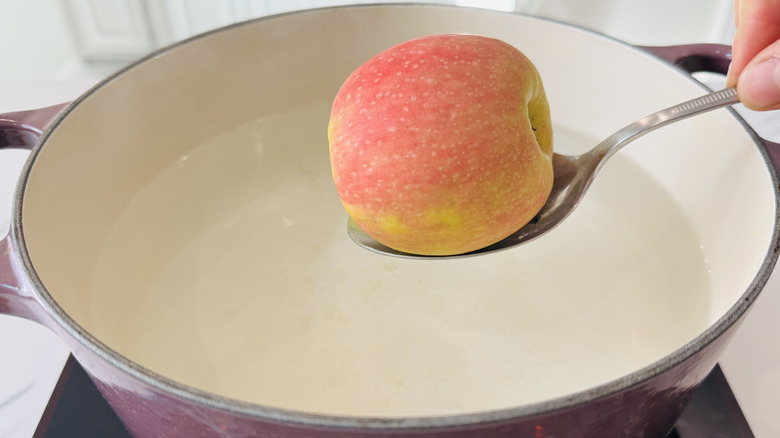
Step 1: Simmer water
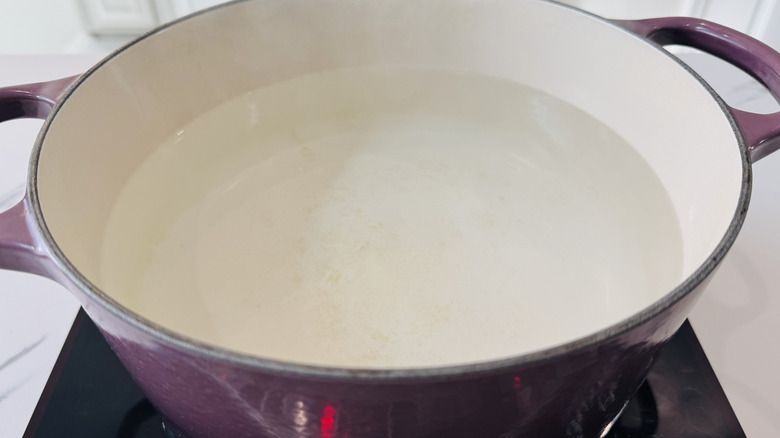
Bring at least 3 inches of water to a simmer in a large pot.
Step 2: Add the apples
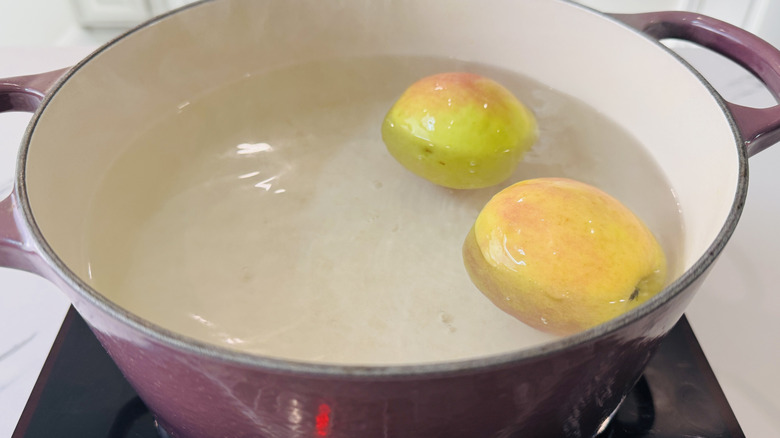
Add one or two apples at a time, and use a slotted spoon to rotate occasionally for about 1 minute.
Step 3: Remove wax
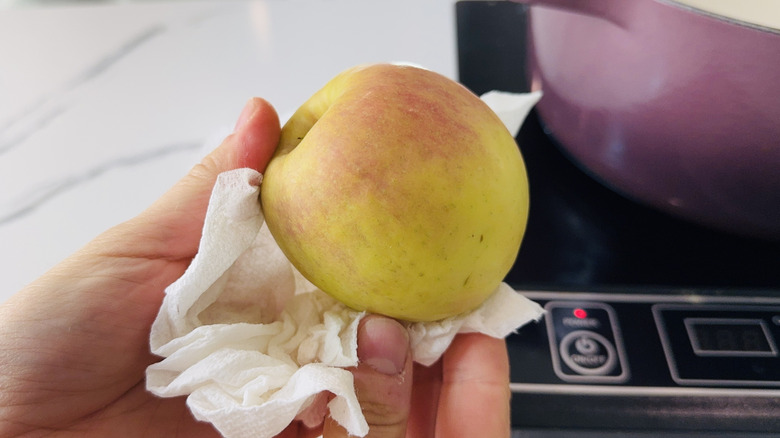
Lift one apple out of the water at a time and rub briskly with a paper towel to remove any wax coating.
Step 4: Repeat
Repeat with the remaining apples.
Step 5: Transfer to a baking sheet
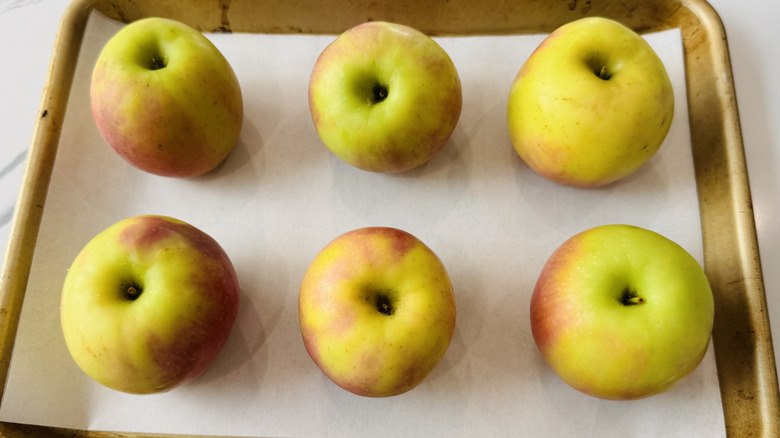
Transfer the apples to a parchment-lined baking sheet or platter.
Step 6: Add sticks
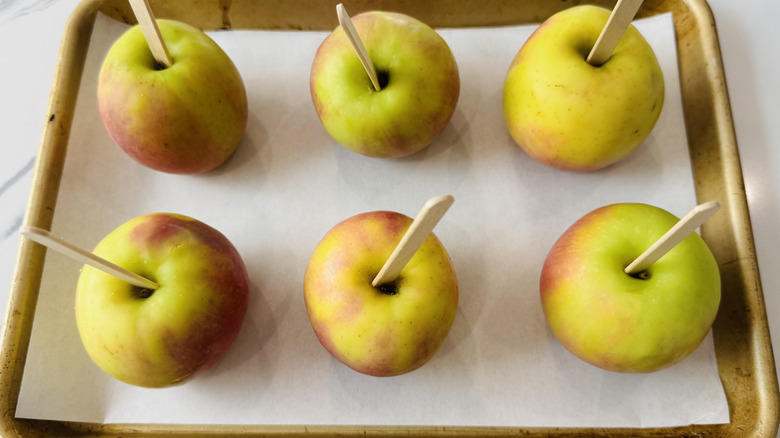
Push one popsicle stick or wooden skewer into each apple.
Step 7: Chill the apples
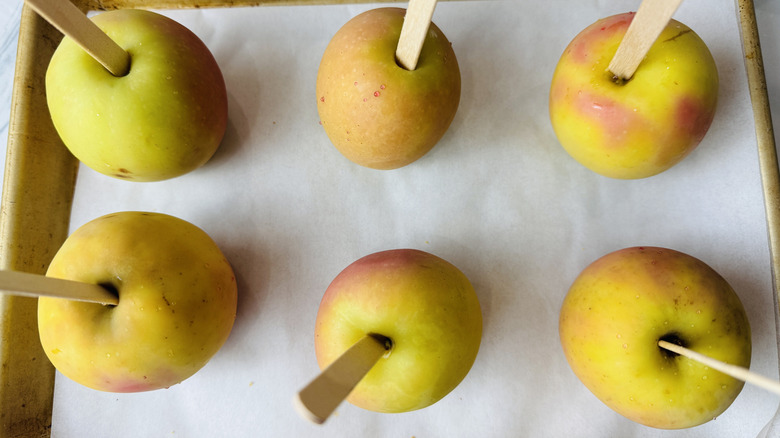
Refrigerate for at least 1 hour.
Step 8: Wipe the apples

After an hour, you may see a sticky liquid beading on the surface of the apples. Use a paper towel to wipe it away.
Step 9: Heat caramel
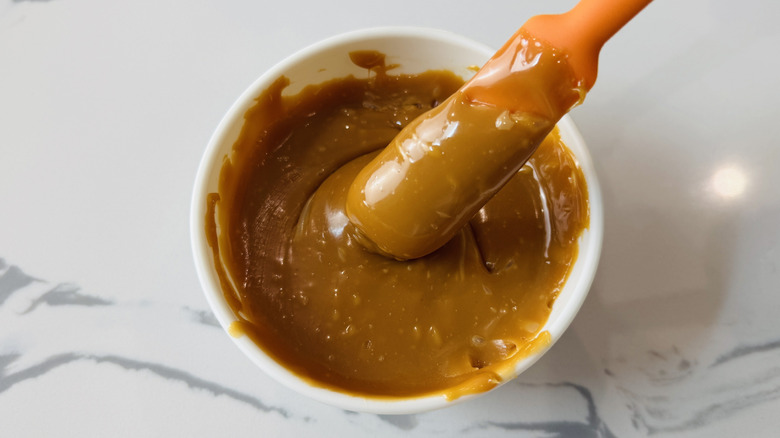
In a small, microwave-safe bowl, melt half the caramel candies in 15-second spurts, stirring until smooth.
Step 10: Stir in cream

Stir in 1 tablespoon of cream to combine.
Step 11: Dip the apples
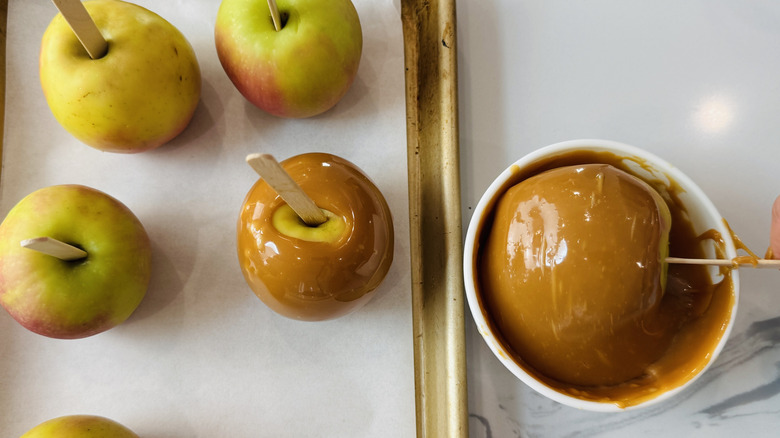
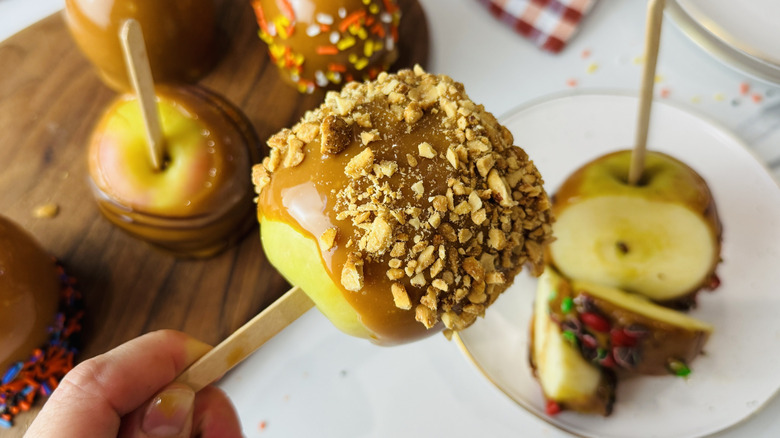
Dip one apple at a time into the caramel to coat, rotating slowly to cover all sides and letting the excess drip off. Wipe off the bottom lightly to remove excess.
Step 12: Repeat

Transfer the apple back to the baking sheet and repeat with two more apples.
Step 13: Add toppings
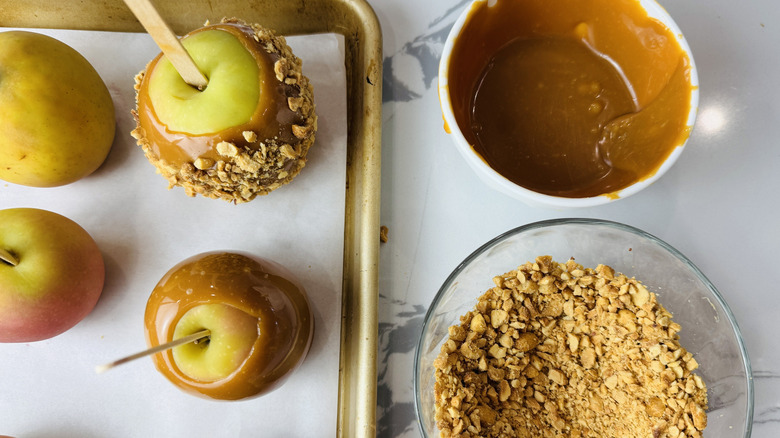
Melt the remaining caramels, add the remaining cream, and repeat with the remaining apples. Optionally, while the caramel coating is warm, you can dip each apple into crushed nuts, sprinkles, or any desired toppings.
Step 14: Chill
Refrigerate briefly until set.
Step 15: Serve the caramel apples
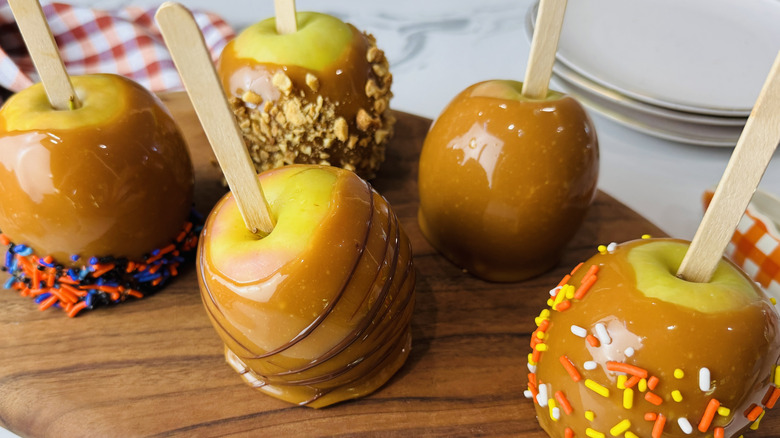
Drizzle with melted chocolate if desired, then serve the caramel apples.
What can I serve with caramel apples for a Halloween party?
3-Ingredient Caramel Apple Recipe
Throw together this nostalgic combination of sweet sticky caramel and tart crunchy apples with only 3 ingredients for your next autumn celebration.
Ingredients
- 6 small to medium apples
- 2 (11-ounce) bags soft caramels, unwrapped, divided
- 2 tablespoons heavy cream, divided
Optional Ingredients
- Nuts or sprinkles, for garnish
- Melted chocolate, to drizzle
Directions
- Bring at least 3 inches of water to a simmer in a large pot.
- Add one or two apples at a time, and use a slotted spoon to rotate occasionally for about 1 minute.
- Lift one apple out of the water at a time and rub briskly with a paper towel to remove any wax coating.
- Repeat with the remaining apples.
- Transfer the apples to a parchment-lined baking sheet or platter.
- Push one popsicle stick or wooden skewer into each apple.
- Refrigerate for at least 1 hour.
- After an hour, you may see a sticky liquid beading on the surface of the apples. Use a paper towel to wipe it away.
- In a small, microwave-safe bowl, melt half the caramel candies in 15-second spurts, stirring until smooth.
- Stir in 1 tablespoon of cream to combine.
- Dip one apple at a time into the caramel to coat, rotating slowly to cover all sides and letting the excess drip off. Wipe off the bottom lightly to remove excess.
- Transfer the apple back to the baking sheet and repeat with two more apples.
- Melt the remaining caramels, add the remaining cream, and repeat with the remaining apples. Optionally, while the caramel coating is warm, you can dip each apple into crushed nuts, sprinkles, or any desired toppings.
- Drizzle with melted chocolate if desired, and then refrigerate briefly until set.
- Serve the caramel apples.
Nutrition
| Calories per Serving | 509 |
| Total Fat | 10.5 g |
| Saturated Fat | 3.8 g |
| Trans Fat | 0.1 g |
| Cholesterol | 12.9 mg |
| Total Carbohydrates | 105.3 g |
| Dietary Fiber | 4.4 g |
| Total Sugars | 87.2 g |
| Sodium | 257.8 mg |
| Protein | 5.4 g |
Tips for the best caramel apples

Making perfect caramel apples can be simple, as long as you know what pitfalls to avoid along the way. The first step is choosing the right apples and storing them properly. You'll want firm, small apples that are easy to dip and handle throughout the process. Store the apples in the refrigerator, so the caramel coating will set more quickly on their surface.
While dunking the apples in hot water may seem like just an extra step, it's incredibly important. The hot water helps remove the wax coating from the apples, which would keep the caramel from adhering properly. Rub thoroughly after simmering and chill for at least an hour — during this time, you'll notice some sticky dots of liquid forming on the surface. They'll need to be wiped off before dipping, or you'll find bubbling all over the surface of the apples after dipping, ruining their look.
Choose soft caramels for coating (hard caramels would be too brittle), and avoid overheating in the microwave, which could cause them to burn. If the caramel cools too quickly while dipping, simply pop it back into the microwave for a few seconds to bring it back to the right consistency. Lightly scrape off the bottom of the apples after dipping to remove any excess, which could cause a "foot" or ring of caramel to set around the base. Chill to help the caramel set more firmly before serving.
How long do caramel apples last?
While caramel apples are best made and enjoyed on the same day, they can be made ahead if needed. To make them early in the day to serve for an afternoon or evening party, prepare as directed and store them uncovered in the refrigerator. Let them stand at room temperature while serving. For longer storage, seal the apples in airtight storage containers or individual cellophane bags to reduce exposure to air and moisture. In the refrigerator, they should last up to four days.
If you do have caramel apples left over that you just won't finish in time, freezing can be another good option. Note that the texture of the apples and caramel may change slightly after freezing. To freeze, consider slicing up the apples for easy grabbing. Transfer to an airtight container or freezer-safe zip-top bag, and seal tightly. Freeze for up to two months. Thaw in the refrigerator before serving.
The one thing you probably shouldn't do? Store your caramel apples at room temperature. This leaves them at the mercy of humidity, warm temperatures, and even bugs that may be attracted to the caramel coating. Always check stored caramel apples for mold, discoloration, changes in texture, or an off-odor before enjoying.