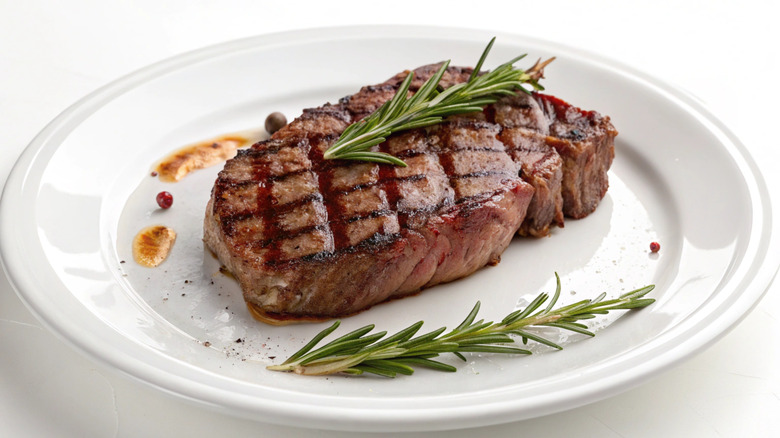
12 Tips All Home Chefs Should Know For The Juiciest Steaks

With a crispy sear on the outside and a juicy, tender interior, a well-prepared steak can turn an ordinary meal into a special occasion. From the delicate texture of a tenderloin to the robust, meaty bite of a T-bone, each cut offers a slightly different experience. Still, a great steak is about much more than the cut. If not handled properly, even the most coveted piece of beef can turn out tough and dry.
While cooking steak at home can feel intimidating, it doesn't have to be. The reality is that a successful meal comes down to a few basic elements, including preparation, timing, and technique. Mastering these key fundamentals can turn the preparation process from a guessing game to second nature.
You might feel like steak from a restaurant always tastes better, but whether you are cooking on a skillet or firing up a grill, making it at home doesn't have to be complicated. With the right know-how, achieving that perfect balance of buttery tenderness and charred edges isn't as daunting as it sounds. On that note, here are our tips for making your next steak a sizzling success.
Select the right cut of beef

Different cuts of beef have varying flavors and textures. The cow's muscles that do less work are juicy and tender, while the more active ones tend to be flavorful and relatively tough. While all steaks have slightly different qualities, some of the most succulent include ribeye, New York strip, porterhouse, and filet mignon. On the other end of the spectrum, cuts such as flank, brisket, and chuck are leaner and more sinewy, making them ideal for dishes such as beef stew and pot roast.
The easiest cuts of steak to cook are typically the tender ones. Meanwhile, tougher pieces of beef require longer cooking times and more careful preparation to avoid ending up chewy. In short, since steaks shouldn't be kept on direct heat for long, leaner and tougher cuts often fall short on the right amount of time to break down their connective tissue, resulting in a firmer, chewier bite. This is precisely why many choose to leave cuts like brisket to the professionals at barbecue joints.
When buying a steak, look for abundant marbling — those thin white streaks of fat running through the meat — as they melt during cooking and keep the steak juicy. Also, it's best to opt for uniformly thick steaks, as this reduces the risk of one part overcooking while the other stays underdone. In the U.S., it can help to choose USDA grades like Prime or Choice, which indicate superior marbling and tenderness compared to leaner Select cuts.
The type of oil matters
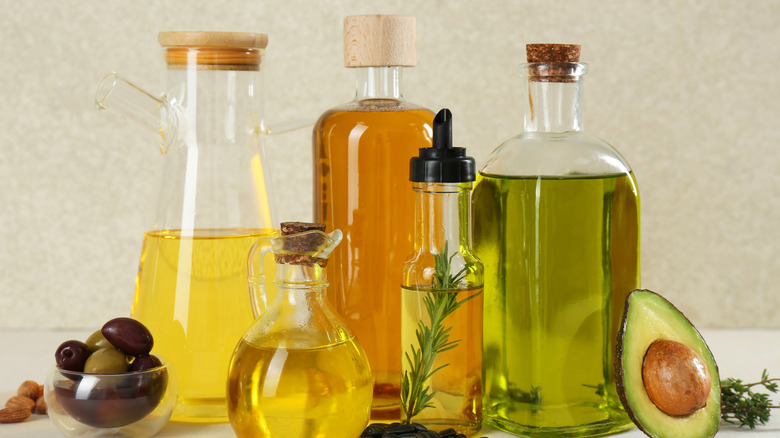
The type of oil you use to cook your steak can affect its flavor, texture, and sear. Since many cuts of beef are cooked on piping hot pans, it's best to prepare them in oil with a high smoke point. For those not in the know, smoke point refers to the temperature at which the cooking fat starts to burn. Once this happens, it will begin to smoke and can give your food a harsh, acrid taste –– not to mention the risk of harmful free radicals. And in case you are wondering, mixing butter with oil won't increase its smoke point.
So what are the best and worst oils to use for searing? High smoke point options like refined avocado, grapeseed, or canola are ideal for cooking with hot pans. Another option is to use ghee or clarified butter, both of which can withstand high heat while adding a touch of nuttiness to the meat. On the other hand, extra virgin olive oil, coconut oil, or regular butter have relatively low smoke points, meaning they could burn before your steak reaches the perfect sear.
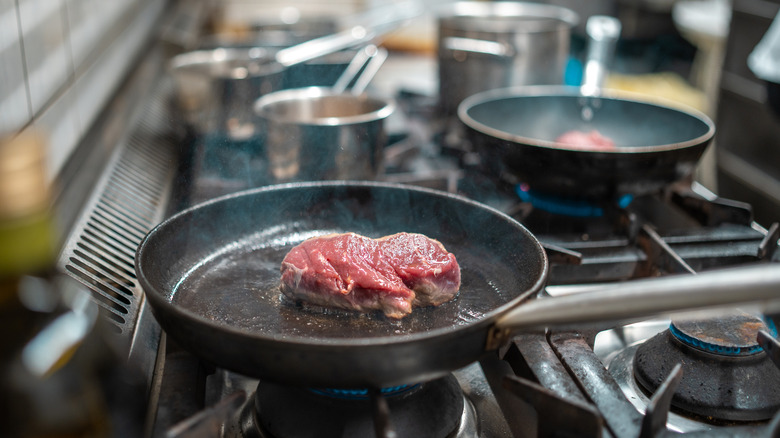
Use the right pan and preheat the cooking surface

Getting your pan or grill sizzling hot before adding a tender cut of steak is the key to that perfect, restaurant-quality sear. This is because ultra-high temperatures activate the Maillard reaction — the chemical process that gives the beef its deep, savory flavor and beautiful crust. A hot surface also reduces the risk of sticking, allowing the meat to lift away easily after it has seared.
For the perfect steak, choose a heavy-duty pan that retains heat, such as cast iron. Once on the stove, it's best to heat the cast iron before adding oil to ensure that the entire pan reaches an even, searing temperature before you drizzle it with your cooking fat. To test whether it's ready for action, move your hand a few inches above its surface to feel for equal heat in all zones. Alternatively, you can flick a few drops of water into the pan to check for the right temperature. The droplets should bead up and glide around the surface when it's ready, rather than sizzling away.
Let the steak come to room temperature and pat it dry
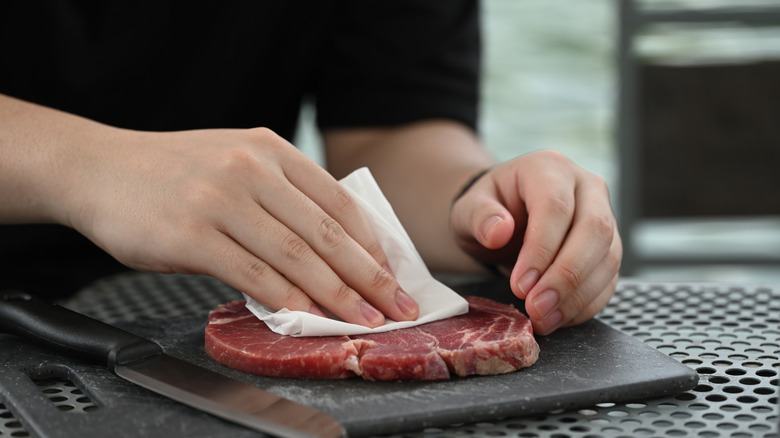
As tempting as it may be to throw a steak in the pan as soon as you take it out of the refrigerator, a little patience can go a long way. Allowing the meat to come to room temperature helps it cook more uniformly, preventing a cold center and an overdone exterior. For best results, take your beef out of the fridge anywhere from 20 minutes to an hour before cooking. That said, never leave the steak out for longer than two hours, since, after that, it may go above 40 degrees Fahrenheit and enter the unsafe temperature range that is conducive to bacterial growth.
Once the cut of beef has had the chance to reach room temperature, pat it dry thoroughly with a paper towel before placing it on the hot pan or grill. If the steak is still damp when it hits the cooking surface, the water has to evaporate first, meaning you are actually steaming the meat instead of searing it. This, in turn, prevents or delays the Maillard reaction (which gives the steak that lovely external crust) and sabotages your mission for a perfectly browned bite. Last but not least, drying the beef also minimizes oil splatter, keeping your stovetop clean and ensuring kitchen safety.
Don't overseason the steak
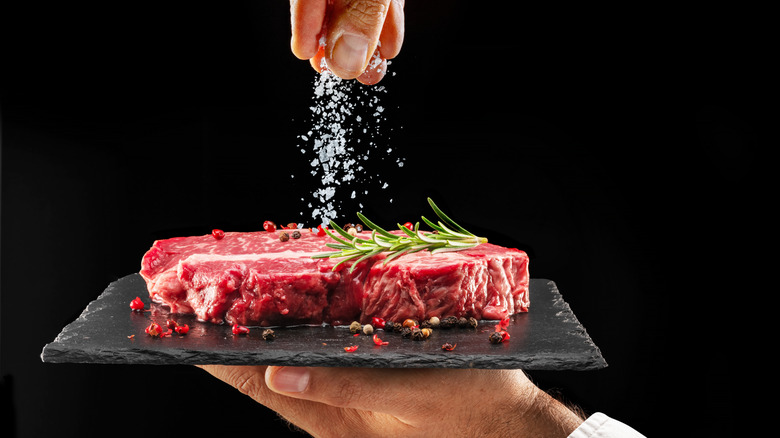
Sprinkling seasoning over a steak can enhance its taste and texture, provided you know what you are doing. This is because overseasoning beef can overpower its natural flavor, defeating the whole purpose of choosing a quality cut in the first place. As such, it pays not to be heavy-handed with additions like black pepper, thyme, or chili flakes. Some consider one teaspoon per pound of meat to be the perfect ratio for seasoning steak.
The question of when to salt the beef is surprisingly divisive. According to some, salting too early can draw excess moisture from the meat, leaving it dry and less appealing. Many others disagree, however, saying that doing it ahead of time actually helps the salt and any other seasonings penetrate the cut, resulting in a more flavorful and tender meal. They argue that if you give the salt enough time, the moisture it draws out — along with the seasoning — is reabsorbed into the meat. Most chefs recommend salting steak in advance, allowing approximately two hours for every half-inch of thickness.
Reverse sear the steak
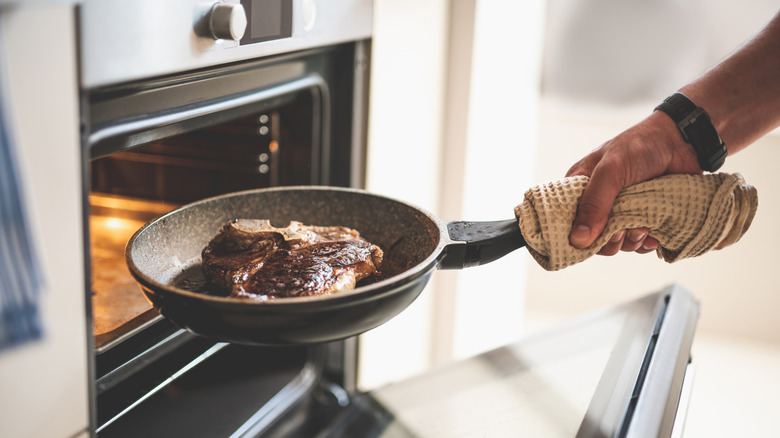
While culinary purists recommend heating the pan before the meat even touches it, reverse searing steak flips this advice on its head. Instead of starting with a sizzling skillet, the beef is first cooked on low heat — from 200 to 250 degrees Fahrenheit — in the oven. This lets the interior cook gently and evenly from edge to center, ensuring that it doesn't develop the dreaded gray band of overcooked meat just below the sear. After reaching around 115 degrees Fahrenheit, the steak is transferred to a blazing-hot pan on the stovetop to give it a nice crust.
Proponents of the reverse sear are adamant that it's more forgiving than the traditional steak preparation method. Since the meat is cooked gradually over a longer period, there is less risk of ending up with a charred crust and a cold, underdone middle. The reverse sear may also produce a crispier exterior because the beef is already dry on the outside after slow cooking and is unlikely to steam in the pan. In addition, fans of pan drippings will be pleased to know that this method produces flavorful juices around the meat, which make an ideal steak topping.
Don't overcook the steak
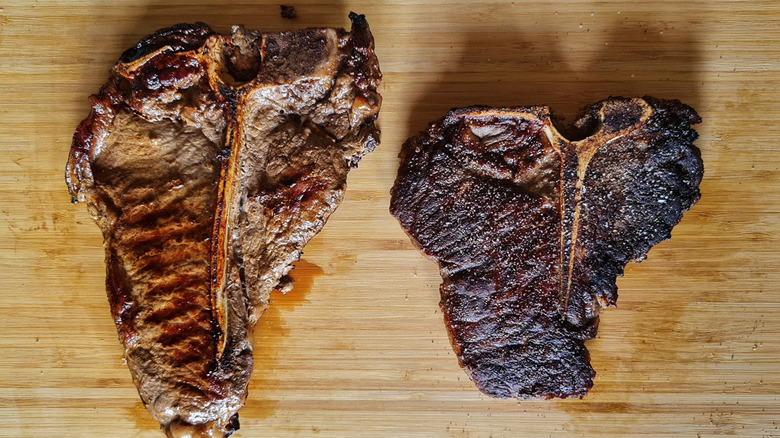
The preferred level of doneness of a steak is a very personal thing. Some carnivores like the centers of their cuts blood red, while others prefer a firmer, evenly cooked bite. Whether you want your beef pink in the middle or cooked all the way through, the goal is to get it just right — after all, any steak will turn tough if you cook it for too long. Since no two cuts are the same thickness, getting the meat to your exact specifications can be tricky. This is compounded by the fact that the rate at which it cooks depends on the temperature of the pan or grill.
While you could prod the steak with your finger to ascertain its level of bounciness — rare feels soft to the touch while well done feels hard — this method tends to be unreliable. Given that there are so many variables at play when cooking a cut of beef, the best way to gauge its doneness is by using a meat thermometer. As a rule of thumb, rare steak should reach 120 to 125 degrees Fahrenheit, medium-rare 130 to 135, medium 140 to 145, and well done 160 or more. When taking it off the heat, be sure to account for carryover cooking, since the internal temperature of the meat is likely to rise as it rests.
Don't overcrowd the pan or grill
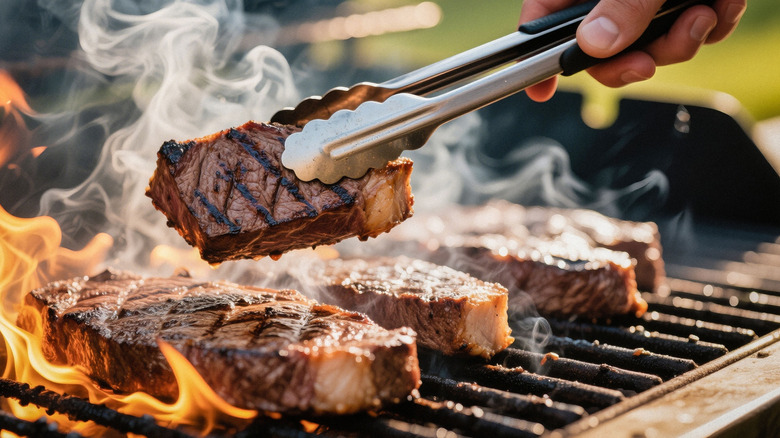
Great steak isn't just about flavor — it's also about texture and the contrast between the tender, juicy interior and the caramelized crust. This outer sear develops when high heat triggers the Maillard reaction, a chemical process that gives steak its browned exterior and rich flavor. However, it only takes place when the pan is hot and there's no excess moisture. Since water boils at 212 degrees Fahrenheit, too much moisture can hinder the Maillard reaction, which requires higher temperatures between 280 and 330 degrees Fahrenheit.
While it's easy to be tempted to fill the pan or grill with steaks, especially when cooking for large groups, packing the protein too tightly on the hot surface all but guarantees underwhelming results. Given that meat releases moisture as it cooks, cramming pieces together traps steam, preventing the Maillard reaction and stopping the steaks from browning. Overcrowding also lowers the pan's temperature, which makes matters worse and could result in soggy pieces of beef.
Follow the 3-3-2-2 steak cooking method
Not every steak turns out like the ones on cooking shows. Sometimes it's burned on the edges and raw in the middle. Other times, you're left with that unappetizing gray band, an overcooked layer of meat just beneath the browned crust. To avoid these common problems, the 3-3-2-2 trick may be the solution to perfectly cooked steak.
This cooking method relies on bursts of searing to keep the cut of meat nice and juicy on the inside and crispy on the outside. Instead of placing the steak on a sizzling pan, heat the skillet to medium heat or roughly 330 degrees Fahrenheit. Place the cut in the pan and cook for three minutes, without any jiggling or prodding. Next, turn it over and cook for another three minutes. Repeat the cycle by flipping it back to the first side and cooking it for two minutes, then finishing with a final two minutes on the other side. Finally, let the beef rest for a few minutes. Add a minute or two to the cooking time if you prefer your steak well done, but be careful not to overdo it and end up with a dry and tough piece of meat.
Don't forget to baste the steak in butter
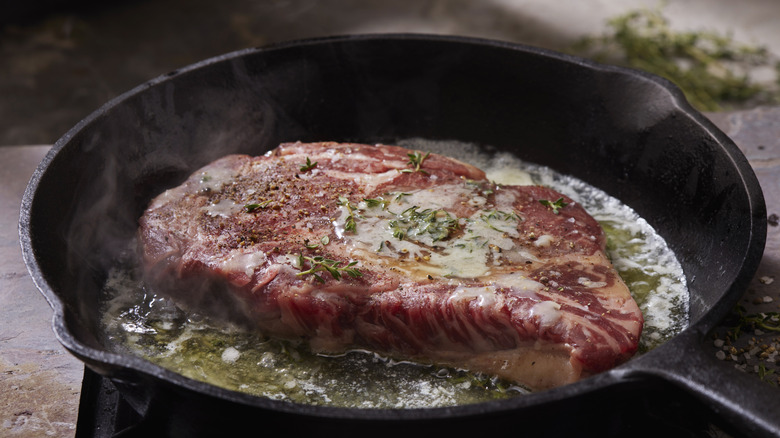
Basting a steak in butter as it cooks can enhance its flavor, crust, and aroma. Provided that it's done correctly, spooning butter over the meat can infuse it with decadent, caramelized notes. For added flavor, you can also incorporate aromatics like garlic, shallots, and rosemary. While butter-basting can deliver incredible flavor, it's a hands-on technique that may not be the best choice for novice chefs or those seeking precision.
To baste steak in butter, cook the meat until it develops an initial sear on both sides. Once the crust has formed, add unsalted butter and the aromatics to the pan, reduce the heat to medium, and allow the butter to brown and release flavors without burning. Tilt the pan so the fats slide to the bottom, then use a spoon to pour them repeatedly over the steak. Turn the meat every 30 seconds to a minute to ensure even cooking and a caramelized crust. Remember to occasionally check the steak's internal temperature with a meat thermometer to prevent overcooking.
Let the steak rest before serving
As eager as you might be to serve your steak right after it has been cooked, when it comes to achieving perfection, it pays to practice patience. This is because the crust that forms during the searing process actually locks in moisture. Cutting into the protein too soon releases these juices onto the plate or cutting board, leaving the meat dry and less appetizing. On the flip side, giving the steak a few minutes to rest allows its juices to redistribute evenly throughout the cut.
The time you let your steak rest depends on its size. As a general rule, allow it to sit out for about half the time it took to cook. For instance, if the cut of meat spent 10 minutes on the skillet or grill, let it rest for 5 minutes. That said, it's important to pull the steak off the heat a few minutes — or a few degrees — before it hits your desired level of doneness. The beef will continue to cook on the plate, which can raise its internal temperature by several degrees and push it from medium-rare to medium.
Cut the steak against the grain
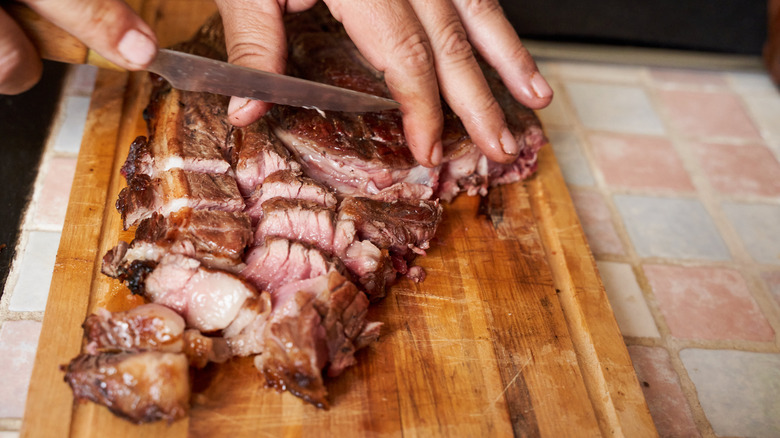
Even beautifully marbled ribeyes or filet mignons have muscle fibers. They might be finer and less dense than, say, those in a flank or hanger steak, but they are still there. These muscle fibers run in one direction, known as "the grain." If you cut the meat with the grain, each bite will come with these long strands, making it harder to chew. On the other hand, when you cut the steak against the grain, you are shortening these fibers, making the meat more tender. Of course, if you are trying to tenderize tough cuts of beef, you might want to combine this technique with other methods like marinating or slow cooking. Since the muscle fibers are more visible in raw steak and are harder to see after cooking, it's best to identify the direction of the grain before tossing the meat in the pan.