3 Best Ways To Upgrade Grilled Cheese Without Any Extra Ingredients
We may receive a commission on purchases made from links.
When it comes to grilled cheese sandwiches, lots of people take a "more is more" approach. Martha Stewart brings sophistication to grilled cheese sandwiches with several "grown-up" fillings in place of classic American slices, while Ina Garten makes a decadent three-ingredient grilled cheese spread for her version, which includes mayonnaise, Dijon mustard, and parmesan cheese. According to chef Isaac Bernal, executive chef of the Representation of Spain to the United Nations, there are several ways to make these sandwiches even better without adding a single additional filling or condiment.
"Some of the biggest improvements don't require any extra ingredients at all," Bernal told The Takeout. Really, you just need two slices of bread, cheese, and cooking fat. Vegetables, proteins, seasonings, and spreads can be nice, but too many add-ins can muddle up what makes this straightforward sandwich so crave-worthy in the first place. "At its heart, grilled cheeses are loved because of their simplicity, so technique is the best way to improve them," he added. Here are three easy strategies to upgrade basic grilled cheese sandwiches that won't require specialty kitchen tools, a trip to the grocery store, or complicated techniques.
Choose the right pan
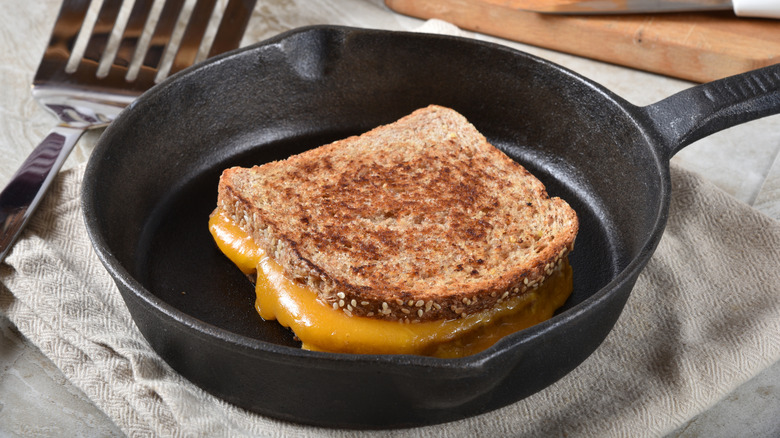
Not just any pan will do when you want to make the perfect grilled cheese sandwich. "Use a heavy skillet that holds heat evenly," Bernal advised. Whether you choose to cook with a standard-size cast iron skillet or a square, ridged grill pan, many toasted sandwich enthusiasts affirm that the weighty nature of cast iron is ideal for evenly toasted bread and well-melted cheese.
If you don't happen to have a cast iron pan, others recommend a carbon steel skillet or even a comal. Whichever pan you decide to use, check that the material is relatively heavy, the base is thick and sturdy, and the cooking surface is level. Undulations and warping will cause uneven browning, while a thin bottom doesn't harness and distribute the heat from the stove burner efficiently — both these problems are particularly common in aluminum and nonstick pans. In any case, weighing the sandwich down with a press can help with even browning and covering the skillet with a lid for part of the cooking time aids in heat retention.
Moderate the cooking temperature and time
Blackened bread and unevenly melted cheese do not make for a very satisfying grilled cheese sandwich. You want golden brown toast and an oozy filling, and this is what Bernal suggested to achieve that ideal result: "I recommend cooking the sandwich at a lower heat and at a slower pace to help the cheese melt."
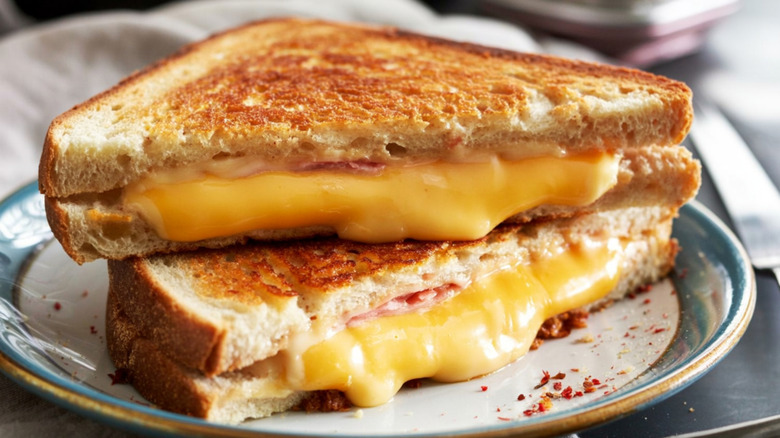
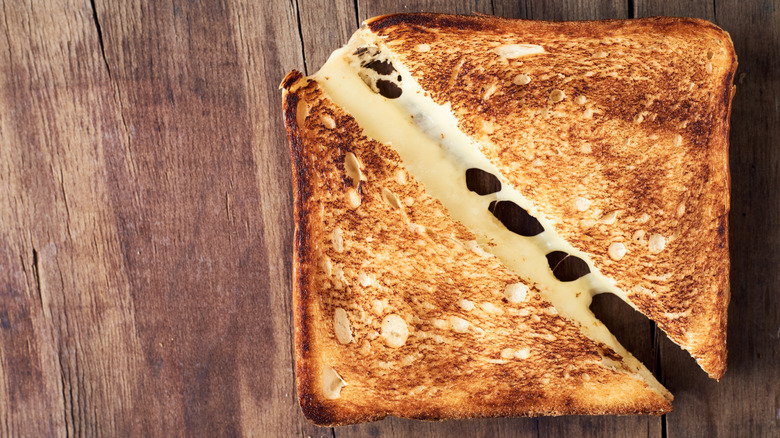
The issue with high heat is that the outside of the sandwich burns before the heat can penetrate to the filling, which is why the temperature of your pan is key to gooey grilled cheese. Really, you shouldn't turn the flame up any higher than medium-low. At that heat, it's going to take around 10 minutes for a grilled cheese to finish cooking. When you cut your sandwich the correct way, pull apart the triangular halves, and see a gorgeous, stretchy cheese pull, your patience will be rewarded.
Give grilled cheese sandwiches time to rest
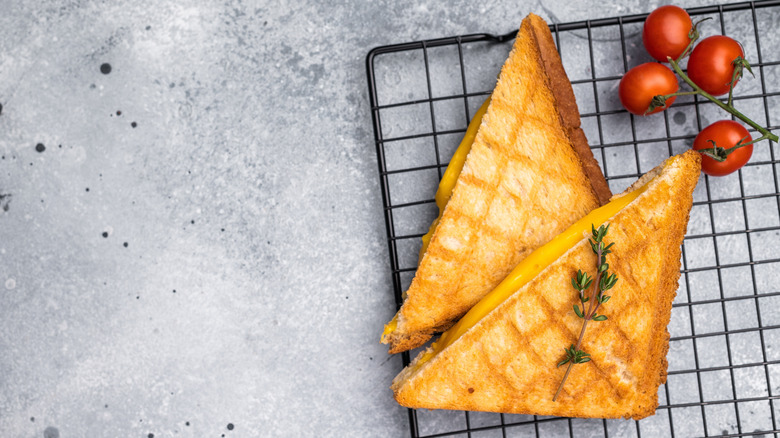
Speaking of patience, it's important not to bite into the sandwich immediately after pulling it from the pan. First of all, you're liable to burn yourself with molten cheese. Second, the melty filling will likely just spill right out, causing the sandwich you spent so much time making to quickly turn into a mess. Fortunately, you don't need to let grilled cheese sandwiches rest for too long. Bernal advised allowing the sandwich to sit off the heat for just one minute.
This small but impactful step ensures all that glorious cheese doesn't squeeze right out when cutting the sandwich or taking your first bite. It creates a cohesive grilled cheese sandwich, which is particularly important if you plan to dip it into a bowl of tomato soup. For best results, place the sandwich on a wire rack to rest rather than directly on a plate or cutting board. This allows for steam to dissipate and air to circulate; keeping the bottom piece of bread from getting soggy.