11 Bread Baking Tips Beginners Need To Know

The thing about bread baking is that it teaches one humility before all else. I owned my own café, baked professionally, and spent years turning out cakes, cookies, and desserts with confidence, but bread is a completely different animal. I'm a self-taught baker, which means most of what I know came from trial and error. And with bread, those errors were loud and impossible to ignore: loaves that flopped, dense crumbs, pallid crusts, and the occasional inedible brick. I learned the hard way, but those lessons are the ones that never leave you.
Unlike cakes or cookies, bread doesn't reward multitasking. I used to joke that when I baked bread, nothing else was allowed in my kitchen — no cakes in the oven, no cookie dough on the counter, no distractions pulling my attention away from the dough. Bread demands presence. It asks you to pay attention to texture and timing. You can't rush it, and you can't bully it into behaving. What surprised me most was how much bread baking sharpened my instincts as a baker. You learn to read dough with your hands instead of the clock, to trust visual and tactile cues, and to accept that every kitchen behaves differently. These are the tips I wish I had when I started and ones that will help you avoid the most common mistakes that build confidence loaf by loaf.
1. The flour matters
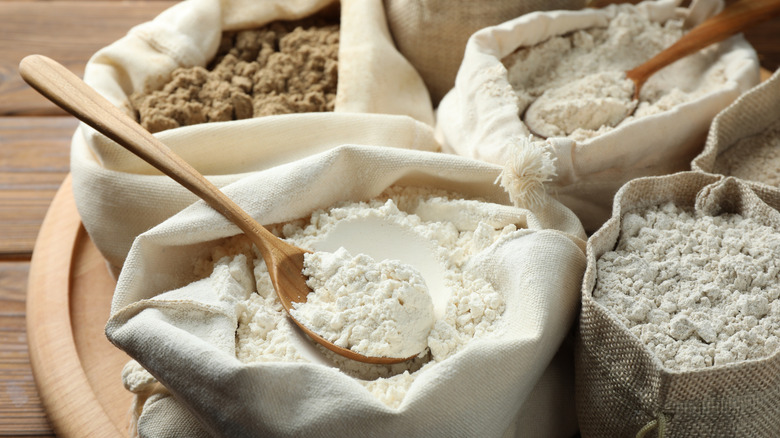
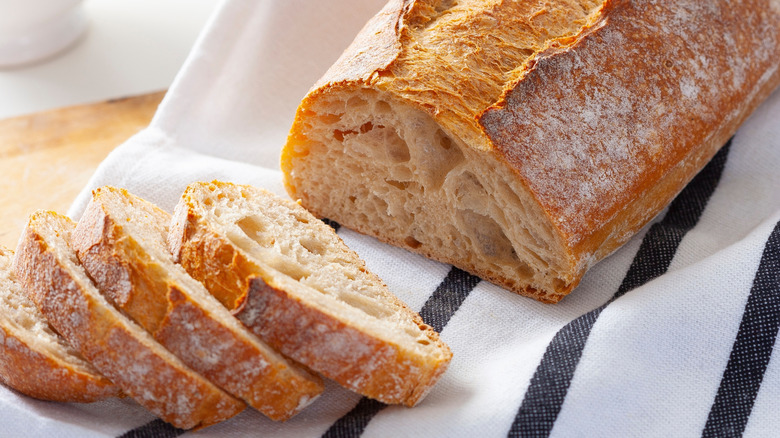
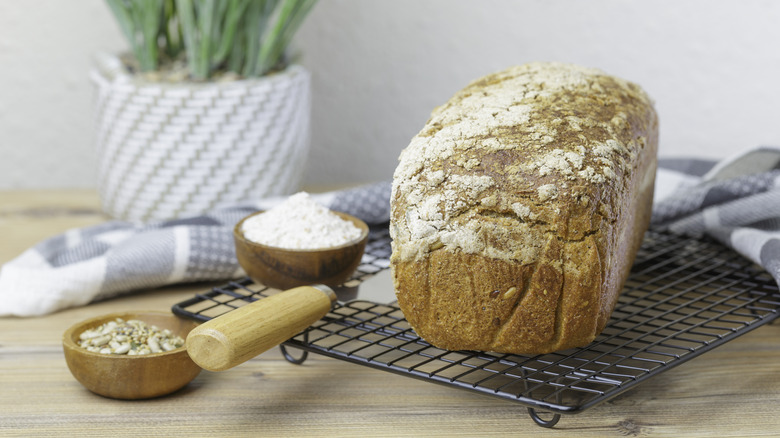
The very act of baking your own bread feels radical. A stance against the preservative and additive-laden commercial loaves, making bread at home is built on a minimum of four ingredients – flour, water, salt, and yeast. That said, let me say it from the start — not all ingredients behave the same and definitely not all flour behaves the same. The type of flour you use will determine the quality, taste, and feel of the bread you bake. Most beginners start with all-purpose flour and this is absolutely fine. There is no need to rush out and stock up on a bunch of expensive flour blends and brands.
As you progress, you can move on to bread flour, which is my personal go to and has a slightly higher protein content. The main difference between all-purpose and bread flour comes down to the fact that it encourages a stronger gluten development. What this means is that the dough stretches better, which then traps gas more efficiently, and bakes into a taller, airier loaf. Wholewheat flour can add a nutty flavor and improve the nutrients, but the dense nature of this type of flour can interfere with gluten formation. As for specialty flours such as rye, spelt, semolina, or oat, I suggest you save them for later, when you have gained more confidence in your bread baking abilities. If you want consistent results, it's best not to freestyle but master the basics first and then experiment.
2. Measure ingredients carefully
Baking bread is not called for science without reason. Sure, once you've baked enough bread, you will start to recognize when dough feels right and when it doesn't. But in the beginning, it's imperative to follow the recipe to the T. By following measurements closely, you understand why ingredients behave in specific ways. For example, the ratio of flour to water determines the hydration, development of gluten, and crumb quality of a loaf. Adding salt affects fermentation. When yeast is added makes all the difference to the rise and flavor. When measurements of each of these elements are off, the chemical reactions you're relying on simply don't happen the way they should. That's when the complaints start trickling in. If you ask any experienced baker why your bread turned out dense or dry, there is a high chance that you will be asked, "How did you measure your flour?"
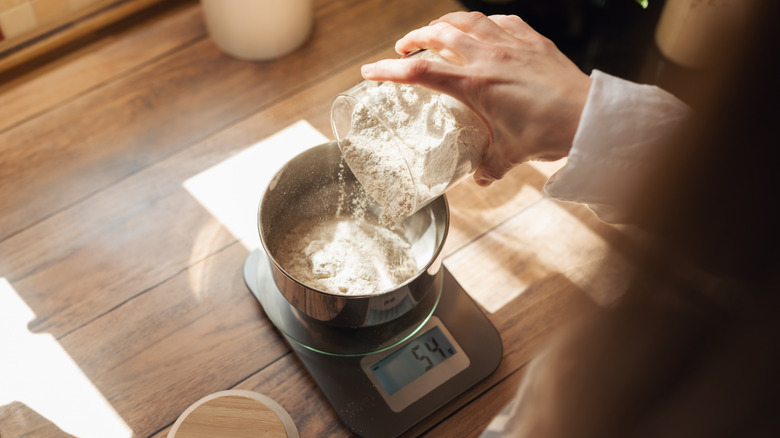
There is a real problem that arise when you use cups to measure flour by volume. Flour is easily compressed and when tightly packed, a cup of flour can weigh up to 160 grams. In comparison, a fluffed and levelled cup weighs closer to 120 grams. This is why I will always recommend using a digital kitchen scale. Weighing ingredients with a scale means repeatable results. Pro-tip: Just make sure you learn how to use your scale's tare (or zero) function so that you're measuring ingredients and not the additional weight of the bowls used.
3. Know your yeast type and how to use it
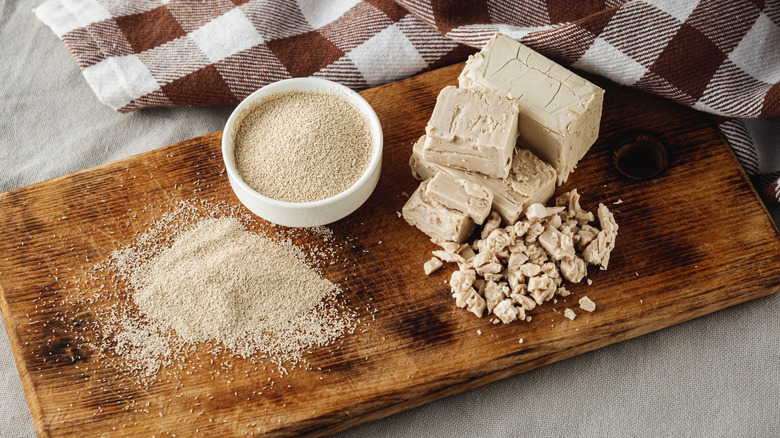
The most hardworking ingredient in the bread baking lineup has to be yeast. This little living organism feeds on the sugars in the dough and releases carbon dioxide and alcohol, causing your bread to rise and develop flavor. To put it bluntly — without yeast, you are making flatbread rather than traditional bread. Sourdough starters are another subject altogether and one we won't be touching on here. What you need to understand is that yeast only works when you use the right type in the right way.
When you are out shopping, you'll usually encounter two kinds of commercial yeast. There's the active dry yeast, which is coarse and granular. This needs to be "proofed" before use. That simply means dissolving it in warm water to "wake it up." Instant yeast has finer grains and usually doesn't require proofing. You just need to add the recommended amount directly into dry ingredients and mix as directed. This makes it especially forgiving and efficient, which is why I consider it the best option for most home bakers. It also has a long shelf life, particularly when stored in the fridge. What matters the most is not which yeast you choose, but that you don't substitute between the two. Recipes are written with specific yeast behavior in mind. The wrong yeast can mean sluggish fermentation or no rise at all.
4. Use warm water, never hot
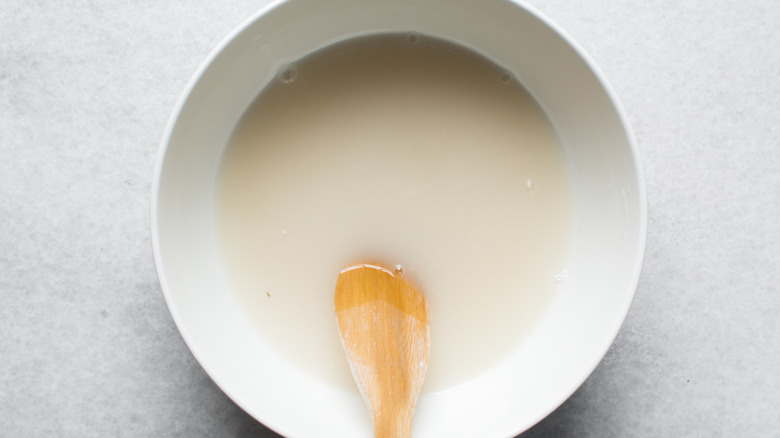
There's a particularly vague term bandied about the bread recipe world and it's understandably confusing. The word in question is "lukewarm." Most recipes call for lukewarm water to be used to wake up the dry yeast and start the fermentation process. However, there's no single scientific temperature that defines lukewarm. In the bread baking world, this translates to simply warm water and never hot or boiling. If the water feels warmer than your skin but not hot or sharp, you're in the right zone.
In fact, if you err on the side of colder temperature water, the worst that could happen is that the fermentation process slows down (albeit considerably but your dough isn't ruined). Hot water, on the other hand, can kill yeast outright before it has a chance to do any work. That's why water temperature matters so much at the mixing stage. Ingredient temperatures don't stop only with water. Any warm ingredient such as melted butter, milk, or eggs should be cooled to lukewarm or at room temperature before meeting yeast.
5. Salt is essential, but timing matters
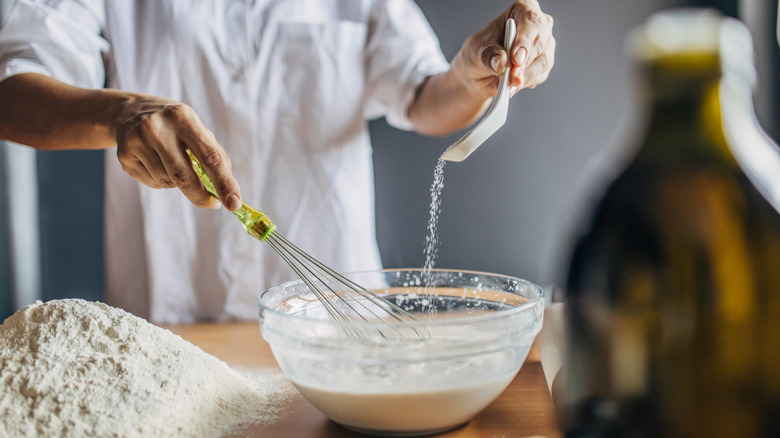
Let's understand a bit about what happens when you add yeast and salt to your flour. Salt may seem like a tiny ingredient in the bread baking process, but it plays a major structural role. If left unchecked, yeast can ferment very quickly and adding salt slows down this activity so fermentation happens gradually rather than all at once. A word of caution though — never add salt directly on top of yeast as this will lessen the yeast's efficacy. The best way to add salt to your mix is to whisk it into the flour before adding any water. This will ensure it disperses evenly throughout the dough.
When dough rises too fast, there is a strong chance that your loaf will collapse later on. The structure won't be able to hold its shape and you may see large, irregular holes. Salt prevents this from happening by regulating the yeast action and giving your bread time to develop better flavor and a more even crumb. Salt also plays a crucial role in gluten development. Salt tightens and strengthens the network of gluten proteins that form when flour and water combine, making the dough more elastic and easier to handle. Without salt, dough can end up feeling extra sticky or break easily, which makes shaping difficult not to mention result in an unappealing, dense loaf.
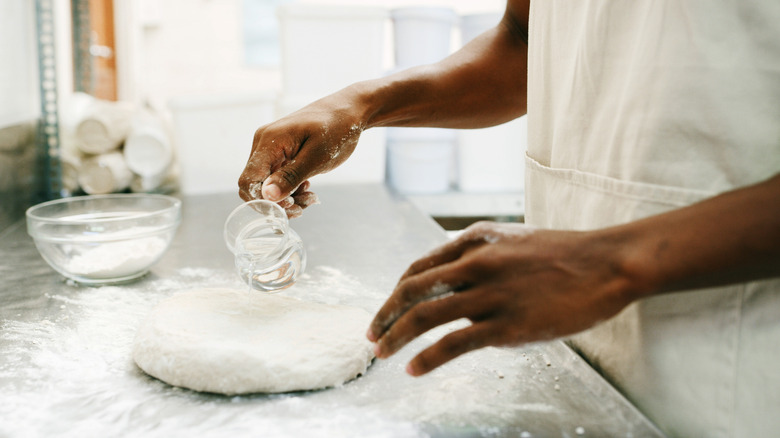
6. A windowpane test beats guesswork
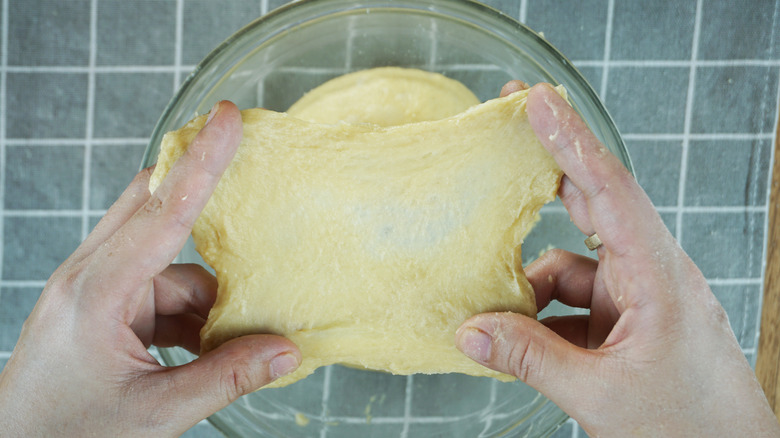
The ingredients are measured and mixed and now for the fun part of bread making — the kneading. Kneading dough is part art and part science and I would encourage you to ignore recipes that describe kneading the dough till "smooth and elastic" or "soft and tender." For a beginner, these descriptions can make no sense. That's where the windowpane test comes in. In short, this is a simple, visual way to see if your dough is ready.
What you need to do is pinch off a small piece of dough (about the size of a ping pong ball). Now, flatten this ball of dough gently, then stretch it between your fingers. If it tears almost immediately, you still have work to do as your gluten network isn't fully developed. Keep kneading and checking periodically. When you can stretch the dough thin enough to see light through it without it tearing, you've achieved the "windowpane." This see-through nature is what indicates the elastic gluten structure that gives bread its rise and airy crumb.
The windowpane test is also helpful when using new and unfamiliar flours. Different flours change how the dough behaves and testing with this is a concrete way to ascertain that your dough is ready to be proofed and baked. As you practice, you'll start to recognize the feel of well-kneaded dough but when in doubt, the windowpane is your reliable checkpoint and one that even professional bakers resort to time and again.
7. Don't overproof your dough
Proofing is the part of the process when you give your dough a final rise before baking, and it's a stage that can make or break your finished product. Great bread makers do not proof by only looking at a clock or obeying a timer. Instead, they learn to touch and observe their dough to recognize the signs that it is ready. Keep in mind that a single recipe cannot cater to various kitchen environments. All kitchens vary in temperature and humidity, so a loaf might rise in 25 minutes in one kitchen and 40 in another.
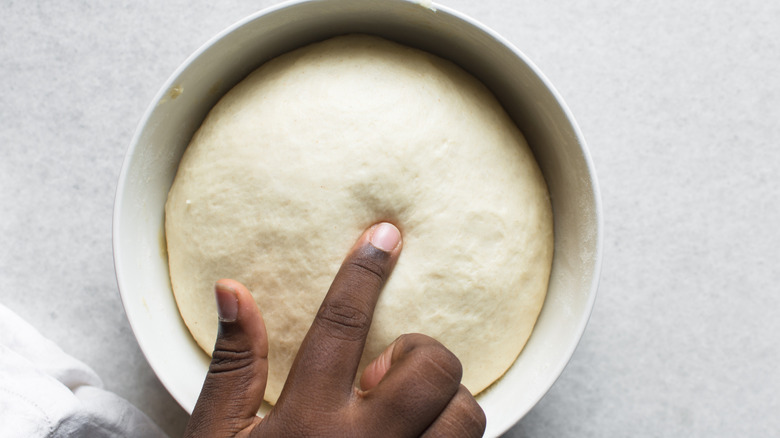
Two simple tests help determine when your dough is perfectly proofed. First, the knuckle test: place your thumb on the rim of the pan and compare it to the top of the loaf. Ideally, the dome should rise about an inch above the pan. Second, the poke test: lightly press a floured finger into the dough. If the indentation springs back slowly, your loaf is ready. If it fills immediately, the dough needs more time. If it stays, you're overproofed and should bake immediately. Finally, avoid aggressive handling, which can tear gluten and deflate your dough. Remember, proofing is game of patience and observation. Overproofed dough leads to collapsed, dense loaves, while a carefully observed rise gives you the beautiful, airy bread every beginner dreams of.
8. Always fully preheat your oven before baking bread
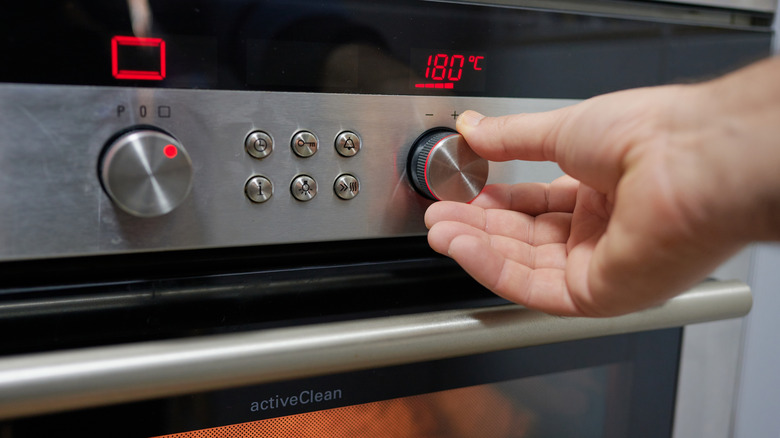
Your dough is now ready for the oven. But there's still one small thing you need to do before popping it in and leaving it to bake — and that's making sure your oven is pre-heated. It may sound like a small thing but for consistent baking results, preheating your oven creates the ideal environment for your dough to rise and bake correctly. This is why it's so important.
Your proofed loaf enters an already warmed oven and a process known as "oven spring" occurs. This is when the yeast undergoes a final burst of activity, producing carbon dioxide that helps the loaf expand. If the oven is cold or not warmed up enough, the rise in your bread is bound to be uneven with scattered dense pockets. The early and immediate blast of heat with a preheated oven causes a puffing up in the early minutes of baking that gives the bread its structure and texture.
To ensure your oven is ready, use an oven thermometer to verify the internal temperature (ideally, between 140 to 158 degrees Fahrenheit). Make sure your racks are positioned correctly for even baking, and keep the oven door closed to avoid heat loss. Of course, the temperatures will vary depending on the type of bread you plan to bake but skipping or rushing preheating can lead to uneven baking, pale crusts, or dense crumbs, so always give your oven the time it needs.
9. Steam in the oven helps bread rise and form a better crust
Once in the oven, there's a critical factor that will help achieve the fluffy volume and crunchy crust breadmakers aspire to — and it's the presence of steam. When steam is allowed to build up within the oven cavity, this humidity delays the browning and creating of the crusty exterior. Instead the dough is given time to fully expand resulting in an airy and well-risen load. As the water vapor condenses on the surface, the crust develops its shiny and crispy appearance as well as improving heat transfer to the interior.
As the loaf continues to bake, the starches within the loaf absorb the water vapor and solidify to form the crumb structure. If this seems all too scientific for you or reminiscent of a chemistry class, just know that steam is good for baking bread and it creates exactly the environment your loaf needs to flourish. But where do I produce this steam from in my home oven? Well, I won't lie, replicating the similar steam situation found in commercial ovens can be challenging but there are a few techniques that are known to be almost as effective. These include placing a metal container with boiling water in the oven or spraying water directly onto the oven walls or bread to add a quick burst of moisture. Cloche baking or using a preheated baking stone also helps produce crispy exteriors and warm, fluffy bread loaves.
10. Let bread cool before slicing
Once your bread is baked and ready, removing it from the oven is only the beginning. Now comes the impossible part — letting it cool properly before digging in. While the temptation to tear into a warm loaf is understandable, cooling the bread before slicing is an essential final step in baking that is often overlooked.
Leave your loaf on a wire cooling rack to allow air to circulate around the bread. What this does is prevents the crust from becoming soggy, while at the same time allowing the interior to firm up. If you slice a bread loaf that's still hot from the oven, the process whereby the starch molecules solidify to create that ideal crumb structure and crisp crust is interrupted. Rather than cut through the loaf cleaning, slicing will only leave you with a gummy and sticky interior. The cooling time varies depending on the size and type of bread. Small loaves or rolls can often be eaten warm after 20 to 30 minutes, while larger crusty loaves usually require 1 to 2 hours to reach room temperature. Cooling not only improves slicing and texture but also enhances flavor and shelf life.
11. Start with simple, forgiving recipes
Whether you are a novice bread baker or someone who tried once and gave up because it was just too hard, I am here to assure you that bread baking is absolutely within your reach. Soft dinner rolls, crusty focaccia, pizza dough, sourdough loaves ... the list goes on and it's all doable, I promise. The key is to start simple and be smart. Most bread recipes are designed to take you by the hand and walk you through each step, so pay attention. Your first recipes should not be about perfection. Instead, treat them as mini lessons where you learn how dough behaves, how yeast works, and how to feel comfortable with kneading, shaping, and proofing. Practice really does make perfect, and each loaf you bake teaches you something new about timing, texture, and flavor.
A good place to start is flatbread. These are usually made without yeast making them almost fail-proof. Once you're comfortable, you can try classic white dinner rolls, which are surprisingly simple but immensely rewarding. Another excellent beginner-friendly option is soda bread. With no proofing or kneading required, you could be just a couple of hours away from a hearty loaf that is perfect with soups or stews. These approachable recipes give you the chance to practice and understand basic techniques, while still producing bread you can be proud of. And before long, you will find yourself experimenting with more complex loaves and enjoying the fruits of your labor.