11 Rib Mistakes That Are Ruining Your BBQ And How To Avoid Them
There's something magical about the smell of ribs sizzling on a grill. The smoky, caramelized aroma of meat cooking turns your backyard into a neighborhood attraction. When done right, ribs are a tender, juicy, and flavorful treat that can make you feel like you've leveled up in the culinary stakes. But when they go wrong? Then they can go really wrong. One minute and everything is on track for a great barbecue and the next, you are staring at a sad, burnt mess that even your dog would side-eye.
The thing is, barbecuing ribs is an art, one in which patience, timing, and a little bit of know-how will be amply rewarded. Even seasoned grillers mess up now and then. The good news is that most rib disasters are totally fixable once you understand what has caused the problem in the first place. Understanding your cuts, for example, is essential before even lighting up the barbecue, while altering the timing and temperature can turn a potential disaster into a perfect plate. So don't let that rack intimidate you. Grab your tongs and fire up that grill, and let's walk through the most common rib mistakes and how to avoid them.
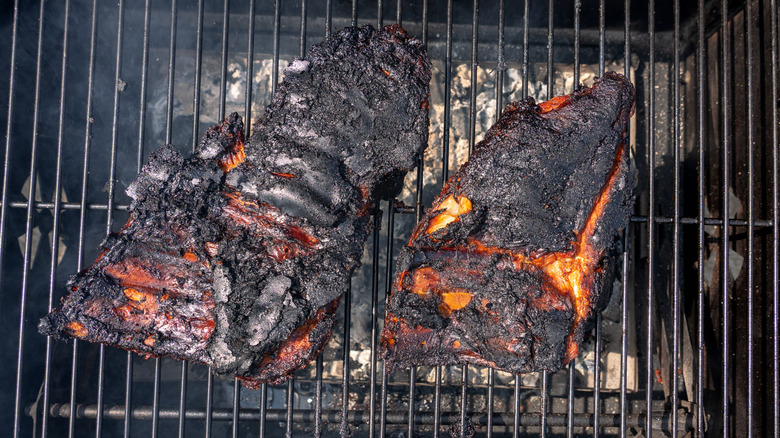
Using high heat
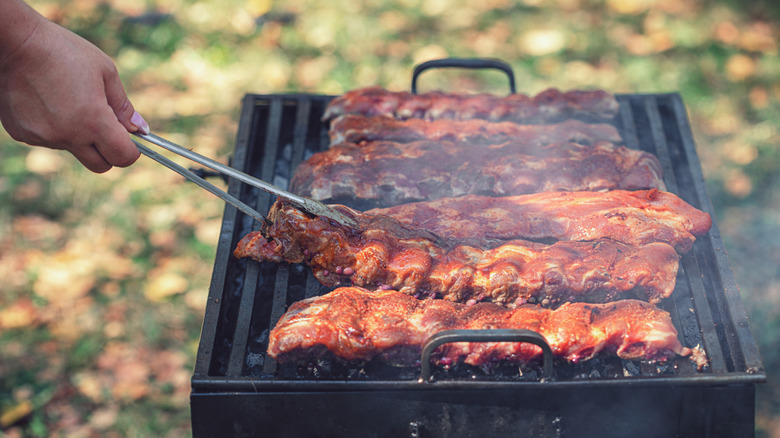
The pressure to cook your ribs quickly when you have a crowd to feed can often be intense. Cranking up the heat may feel like an obvious move, but that's exactly where beginners go wrong. The problem with turning up the heat is that it will dry out the ribs and overcook them, making them tough and unpleasant to bite into. This is exactly the opposite of the juicy, tender ribs that you are aiming for.
There is another danger with blasting your ribs over a hot flame if your dry rub or marinade contains sugar (and most good ones do). The high heat will burn the sugar in no time at all, leaving your beautiful rack smelling more like a campfire accident rather than a delicious dinner. And yes, there are specialized techniques used for cooking ribs on a high flame, but these are better left to experienced cooks and those who are more confident in their craft.
The other danger of cooking with a high flame lies in the chemicals produced as a result of the elevated temperatures. Studies have shown that cooking with high heat can cause oxidative stress, inflammation, and insulin resistance, and may even lead to a higher risk of developing hypertension. The bottom line is to keep things slow and steady — 225 to 250 degrees Fahrenheit over indirect heat is ideal — and enjoy the fruits of your labor in due time.
Lack of marinade

An essential part of getting the full flavor from your meat lies in the marinade you use. Think of it as the base of your taste profile. By using a blend of spices, herbs, seasonings, and other liquids mixed with oil, you not only tenderize the ribs but also add the flavors of your choice. Garlic, oregano, lemon juice, barbecue sauce, beer or other alcohol, vinegar, and olive oil are some of the more popular ingredients used to make marinades. But this is no quick fix or easy hack. For good taste to develop you need time — a significant amount of it.
You have to let the marinade soak into the ribs for several hours to work its magic. Leaving it on for just an hour or two isn't going to cut it. Even if you are keeping things simple with a mix of salt and pepper, the seasoning still needs time to sink in. Many folks also make the mistake of leaning on their BBQ sauce to provide the flavor, but keep in mind that your sauce can only do so much. To this end, you will need to plan in advance. The easiest way is to apply the marinade and let the ribs sit overnight in the fridge. Remember to pat them dry before adding any spices the next day. Leaving it overnight will let the flavors settle deep into the meat so when you finally grill them, you're rewarded with ribs that taste delicious all the way through.
Not experimenting with a dry rub
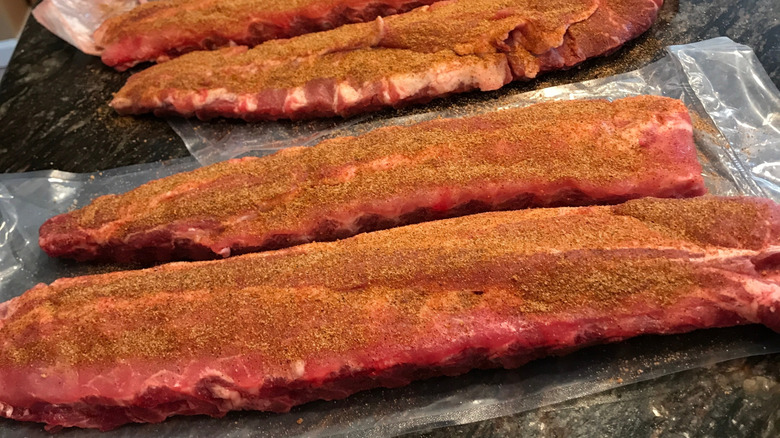
A dry rub is usually a mix of salt, spices, and herbs which are rubbed directly onto the meat. Sometimes, a little bit of sugar may also be added. A dry rub will work on the outer layer of the meat and form a crust, helping to prevent it from drying out, and allowing the full flavor of the meat to come through. The fun part is experimenting. Some people love a bold, spicy mix while others prefer a sweeter, more subtle nod of flavor. The trick is finding the correct proportion of the ingredients so as to ensure the meat is enhanced rather than overwhelmed.
Patting your ribs dry before applying the dry mix is an important part of the process. This helps the rub to stick to the surface and form a crust, browning the ribs to perfection. A dry surface is essential, as the presence of water affects the Maillard reaction — the process that creates the incredible texture and smoky flavor. Therefore, the drier the surface, the better the result.
There are many ready-made dry rubs available, but don't be afraid to play around with your own blends. Some popular options include paprika, sugar, granulated garlic, granulated onion, salt, pepper, and more. The list is pretty much endless, so give your creativity a go and make the grilled ribs truly your own.
Not pre-cooking the ribs before grilling
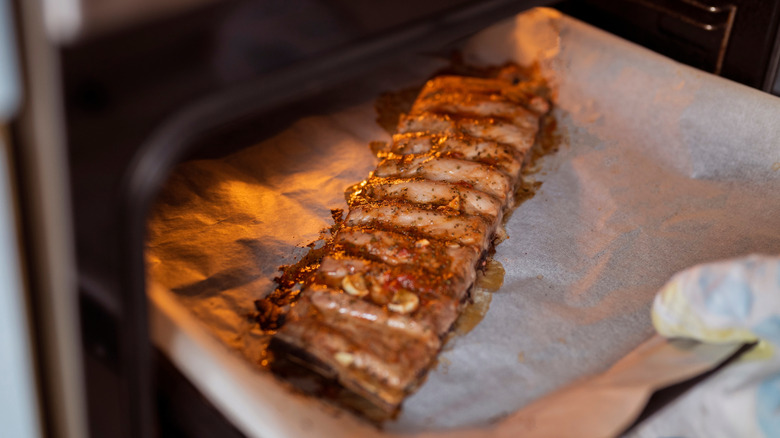
If you usually end up with ribs that are tough, chewy, or burnt on the outside but raw inside, then you have made a mistake that is common to many beginners: forgetting to pre-cook them. If you assume your grill is enough to do all the heavy-lifting, we are here to assure you that it's not. Great ribs often need a two-step process — the slow-cooking stage followed by the char for that irresistible finish. It's how Ina Garten stops ribs drying out on the grill.
Ribs are full of connective tissue and fat, and these require plenty of time and gentle heat to melt into that "fall off the bone" texture that everyone dreams about. Pre-cooking gives you control over the cooking process and keeps the meat tender. The slow heat turns the connective tissue into a soft gelatin with all the juices locked in, and allows the dry rub or marinade to penetrate deep into the meat.
Some folks prefer to slow-smoke them, which renders the fats throughout the meat and results in ribs with a full smoky flavor. Others prefer the oven-baking route, or the slow cooker – it depends on your taste and tools at your disposal. Once the ribs are almost done, you can finish them on the grill over medium heat until they are beautifully glazed and the edges charred just right. Suddenly you have a plate full of ribs that taste as gorgeous as they look.
Not removing the membrane
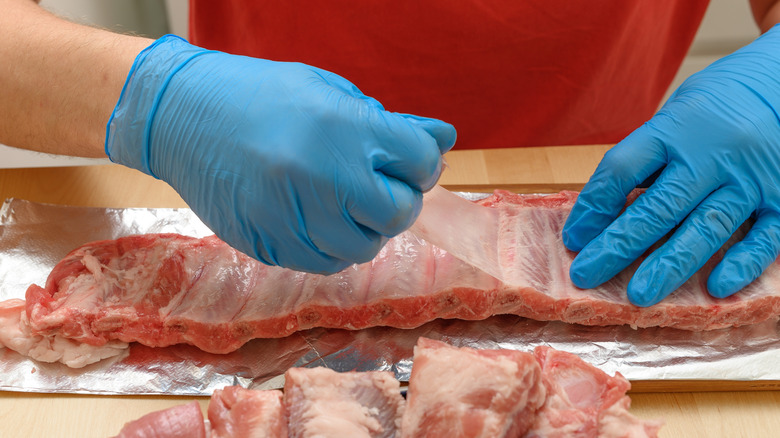
If you are new to cooking ribs, you will probably notice a thin, shiny layer like a skin, clinging to the bone side of the rack. This layer is the membrane, and many a good rib has been ruined because of it. Leave it on, and your ribs will end up as tough and chewy, a far cry from what you set out to cook.
This happens because the membrane doesn't melt or soften during the cooking or grilling process, no matter how long you try. It remains as is, a rubbery layer that prevents the dry rub or marinade from reaching into and flavoring the meat. Your ribs will taste great on the outside, but the meat underneath will remain bland, plus you will have to constantly struggle with bits of membrane while you eat. So do yourself (and your guests) a favor and take it off before you start cooking.
Removing the membrane is easy. All you need is a butter knife to gently slide under the edge between the bones. Lift it up, slide two fingers in and pull the membrane off. Using a paper towel might help you get a better grip. If you are all thumbs when it comes to knife skills, you could always ask your butcher to do it for you. Once you've gotten rid of that membrane, your ribs will be able to soak up all of the smoke and spice you desire.
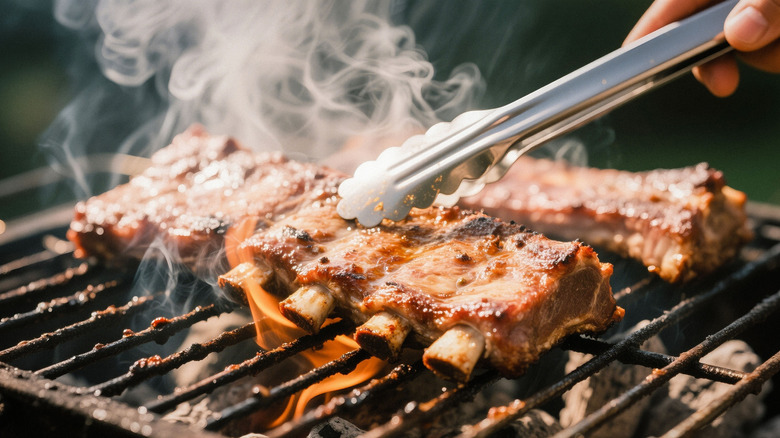
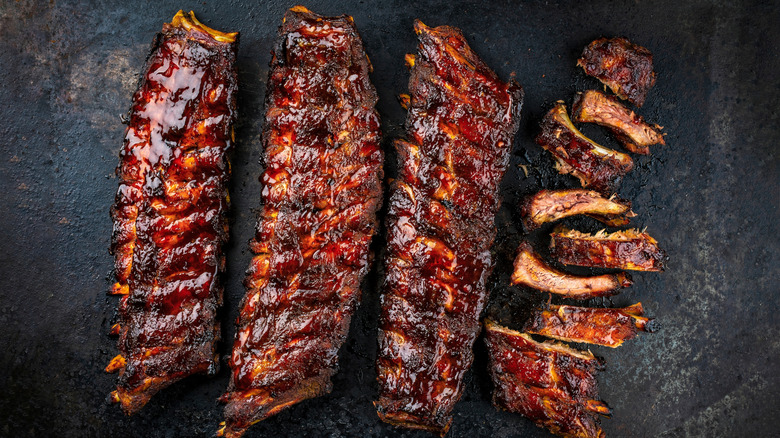
Not knowing when to sauce ribs
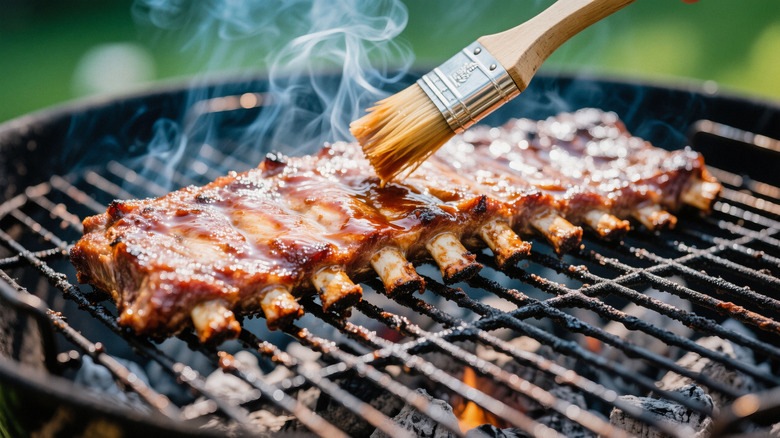
A rookie mistake that many people make early on in their barbecuing journey is brushing on the sauce way too early. We understand, it's tempting to slather it on as soon as the ribs are on the grill, but be assured — adding BBQ sauce too early can ruin the meat. Here's what actually happens when you go this route. Most barbecue sauces contain sugar, honey or molasses, essential to providing flavor but very troublesome when faced with high heat. These sweeteners will caramelize quickly, and if left on the grill for too long, will burn and turn bitter even before you can grab the tongs to try and save the day. Basting your ribs early will just result in them getting a scorched layer that is frankly not very nice to eat.
The trick lies in the timing. The key to getting it right is to first let your ribs cook slowly over a low flame, saving the sauce for the very end. Brush it on during the last 10 to 15 minutes, and don't take your eyes off the meat while the sauce gently bubbles and thickens. Once it has developed that gorgeous glazed finish, pull the ribs off the heat and leave to rest. Remember, the sauce is added as part as the finishing touches and not a part of the main event.
Boiling ribs
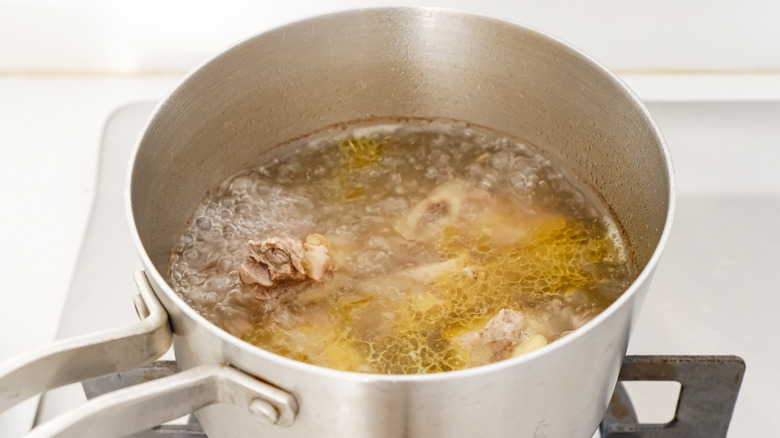
Boiling ribs in the pre-cook stage to make them tender might seem like a no-brainer, but in actuality it's one of the fastest way to end up with bland meat that has been stripped of all its smoky, charred deliciousness. Boiling pretty much ruins the texture of the ribs. The hot water cooks the meat too quickly and this doesn't give the connective tissue the time to break down into tender, juicy gelatin. Your meat will be left soft and rubbery, and minus any flavor to boot.
In other words, boiling is a great way to extract the flavor out of the meat and into the water. So, go ahead and boil your ribs if it's soup you are making. All those delicious juices and fat can be put to better use as a hearty stock then. However, if it's ribs you want to master, there is magic when they are cooked low and slow. At around 225 to 250 degrees Fahrenheit, the fat will render out and the meat melts into soft, silky tenderness. The smoke and heat add their magic to the flavor, forming that layer of crust on the outside. This is where the flavor lies. So yes, boiling may be quicker, but would you microwave a steak? A great barbecue knows no shortcuts. Rather, it is a slow journey on the road to perfection.
Not planning enough time to cook low and slow
Your ribs really don't care about your guests arriving too soon or that dinner was supposed to be served at a specified time. Ribs cook on their own schedule, and the best results come when the meat is cooked low and slow, a process that often takes hours. So plan accordingly if you want to wow your guests with yummy, fall-off-the-bone ribs.
There are specific stages to great ribs, each one with its own schedule. From prepping to preheating, smoking to marinating, and finally resting the meat, you may be looking at close to six hours of time from start to plate. It may sound like a lot, but if you factor in these various methods and give them the due attention they need, we assure you that you will end up with a dish that is unforgettable.
Even if you are using the classic 3-2-1 method (three hours smoking, two wrapped, one sauced), there are a lot of variables to consider. The type of ribs dictates the time taken. It takes spare ribs five to six hours for the connective tissue to break down, as opposed to the four to five hours it takes for baby back ribs. Weather can also slow you down, opening the lids may affect the speed of cooking, and skipping the rest period robs the ribs of juicy flavor. So plan accordingly, ensuring that they are ready early, have had time to rest, and are warm when served.
Undercooking or overcooking the meat
While it would be tempting to believe, grilling or barbecuing ribs is not an exact science. There are a number of variables that affect cooking time and flavoring. If you leave them on too long, the ribs will be dry and overcooked. If you take them off too soon, they will be undercooked, tough, and chewy, not at all worthy of all the effort put in. Getting it right requires you to be alert on many fronts.
One of the common mistakes that many people make is to rely on only one method to determine if the ribs are done. What is actually required is for you to use a combination of visual cues, touch tests, and to monitor internal temperatures to determine that sweet spot.
Aim for a temperature in the range of 195 to 203 degrees Fahrenheit: That's the sweet spot when the fat and collagen render into that lovely, tender texture everyone loves. The "bend test" is done by picking up the rack with tongs to check if it bends easily or if the surface begins to crack. Then there's the toothpick test: Slide a toothpick between the bones. It should slide in and out easily, an indication that it is done. Check the juices, too, which should be clear. So use all your senses to gauge the correct time, remembering to be patient and paying attention to the task at hand.
Not understanding how different cuts need different cooking techniques
Mastering the art of cooking ribs isn't as simple as just throwing them on the barbecue and hoping for the best. You can't mix up baby back ribs or spare ribs with 'dino' beef ribs on the grill and expect to get a uniform result. Each cut of each type of meat behaves differently, and different cuts are better suited to different cooking techniques.
Take baby back ribs, for example. These tender, lean ribs are short and are cut from the spine downwards. They cook a bit faster than spare ribs and are perfectly suited for a hot grill or a quick oven roast. Spare ribs are bigger and fattier, requiring more time, making them suitable to a low and slow method.
Beef ribs are another deal altogether. Beef short ribs are the hearty type that require a slow simmering after being braised in wine or smoked for many hours. Beef back ribs have less meat but make up for it with an intense beefy flavor that comes through after a quick grill. And if you decide on dino or plate ribs, you will require oak wood and a lot of patience. The bottom line is that you need to know your cut of meat. That and the cooking technique you employ, from smoking your ribs to grilling, braising, or slow cooking them, will all affect the final flavor and texture of the ribs.
Skipping the rest
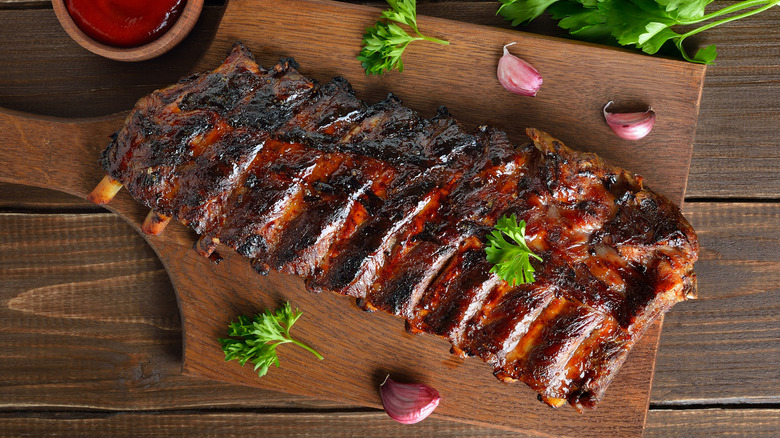
Your ribs are now ready. The bark is caramelized with a lovely brown sheen and the smell will be driving your neighbors crazy. Your gut tells you to start slicing and eating, but that would be a big mistake. After hours of prepping and tender loving care, it's tempting, but cutting into those ribs as soon as they are off the grill will cause all those yummy juices to flow out and escape. You will be left with sad, dry ribs that don't do justice to the hours of labor you have put in.
What you need to do is let your meat rest awhile before slicing. Letting them rest for 10 to 15 minutes after taking them off the grill is necessary for your ribs to go from "pretty good" to "Wow, amazing". This happens as the muscle fibers in the ribs relax, they reabsorb the moisture and lock in the flavor from the juices. Resting also allows the heat to redistribute more evenly throughout the meat. This means that your ribs will have a uniform temperature from center to the edge, giving you a plate of perfectly cooked meat. Use this resting time to pour yourself and your guests another drink and set the stage for the feast to soon follow.