The Plastic Tool You Need To Serve Sheet Cake Like A Bakery Pro
There are a lot of nifty baking tools these days to help even amateur bakers look professional. However, one of the simplest tools that can make it look like you really know what you're doing when serving a sheet cake is probably already stored somewhere in your kitchen — the humble plastic fork. No, we're not talking about the obvious use of eating cake with it, but rather, using it as a way to gauge equal-sized cake slices when cutting a sheet cake. As a bonus, no one will be left without a fork or asking where the forks are.
You'll want to make sure you have the same number of plastic forks handy as the number of cake slices you plan to serve. Then, starting at one of the cake's corners, stick your fork into the cake a few inches from the edge. Moving either across or down the sheet cake, insert the remaining forks at evenly spaced intervals. Forks spaced farther apart will yield fewer, larger slices, while closer spacing will create more, smaller slices. Once the forks are evenly spaced, cut straight lines between them both vertically and horizontally so that each fork ends up centered within an individual square slice. If your cake is dense, it may be sturdy enough to simply lift it by the fork's handle onto a plate. For cakes with less density, use a cake server or the flat edge of your knife to lift each piece onto a plate, fork included.
More ways to use the plastic fork cake hack
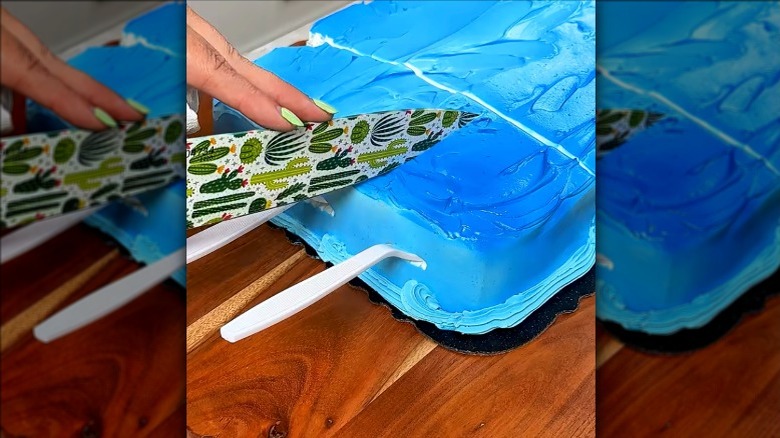
If you have a sheet cake with decorations or a picture printed on the surface that you don't want to ruin just yet by sticking forks into, there's another placement for them. You can instead place the plastic forks along the side of the cake rather than the top. Then use the same down-and-across slicing method to create evenly sized square slices.
You can also use either of these plastic fork-slicing techniques on any rectangular or square dessert, from tres leches cornbread to Costco's seasonal lemon blondie treats; they can even work on a round layer cake using the vertical slicing method. Start by cutting the cake directly down the middle. Then, place forks at evenly spaced intervals, a few inches from the outer edge, around the perimeter of each half. Add a second row of evenly spaced forks closer to the center. Next, slice down and across the cake, creating mostly small square pieces, along with a few triangular slices around the curved outer edge.
Because of the layers, these slices will be tall and not very sturdy to grab by the fork or stand upright, so it's easiest to serve them using your knife's flat edge and lay each slice on its side with the fork resting horizontally on the plate. For larger layer cake slices, you can simply place a single row of evenly spaced forks across the middle of each half and cut between them. There's also nothing that says you can't use plastic forks to gauge evenly sliced traditional triangle slices on a round cake, too.