What All Those Oven Settings Actually Mean (And When To Use Them)
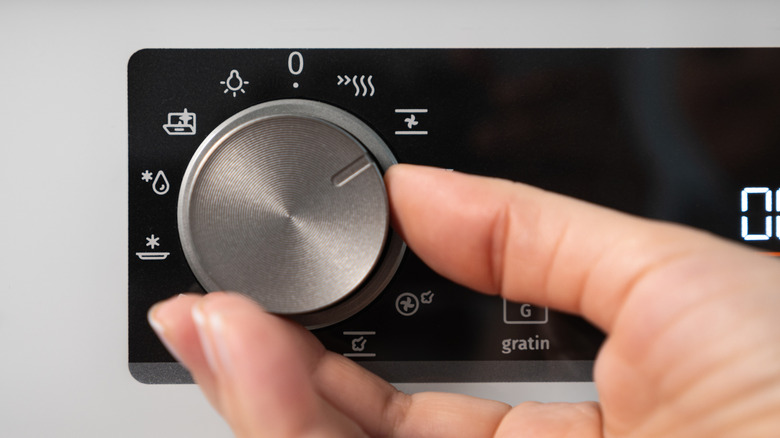
The oven is the centerpiece of the kitchen. Capable of so much more than baking brownies and making casseroles, modern ovens can toast cheese to bubbled perfection, proof bread dough, or evenly roast a family-sized meal (without extra effort on your part). Yet knowing when and how to broil versus when to bake can be the difference between soft meat and seared meat. The press of one button instead of another can make a surprising difference. Even settings like "cook time" aren't always what they seem, and features like "convection" may require you to adjust your recipe.
It's important to familiarize yourself with oven settings to make sure you're not making any of the 13 mistakes that are ruining your food (and oven). Here's a closer look at some of the most popular oven settings, what they mean, and when to use them so you can get the most out of your kitchen.
Bake
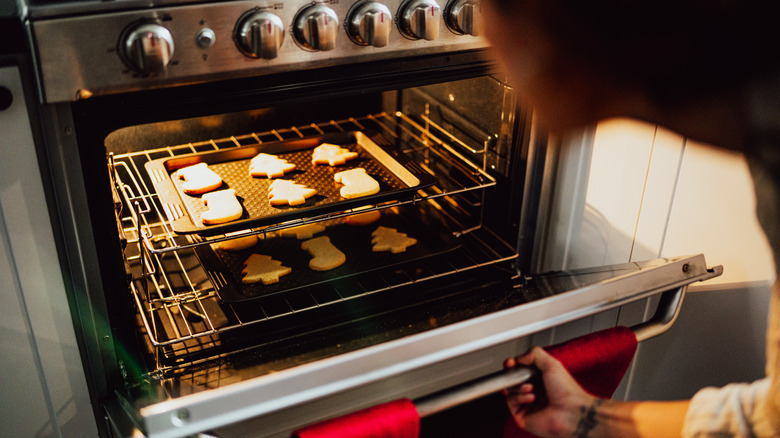
Probably the most-used setting on your oven (next to "timer"), "bake" is what you use to, well, bake. Most recipes are written with the "bake" setting in mind. For best results, the oven needs to preheat fully before you put any food inside (this can take anywhere between 10 and 20 minutes). This is an important step because putting your food in too early can alter the recommended cooking time. You also want to make sure your food doesn't spend too much time in the "danger zone," which falls between 40 and 140 degrees Fahrenheit, according to the USDA. Moving your food directly from the cold refrigerator to a hot oven can minimize any risks of bacterial growth.
Make sure the rack is in the middle, unless the recipe tells you otherwise. It's also important to ensure there's plenty of space around your food when using the "bake" setting, since this mode doesn't ensure consistent heating throughout the oven. If you're baking cookies on multiple racks, for example, this could be a problem. Depending on your oven, the heating element can be at the top, on the bottom, or in both places. This is why foods brown more quickly in certain areas of the oven. To get around this, you want to rotate your pans (the overlooked step that ruins your bakes in the oven).
Convection
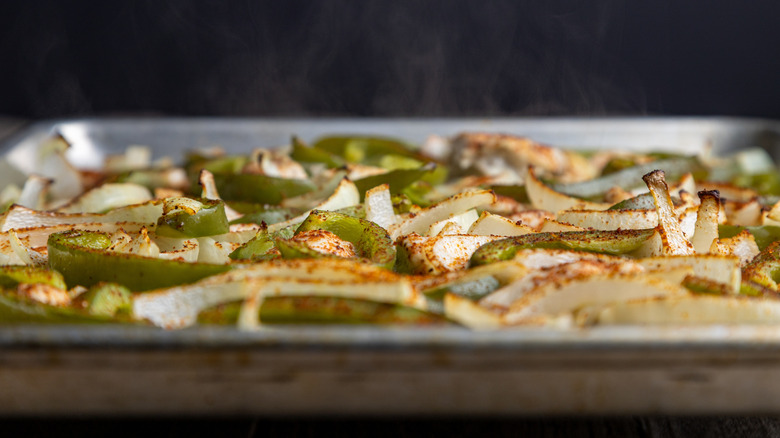
If you want consistent heat throughout the oven, you need to use the "convection" setting (if your oven has that feature). Fans in the back of the oven evenly disperse heat to ensure consistent cooking from edge to center. If you're baking more than one food in the oven for a big family meal, using the convection feature is the way to go.
This setting is ideal for making baked goods as well, since it guarantees even baking without the need to swap and rotate trays. It can also allow for a shorter cook time and great crisping because the heat is consistent. There's an important caveat to keep in mind, however, if you opt to press the "convection" setting instead of the "bake" button. You'll likely need to adjust the cooking temperature and time — or else you could burn your meal. America's Test Kitchen recommends cutting the temperature by 25 (or even 50) degrees Fahrenheit and your time by 30%. This can vary per oven, so always consult your manufacturer's manual.
Broil
The difference between broiling and baking is that broiling uses the top heat element to cook food quickly, so think of it like an upside-down grill. It's an intense heat that browns the surface of food, like when you want to toast cheese until it's bubbling and golden on top of garlic bread. There are both "Broil Hi" and "Broil Lo" (less intense) settings, and which you use depends on what you're cooking.
The first option is great for anything that needs a sear (like steak) and can be less cooked on the inside, while the second is good for thicker cuts of meat you'd like cooked through, like burgers. Leave the oven light on and keep an eye on the food, because it can burn quickly when using this setting. Rack position is also key here, as foods too close to the top heating element can burn (and sometimes catch fire, like I did once with a broiler drawer). Speaking of, broiler drawers at the bottom of an oven or gas cooktop bring the oven's top heat element to ground level, but you must proceed with caution. Dust can catch fire, food that's too tall can catch fire ... you get the point. No matter which broiler you use, have your food at least three to five inches away from the heating element.
Proof
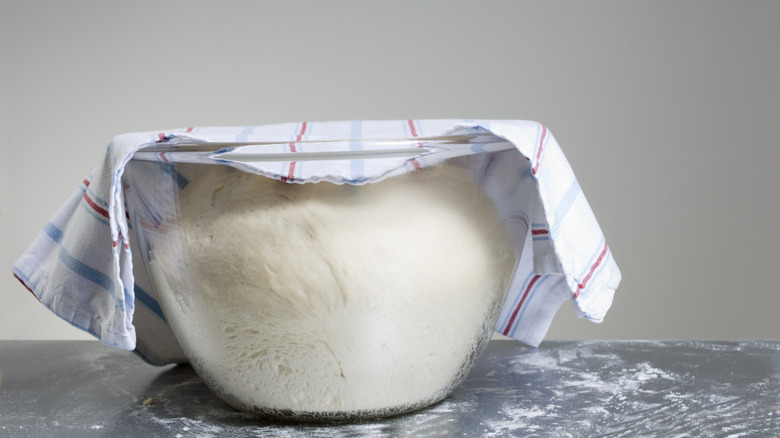
Perhaps my favorite oven setting, "proof," creates a warm environment for yeasted dough to rise. With a low temperature that usually hovers between 70 and95 degrees Fahrenheit, the "proof" setting allows dough to rise evenly and more quickly than it would outside the oven. If it's 67 degrees and drafty in your house, for example, the "proof" setting will help your dough reach its size goal (like double) more quickly. As always when proofing, protect your dough from drying out by covering it with a towel, and coat the inside of the bowl lightly with oil to help with sticking. Compared to room-temperature rising, proofing dough with this setting gives you consistent results.
However, if you're making sourdough, you want to skip this feature. Sourdough's bulk fermentation process is a slow one (think of how aerated the dough gets) at a steady 76 degrees Fahrenheit (thanks to the warm water you add with your autolyse and levan). The heat from the proofing setting may reach too high in your oven for this type of bread.
Cook Time (or Bake Time)
"Cook time" is not the timer. Instead, it's a programmable feature that lets you set how long the oven will stay on while baking. You can put your food in the oven like you usually do, but instead of setting a timer to signal when something is done, you select the "cook time" (or "bake time") setting. This turns the oven off after the programmed time elapses. This is great for recipes that require precise timing, like lasagna and casseroles.
However, this setting is not great for a lot of desserts because the oven doesn't immediately cool — it just turns off. So residual heat will still be in the oven, potentially burning your cookies. To get around that, avoid using "cook time" for desserts like soufflés. If you absolutely need to, set the timer for less time than the recipe requires. If you tend to burn your food because you don't hear the timer or aren't good about keeping an eye on the oven, "cook time" might be your best friend. Just set it, put the food in when the oven is at temperature, and walk away.
Warm
Let's say you're hosting a dinner party and all the food is done, you're just waiting for the guests to arrive. How do you keep everything hot without overcooking it? "Warm" mode, depending on the oven model you have, can keep food at a desirable, serve-safe temperature for three hours. According to oven manuals, non-crispy foods should be covered with foil to keep from drying out; crispy foods should be left uncovered. Do not use this feature to cook food or warm up cold food — it's for maintaining heat.
No one likes cold mashed potatoes or non-crispy Brussels sprouts, so take advantage of this feature instead of leaving food out or leaning on the microwave (which can both dry out your food and make it mushy). GE appliances are set to 180 degrees Fahrenheit on "warm." If you don't have this function on your oven, you can set the bake time to that temperature and keep an eye on the clock.