11 Vintage Cooking Hacks Most Of Us Forgot About

We may receive a commission on purchases made from links.
When it comes to old-school cooking hacks, there's no shortage of novel, if not downright strange, ideas. Grandma certainly had a way of doing things, and most of us probably never truly knew how she was able to achieve the delicious results she did. Sadly, many of the retro trends that were once her favorites have since been forgotten, though many of these tips and tricks erased from our memories remain relevant to modern kitchens even today.
In this post, we're taking a stroll down memory lane to pay homage to many long-forgotten vintage cooking trends. From quirky time-saving techniques to deliciously frugal hacks, we're reminiscing on old tips that were nothing short of culinary genius in hopes that these once popular techniques might make a well-deserved comeback.
Sound interesting? If so, stick around as we explore 11 vintage cooking hacks that most of us have forgotten about.
Enhancing coffee with salt
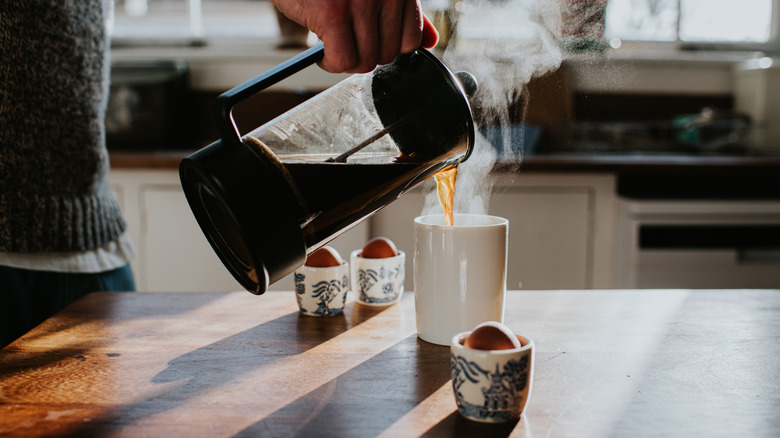
Adding salt to coffee is an easy, vintage, and, for some people, unfamiliar way to add more flavor to coffee. Those aware of the quirky tip often credit Alton Brown with the idea, though he certainly isn't the originator. Adding salt to coffee actually goes way back hundreds of years, and is still enjoyed in certain areas of the world today. Even so, the idea is still quite unusual in modern America, where heavily sweetened brews tend to reign supreme.
So, what's the point of the uncanny hack? Apparently, adding a bit of salt directly to coffee grounds mediates bitterness while simultaneously highlighting the natural flavor of the brew. Think of it like adding salt to a sweetened baked good; the ingredient is crucial to enhancing the flavor of even the sugariest treats.
Call it crazy if you want to, but adding salt to your coffee might just be the solution you've been looking for to amp up the taste of your morning cup of joe. For even more flavor, be sure to brew your coffee at the right temperature, and to use filtered water along with fresh coffee beans; these are just a few of many tips for brewing the most enjoyable cup, and trust us, it all makes a huge difference.
Adding mayonnaise to cake batter
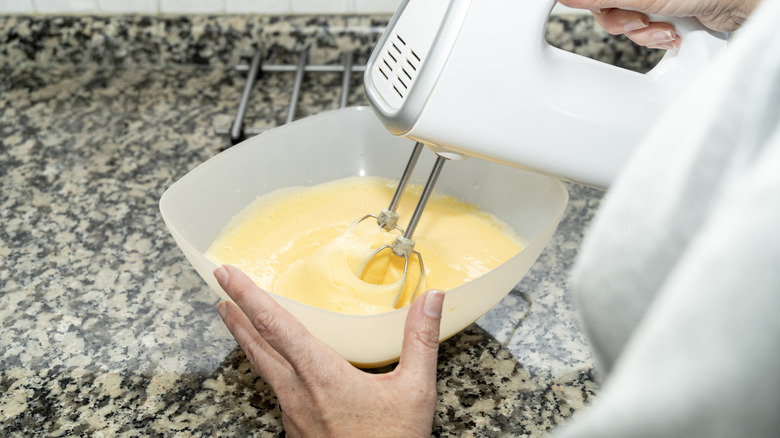
Adding mayonnaise to cake batter kinda sounds like a cruel joke, doesn't it? It's easy to understand why some might find this tip utterly repulsive; after all, most of us associate mayo with savory potato salads and sandwiches. Still, it's worth noting that the eggs, oil, and vinegar (apple cider vinegar can add extra oomph to baked goods) often used in cake recipes are already contained in mayo, pre-mixed and ready to go. It makes sense, then, that using mayonnaise in cake would serve as a money-saving hack during tough times when eggs and other ingredients were hard to come by.
Though adding mayonnaise to cake batter certainly isn't as popular in modern-day society as it was in the 1930s and 1940s, we were able to find a few instances of its use even today. Decadent cake batter recipes, including this espresso-infused chocolate cake, utilize the ingredient and yield nothing but moist, delicious results.
So, how much mayo are we talkin' here? In most cases, it could be up to 1 cup of full-fat mayonnaise, but really depends on the recipe used. Ultimately, whether or not this vintage-style add-in is worth a try is up to you, but those who have taken the plunge state that using mayonnaise in cake is so tasty it even rivals sour cream. Enough said!
Storing cookie dough in ice trays
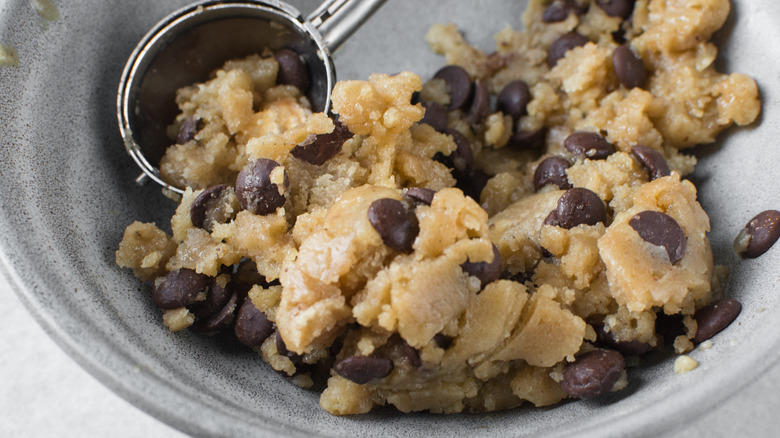
Storing cookie dough in ice cube trays is a nifty storage tip that has seemingly faded into the distant past. Using an ice cube tray this way not only clears clutter and frees up space in your freezer but also neatly segments your cookie dough so there's no guesswork involved in proper portioning. The results? Perfectly sized cookies with little to no waste.
As you might imagine, using an ice cube tray to portion cookie dough is easy. Simply scoop your cookie dough into each individual ice cube tray cranny before covering and freezing. When you're ready to bake the cookies, remove the dough from the ice cube tray, prep your baking sheet, and pop the dough into the oven or air fryer for warm, delicious, and evenly-portioned treats. To make the task even easier, consider using silicone ice cube trays like these Cuisinart Silicone Ice Cube Trays, as the smooth and malleable material makes the extraction process a cinch.
You can store cookie dough in the freezer for a couple of months, but it might help to add a lid to your ice cube tray. You could use foil as a cover, or you can purchase covered trays like these Amytor Silicone Ice Cube Trays with lids found on Amazon. Either way, out of the many creative ways to use ice cube trays these days, using them to store cookie dough has to be one of our favorites.
Balancing cake pans upside down on glass bottles
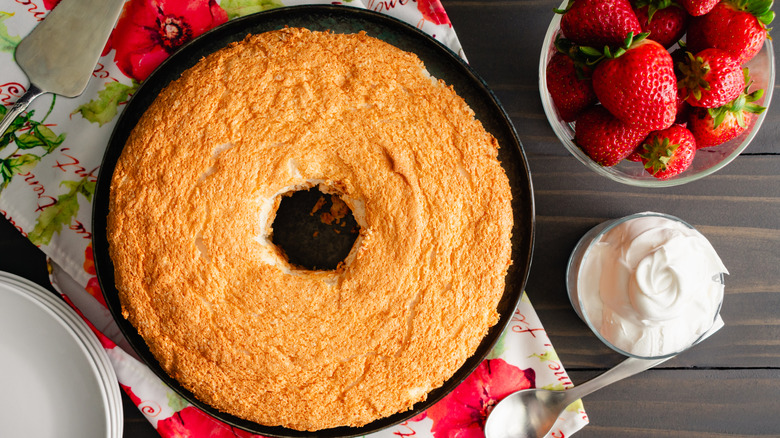
Balancing a cake pan upside down on top of a glass bottle is an old school hack that's been used by older generations for years, especially for angel food cake. Though seemingly more akin to a circus act than kitchen tip, this daring vintage technique works particularly well for producing light and fluffy results by allowing cakes to cool evenly from all sides.
At this point, you're likely wondering exactly how this all works, and we'll admit, there are a few things you need to keep in mind before attempting this not-so-typical cake cooling method. First, you'll want to ensure that the cake pan in question has a hole in the center, similar to this Cuisinart Chef Non-Stick Bakeware 9-inch Tube Cake Pan. You'll also want to find a good bottle to fit into the cake pan hole; while old glass soda bottles can work well, you may need to experiment to see which bottle type fits your cake pan best.
Once you've scored the right tools, it's time to bake. Simply cook your cake as usual before carefully flipping it upside down, and sticking the center of the cake pan through the hole. Your cake will cool evenly this way, and should yield an irresistibly light and fluffy texture that will serve as a testament to your efforts.
Stashing bacon grease
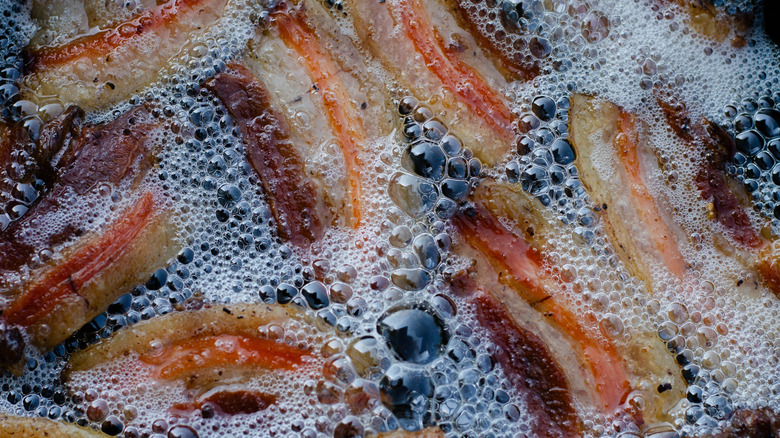
We don't know about you, but a can of bacon grease propped next to the stove was the norm in our grandma's house. So, what's its use? First, it works as free oil — use it to fry up potatoes, season cast iron pans, or take on any other task that might require grease. Second is flavor enhancement; because bacon is incredibly tasty, its fat often holds onto that flavor, thereby infusing anything you cook in it with a deliciously smoky taste.
To store leftover bacon grease, you'll first need to render the fat from your bacon. This, of course, is the fun part. Simply fry up your bacon, preferably in a shallow skillet over a low heat, and let the magic happen. Once cooked, remove the bacon from the pan and allow the fat to cool a little before transferring it into an airtight container. You should also strain it before storing to create a tasty white fat with no little bits in it.
One more thing: it's important that you use "clean" fat here, and not the fat from burnt bacon. Bacon that's overly charred will lend the grease a scorched flavor that may not complement whatever you're using it in. Also, consider refrigerating the fat – though grandma usually left it on the stove, it's better to be safe than sorry, especially if you plan to keep the grease long term.
Boiling cake batter ingredients
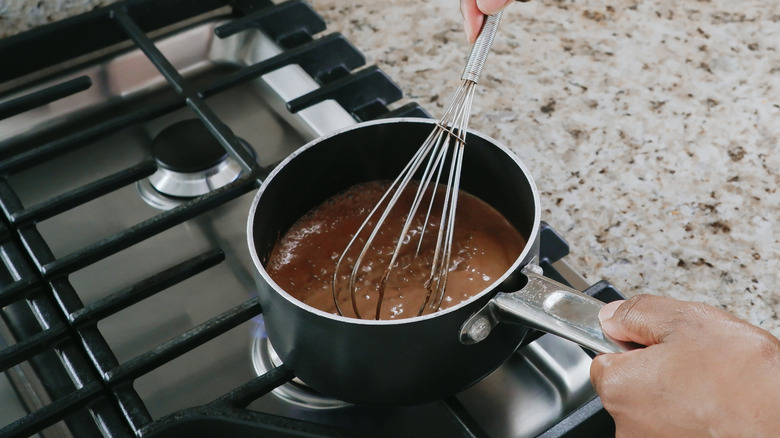
Boiling cake batter isn't quite what it sounds like, but it still involves steps most of us wouldn't consider when throwing together the average modern-day cake. While most of us are making boxed cake recipes that involve not much more than a couple eggs, milk, and the exhilarating whirl of a good hand mixer, old-school boiled cakes take things a bit further.
Instead of boiling the cake batter in its entirety, boiled vintage cakes start with add-ins like raisins, fruit, and spices, which are then cooked over the stovetop along with select ingredients. Cakes made this way usually feature a texture unlike the traditional fluffier and lighter versions of cake we're used to; instead, they tend to be rich, moist, and dense thanks to unique preparation methods.
It all starts with one simple step – placing several ingredients in a pot to be boiled before adding dry ingredients to the mix. Which ingredients are boiled depends on the recipe, but it's usually the fruit, sugar, and butter that are simmered, cooled, and incorporated before baking. Dried fruits like dates, dried cranberries, and raisins are often used, and because of the boiling process, they're typically plump and juicy by the time the cake batter is ready to be baked. The result is an unbelievably moist, tender, and juicy cake that adds an unmistakably vintage touch to the average dessert. Yum!
Using baking soda to tenderize meat
Most of us are familiar with using acidic tenderizing ingredients like lemon or vinegar to help break down the fibers of meat, but not everybody knows how to use baking soda to achieve much the same results. This old-school method, similar to the velveting technique, is an effective yet vintage way of yielding insanely tender, melt-in-your-mouth meat.
Using baking soda on meat can lead to impressive results, but a few tips will keep you on the right track. When cooking chicken, steak, salmon, or pork chops, leave the baking soda on for no longer than 10 minutes or so before rinsing it off completely. As for using it to tenderize ground beef, try adding a ½ teaspoon per pound, making sure to distribute it evenly before browning. No need to rinse it off in this case -– simply incorporate it into the beef mixture, allow it to sit about 15 minutes, and cook as usual.
Looking for other fun ways to use baking soda in your modern-day kitchen? Try using it to neutralize the acid in your spaghetti. Like when tenderizing meat, only a smidge of baking soda is needed to accomplish this goal – ¼ teaspoon for most sauces is enough to tame the acid most of the time. No matter what you're using your baking soda for, be careful not to use too much; your meal might take a turn for the worse as the excess baking soda could produce bitter results.
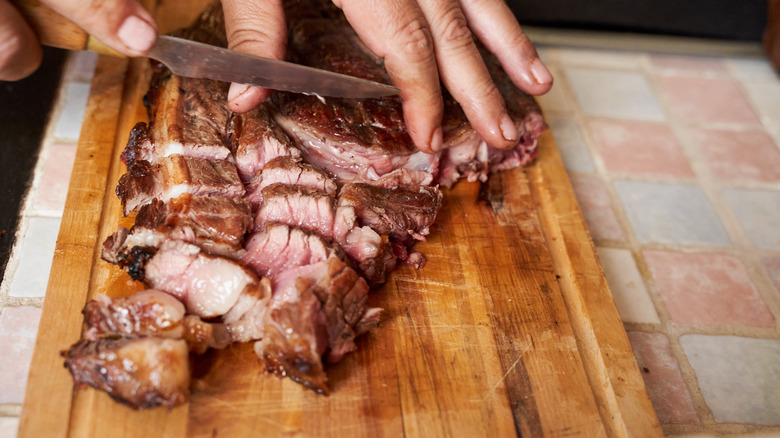
Making sun-dried beef and herbs

We're all for the quick and easy way of doing things, but sometimes, old-school longer and slower methods can prove more satisfying. Sun-drying meat and herbs is one such instance, and the flavor payoff is totally worth it in the end. To make sun-dried beef, consider purchasing a hanging mesh shelf to protect your meat from flies and other critters. Cut the meat into strips and add to it your choice of seasonings — ingredients like fish sauce, oil, salt, and sugar usually work well.
Once the meat has marinated in the ingredients, transfer it to your outdoor mesh shelf and allow it to sit in direct sunlight for three to four hours. Bring it back in and either refrigerate, freeze, or cook the meat until it reaches the desired internal temperature with an instant-read thermometer like this Alpha Grillers Digital Meat Thermometer. The results? Flavorful beef that'll be dry on the outside yet soft on the inside.
Dried herbs require a similar approach, but will need more time — about a week or two. Tie the herbs together and hang upside down out of direct sunlight until they're dry enough to crumble. Don't have that much time? You could just as easily dry them in the microwave; it's one of the many microwave hacks every home cook should know that your older relatives may (or may not) have told you about.
Preserving cheese by coating it in butter
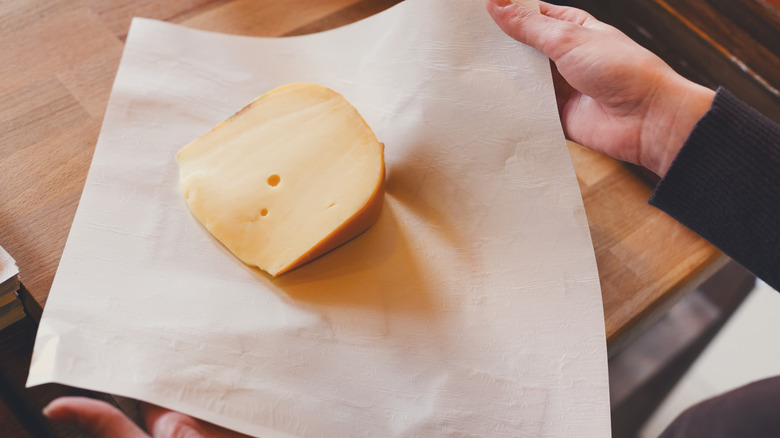
This hack's a bit messier, but it has been passed down through generations for a reason. Cheesemakers have reportedly been smearing cheese with butter for years, though, admittedly, this is the first some of us have heard about it. Apparently, a thin layer of fat of any kind can prevent spoilage and lock in moisture, making it a prime choice for keeping refrigerated cheese fresher for longer.
When taking on the task, be sure to remove the cheese from its original packaging before swiping butter on all sides, including its cut edges. Once finished, rewrap the cheese in wax or parchment paper and store in the fridge. When you're ready to eat, cut the cheese, wipe off the excess butter, and consume. Be sure to add a little extra butter to the edge you cut through; keeping every inch of your cheese covered in a layer of fat yields the best results.
Worried you won't know which cheese is which after removing its original packaging? Don't stress; simply use a marker to add its name and expiration date for easy identification.
Transforming old coffee into ice cubes
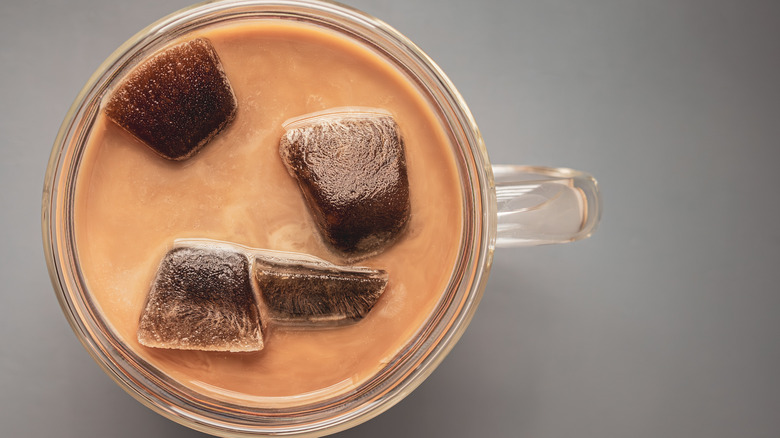
Coffee connoisseurs, listen up — this one's for you. We've all had a day or two when sad-looking cups of coffee were left hanging around the house. At room temperature, those old cups of joe might not seem appetizing, but the old school hack of freezing them for later use completely changes the game.
Instead of dumping your old coffee down the sink, try pouring it into an ice cube tray instead. Then, whenever you get the hankering for iced coffee, simply add a few cubes to a glass of milk and there you have it — iced coffee that gets stronger, rather than weaker, as it sits.
This hack was reportedly born out of the need to reserve every last morsel of food and drink due to tough times; and with what seems to be an all-out obsession with coffee in today's world, you'd think this tip would be more popular than it is. All in all, this frugal coffee hack is no doubt a delicious one — just be sure that the coffee you're aiming to freeze is still safe to drink (i.e., not spoiled) before stowing it away for later use.
Repurposing leftover potato water for soup
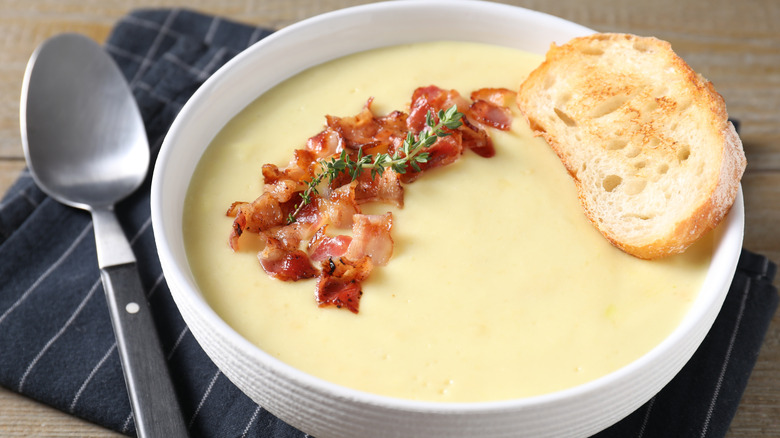
Saving your potato water to use as a base for soup might not be the most glamorous vintage tip on the list, but it sure is effective. This non-pretentious cooking hack is one that most home cooks seem to have forgotten about but can add flavor and thickness to just about any soup. Just as leftover pasta water can transform sauces into thick, luscious, and velvety toppings, the water from boiled potatoes can have a similar effect. The secret lies in the starch – that cloudy, murky water is full of flavor and thickening properties that, with a little help, can be utilized to create something wonderful.
To use leftover potato water as a base for soup, consider adding a bit of salt, pepper, and a variety of veggies to make a homemade broth. Alternatively, use the potato water as a base for your next potato soup, using frozen hash browns to save on time. Whatever you do, be sure that if you plan to use whole, unpeeled potatoes, to clean them thoroughly by using a tool like this OXO Good Grips Vegetable Cleaning Brush; otherwise, you'll be left with brown, mucky water you'd never want to convert to a bowl of soup.