Are Any Of These Bag Sealers Worth Ditching The Clip For?
We may receive a commission on purchases made from links.
For my staff job here at The Takeout, I don't think you quite understand just how many bags of chips, candies, and novelties I have to open up for review purposes — not to mention the things I like to eat on my time off the clock. That means I require an ungodly amount of chip clips (I've got around 10) that inevitably experience a lot of wear and tear. Some of these clips have been used so often that they've actually snapped, so I thought that it was worth exploring whether or not an alternate bag sealing method would keep my chips crispy without the clip.
There is one solution that I've seen on the internet, which is an electronic bag sealer. There are multiple brands that produce these handheld devices with a heating element that fuses bags shut. In theory, that's a great idea, considering a chip clip isn't always the best at keeping excess air out of your chip bag. Air, as we all know, is the enemy of our beloved snacks. So I found a few brands of bag sealers online and set out to see whether or not these things work by putting them through their paces.
Methodology
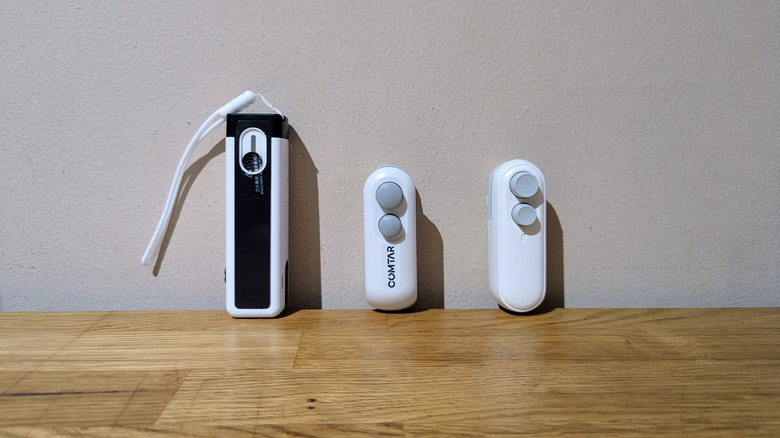
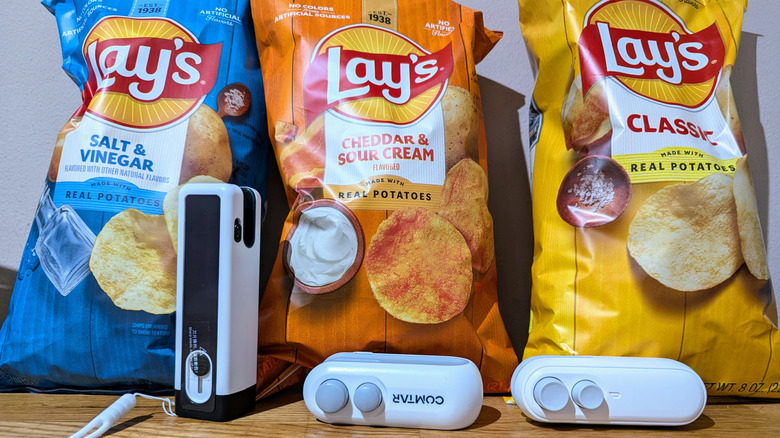
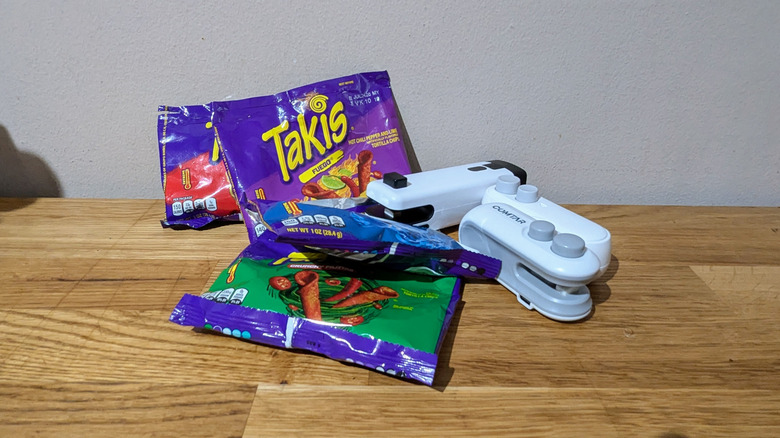
For this review, I purchased three different brands of bag sealers off of Amazon. One of them was the HSLGOVE 3-in-1 mini bag sealer (pictured far left), which cost $14.98. Another was the Comtar upgraded mini bag sealer with cutter and magnet, which was $7.99 (pictured in the middle). Finally, I ordered the upgraded 2 in 1 mini bag sealer with cutter and a magnet from a vendor called The Generic Store for $15.99 plus $5.99 shipping and handling (the far right sealer in the pic). For simplification, I'll refer to this one as the Generic sealer from here on out. These prices are all recorded from the moment of purchase, and may change depending on time and region.
I primarily tested them all to see if their main function, bag sealing, worked as advertised, and if so, how well, by trying them on multiple types of snack bags. My plan was to also learn best practices as to how to do so along the way. I also tried the snacks a few days after sealing to see whether or not these sealers were the secret to keeping chips fresher for longer.
Setting up the bag sealers
Every sealer came with the instruction to charge them prior to using them for the first time. All three had a USB port with an included cable, though they weren't all the same variety of cable. The HSLGOVE and Comtar units both use USB-C connectors, while the Generic sealer uses a micro USB-B connector. Two of them, the HSLGOVE and the Generic sealer, took around 30 minutes to charge up properly.
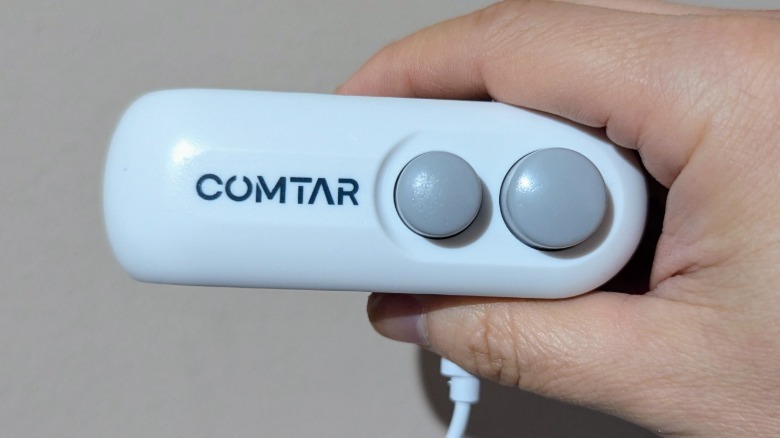
The Comtar sealer, however, started off with a bit of an issue. After attempting to charge it for eight full hours one day and finding it wouldn't hold any juice, I finally relented and ordered a replacement device. While that was on the way, I attempted using different wall adapters and cables to see if maybe my electronic equipment was the problem, but nope — the replacement device ended up keeping a charge and it powered on just fine. This is just a reminder that cheap electronics aren't always reliable.
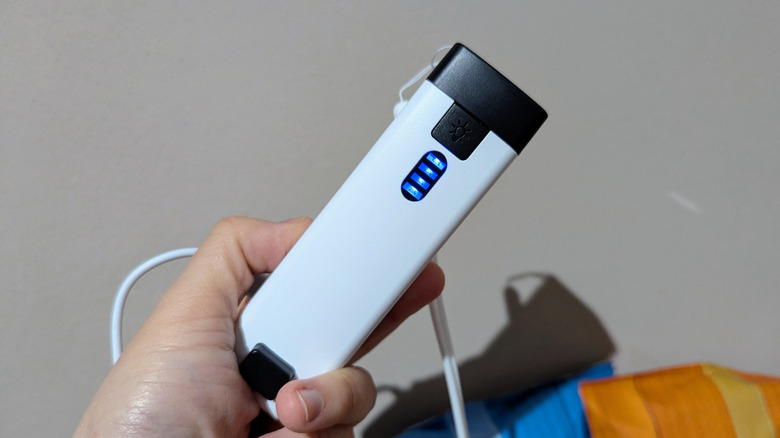
All of them have some way to indicate that they're charging and when they've completed, usually with a light that switches off once the battery's full. They all also have an indicator light to show when the switch is in the on position, which is extremely important from a safety standpoint. Since these things rely on high heat, you're going to want to make sure they're off when you aren't using them. For this reason, I don't recommend you absentmindedly stash one in your pocket by accident like I did (it was off, thankfully, but imagine if it wasn't).
The snack bag test
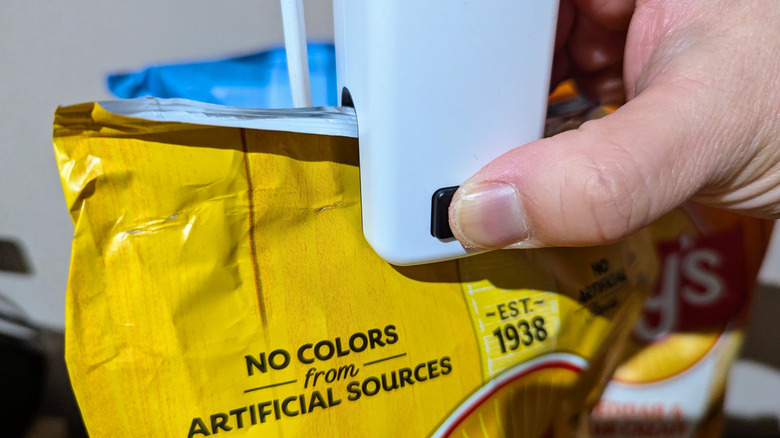
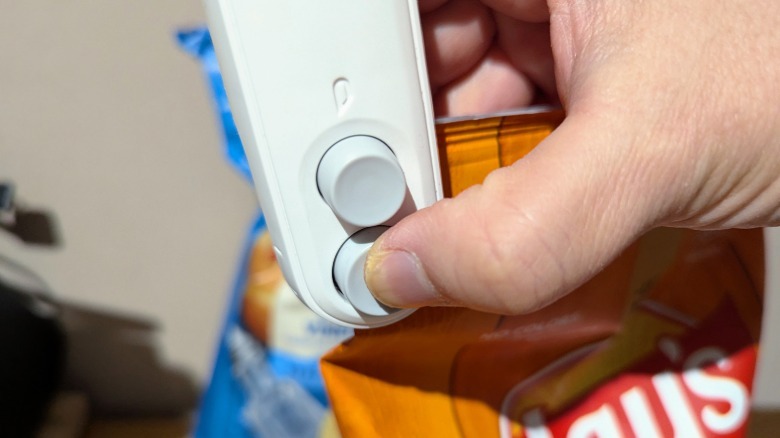
I started my test by using the fully-charged sealers on potato chip bags. Once powered on, I let each device warm up for a bit before I used them for the first time. They all function similarly in that you put the open bag in a groove that's built into in each device. Then you press a button which brings the heating element in contact with the bag, and next you're supposed to drag the sealer across the length of it, which should melt the packaging shut.
The HSLGOVE unit (pictured above), was my first foray into using one of these things, so admittedly I was going to run into some issues. I clamped down tightly on the Lay's bag and it immediately melted a hole into the packaging. Dragging the sealer across the top wasn't as smooth as I thought it'd be, because in order to seal the bag, you have to keep the sealer clamped shut. But if the sealer is clamped too tightly, then you can't glide the sealer across the length of the bag. To further complicate the issue, if you keep the sealer in one spot for too long, it'll melt a hole through the bag. I ended up folding the bag over one more time to try double-sealing it, which sort of worked, but a small squeeze indicated that this wasn't airtight, as I felt and heard air hissing out of some unknown patch I'd missed. So this thing mostly works, but maybe I was doing something wrong.
The Generic sealer caused me similar headaches, if not worse ones. After it had warmed up, I tried my best to move it across the top of the open bag as smoothly as possible, but the bag kept getting snagged in the device, resulting in immediate holes melted through it. Every time this happened, the scent of melting plastic filled the air, which made me kind of uncomfortable, considering this bag was storing, well, food.
Again, I couldn't get a proper seal because it's visually impossible to tell if you've gotten it correctly until you squeeze the bag a little. I still felt a slow deflation somewhere. Some of the instructions for the devices tell you to double-seal the corners of the open side using a downward slant (to ensure you've gotten the hard-to-reach ends of the bag), but that maneuver is difficult due to the way you have to position the sealer. I couldn't quite master this even after practicing, as that awkward angle makes it hard for the sealer to run across the plastic.
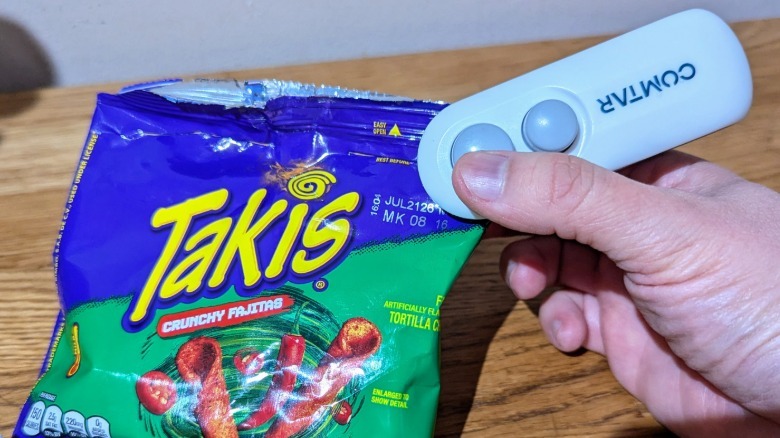
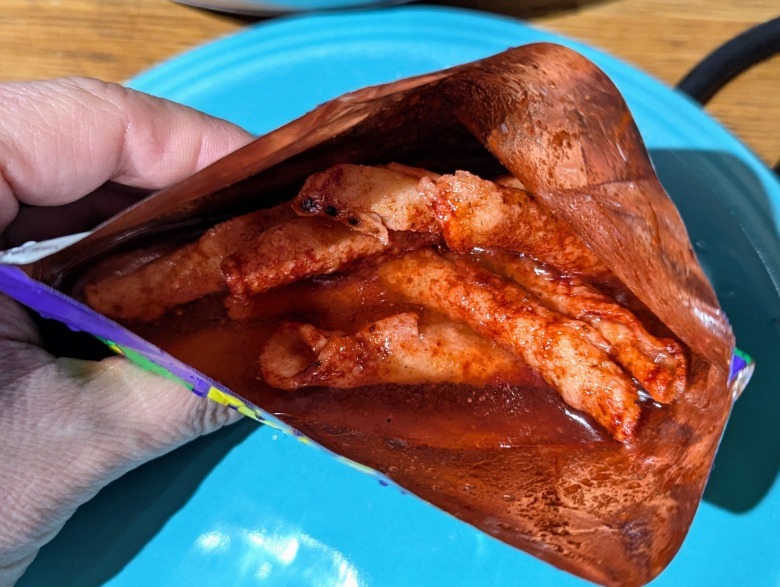
My Comtar replacement finally arrived, and with two sealer's worth of practice under my belt, I was hoping I'd do better. This time I switched to smaller bags of chips (my precious Takis) because I'd already run out of the large ones I had. Just like the other two sealers, it was the same story — there was an unidentifiable leak in the bag. This dragging motion across plastic is a real bag destroyer. Videos online make it just look like a quick swipe, but for me, at least, the learning curve was so frustratingly steep that the idea of destroying so many bags just to get it down started to make me wonder if it was worth the effort and the money.
The real test was a few days later when I tried the chips. The potato chips, though still crunchy, were starting on their descent into staleness. If I'd used a clip, I'd have gotten a similar result, if not better, based off prior experience. The Takis, which admittedly were a different category of snack altogether, were a different story, as they remained as crunchy as ever. I don't think this had anything to do with the sealer; I have had many a Taki, and they are hard-fried to the point where they seem to grow stale more slowly than a delicate potato chip does. This was a methodology flaw on my part, so take this into consideration.
Just how leaky are these seals, anyway?
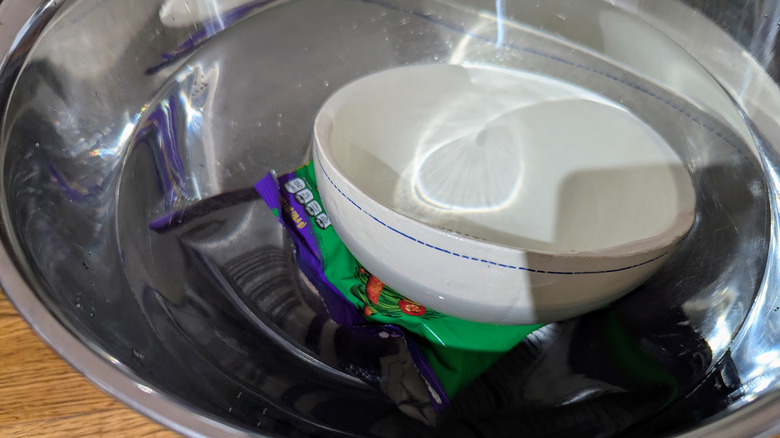
This might be getting a little extreme, but I wanted to see just how unreliable the seal might be, so I actually submerged one resealed bag of Takis in a bowl of water. You know, for science. As you've seen, regardless of the device, all the bags did in fact seal somewhat as advertised, seemingly to the same degree. I used a ceramic bowl to anchor down the chips and let them sit for an hour, then opened the bag of rolled tortilla chips to see how they fared.
Let's just say if this thing were a ship, it would have sunk to the bottom of the ocean. Never let go, Jack, never let go. While the bag wasn't completely full of water, quite a bit had gotten into it. This reflects just how difficult it is to tell how well your seal's been executed on any given bag. Granted, this is a very extreme way to test whether or not you've done it properly, but that means that left alone, these Takis would eventually have gotten stale thanks to air getting into the bag.
The candy bag test
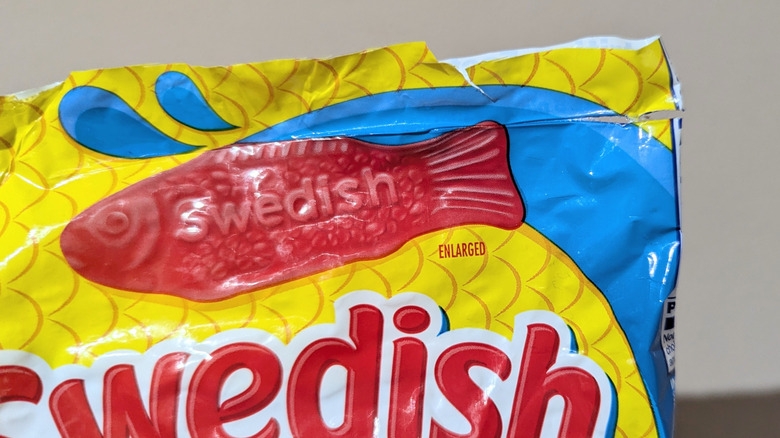
While potato chip bags are typically made of a kind of plastic called oriented polypropylene with an extremely thin coating of aluminum inside, candy bags are made out of just plain plastic. It was worth exploring whether or not the sealers worked on these bags as well, as some candy packaging for things like gummies isn't resealable (dry whole spices like peppers come in plastic bags too). Again, the Comtar succeeded here in at least fusing the bag shut for the most part, and this time I was able to seal a bag of precious Swedish Fish almost completely. The key word being "almost." I still heard the tiny hissing of air somewhere, and I could feel the bag deflate ever-so-slightly with a little squish.
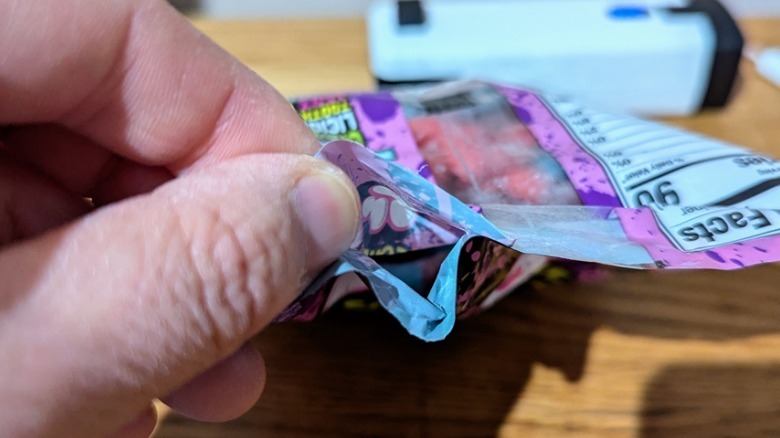
At the risk of sounding like a broken record, again, the same problems persisted with the other two devices. I had to run them multiple times in some cases. It's the same story: Either you press too hard on the button and straight-up melt your bag, or you do it too lightly and don't seal the bag at all in some spots. Even if the bag was completely transparent, I'm guessing it'd be difficult to tell by looking just where any problem areas were, since it can be so subtle.
I'd also like to note that the Generic unit was prone to accumulating melted plastic on its heating contacts. At some point it visibly began smoking, which was disconcerting, and it spread an unappealing plastic smell throughout my kitchen. But two days later, all the candy was remarkably still as bouncy and as chewy as it was when I first opened it, so I'd consider this a minor success for the machines.
Are any of these bag sealers worth buying?
This comes down to the final question: Are any of these bag sealers worth buying? I think you already know the answer. From my experience trying all three, all I've found is that they're difficult to use, perform inconsistently, and vaporize plastic into your food. I guess one nice thing is that they won't have to clutter up your junk drawer, because they all come outfitted with a magnet, which means you can slap them on the side of your refrigerator for easy access. But ask yourself: How often are you resealing snack bags, anyway? Do you really need to be adding to the clutter in your kitchen? Heck, learning the origami of folding snack bags tightly might be more practical than using these things.
I suppose if I had to choose, I would go for the large one, the HSLGOVE. That's only because it has a random flashlight built into it, along with a very easy-to-read battery display on the side, unlike the other devices (the box cutter blade installed in it is so wobbly I actually consider it dangerous). The flashlight may actually be the only useful thing about it, unless you can practice with maybe a dozen snack bags and finally perfect your resealing game. As a whole, I just can't recommend buying these things, even if the idea sounds great on paper.
The Extreme Reviews team took these bag sealers to the limit

The guys at the Extreme Reviews YouTube channel reviewed the same trio of bag sealers, and while they picked a different sealer as the marginally better one, we all came to the same conclusion: These things just aren't super worth it. However, if you watch the Extreme Reviews video below, you will get to see if the seal on a bag can withstand a katana blow, among other wacky tests, and that will be very worth your time.