Make Homemade Ice Cream By Taking Advantage Of Your Frozen Backyard

We may receive a commission on purchases made from links.
When you're a kid, snowy days are something to look forward to. First and foremost, they might mean a day off school! Even if they happen on a weekend, there's all the fun of sledding, snowball fights, and making snowmen. As you get older, though, snow might just mean shoveling and sloppy commutes — so sad. Still, there's a way you can reclaim a little of that childhood joy right in your snow-covered backyard (or balcony, if you're an apartment dweller). You can actually employ that snow as a low-tech DIY ice cream maker!
What you do is take a big bowl and bury it in the snow up to the rim, or as close as you can get. A metal bowl is preferable since the material is so efficient at conducting heat (and cold). Pour in your ice cream ingredients — like heavy cream and powdered sugar — and stir. If it's below 32 degrees Fahrenheit, leave the ice cream out there in the snow, which will serve as a natural freezer. You may want to cover it, too, so no random bits of schmutz fly in and it's safe from wandering wildlife. Stir it every so often, and eat it once it reaches a reasonably ice cream-like consistency. If you're willing to brave the cold, you can also whisk the mixture constantly for about 20 minutes for fluffier results.
Your ice cream base can be flavored with whatever you have on hand, like the best store-bought vanilla extract or a sprinkle of cinnamon. You can also try our three-ingredient granita, which requires nothing more than fruit, sugar, and water.
You can also make ice cream out of snow
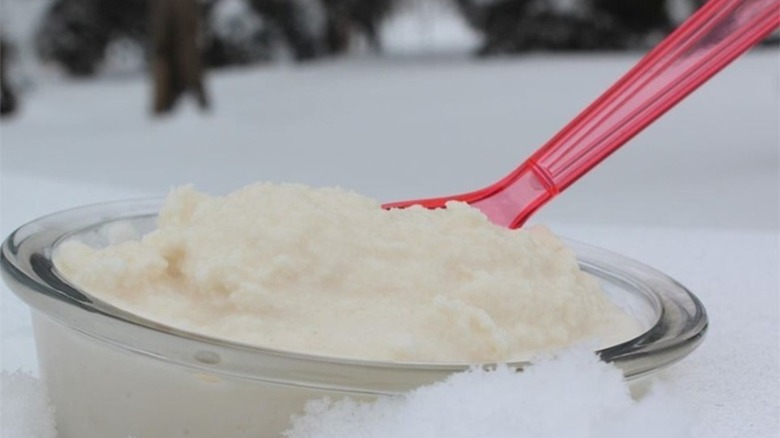
If you live in an area where the snow is clean and pristine and you don't have any pets to turn it yellow, you might want to experiment with making an old-fashioned snow cream. (It's relatively safe to eat snow as long as it's from the undisturbed top layer, bright white in color, and you don't live in a polluted area.) The simplest way to make snow cream is to mix a can of sweetened condensed milk with 2 to 3 quarts of fresh snow. You can also add vanilla or another flavoring extract. You needn't leave your snow cream out in the cold, either — in fact, you can bring the snow indoors and make it there.
If you're not sold on the idea of eating snow, there's another treat you can make where the snow is part of the process but isn't actually consumed: maple snow candy. If you ever read the "Little House" books by Laura Ingalls Wilder, you may remember the family making it in "Little House in the Big Woods." The Ingalls family might have tapped their own maple tree, but you can use maple syrup from the grocery store. Simply boil the syrup until it reaches the soft ball stage (235 degrees Fahrenheit), then pour it over some snow. After about 30 seconds, it will solidify into a chewy candy. Again, you'll want to make sure your snow is as clean as possible. Also, while it may be fun to pour the hot syrup directly over the snow in your yard, it's probably best to bring a pan of snow into the house in order to keep the syrup from cooling off.