12 Mistakes To Avoid When Making Homemade Pizza, According To Chefs
We may receive a commission on purchases made from links.
If you haven't attempted making homemade pizza yet, you don't know what you're missing. Pizza-making can be a messy yet rewarding venture, from watching your handcrafted dough rise to enjoying the tantalizing smell of a freshly baked pie. Still, there are plenty of mistakes to be made in the wonderful world of homemade pizza — but thankfully, we've got the expert advice you need to aid you in cooking up one worthy of a chef's kiss.
In the upcoming post, we're revealing all the best tips and tricks offered by highly-experienced chefs. We've consulted Jeff Bucciarelli, Executive Chef of Moneyline Pizza & Bar at Aria Resort & Casino in Las Vegas; Mark Bello of Pizza School NYC; and James King, Complex Executive Chef for Hilton Tampa Downtown and Embassy Suites Tampa Downtown Convention Center, to get the low down on some of the most common mistakes to avoid when making homemade pizza and what to do instead. From oven temperature to toppings, prepare to get schooled on methods that can help you achieve pizzeria-style results, right from the comfort of your own home.
So, what're you waiting for? Join us as we slice into the common mistakes you should avoid when making homemade pizza.
Not starting with a (very) hot oven
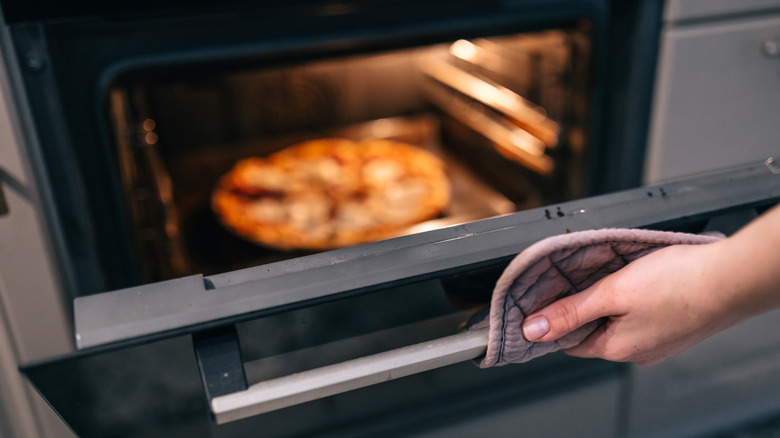
The experts agree: When it comes to homemade pizza, a smokin' hot oven is the way to go. Though daunting at first, cranking up the heat is the key to achieving a delicious pizzeria-style crust. "Most pizzas will cook in about six to eight minutes at 500 to 550 degrees Fahrenheit," said James King. "Just keep an eye on the crust and cheese — you're looking for a bubbly top and golden edges."
Jeff Bucciarelli agreed, while also advocating for proper preheating measures. "Always preheat your oven for at least 45 minutes before baking," he explained. "If using a pizza stone, preheat it in the oven to absorb maximum heat." Although it's tempting to rush the process, doing so will usually lead to less-than-stellar results, including an increased risk of consuming raw pizza dough and undercooked toppings.
If you must dial down the temperature, we recommend going no lower than 475 degrees Fahrenheit. In our experience, this still delivers tastily delicious pizza, though it may take a little longer to cook, at 12 minutes or more, depending on your oven.
Forgetting to invest in the right tools
According to our chefs, a common mistake home cooks make when whipping up homemade pizza is neglecting to invest in high-quality, efficient tools that could take their pie to the next level. Investing in a pizza stone like this Unicook Pizza Stone, for example, is a great way to achieve an uber-crispy crust. Because of their design, pizza stones help evaporate moisture from the dough while evenly distributing heat for irresistibly crunchy results.
Interestingly, there's a tool out there that may perform even better than a traditional pizza stone, despite being of similar design. "Pizza steels are my go-to because they conduct heat better than stones and produce a crispier crust," James King explained. "I recommend using two; position one in the lower third and one in the upper third of the oven. Start your bake on the lower third, then finish it near the broiler on the top third to caramelize the top perfectly."
A pizza peel is yet another investment that can help you achieve a restaurant-style pie; this handheld tool allows you to slide your pizza directly onto a steel or stone for baking. Peels are available in both wooden and metal forms; just be sure to prep them properly to decrease your chances of ruining your pizza. "Dust [a pizza peel] with cornmeal or semolina to prevent sticking and reduce the chance of tearing or dropping your pizza," Jeff Bucciarelli advised us.
Underestimating the power of a cast iron skillet
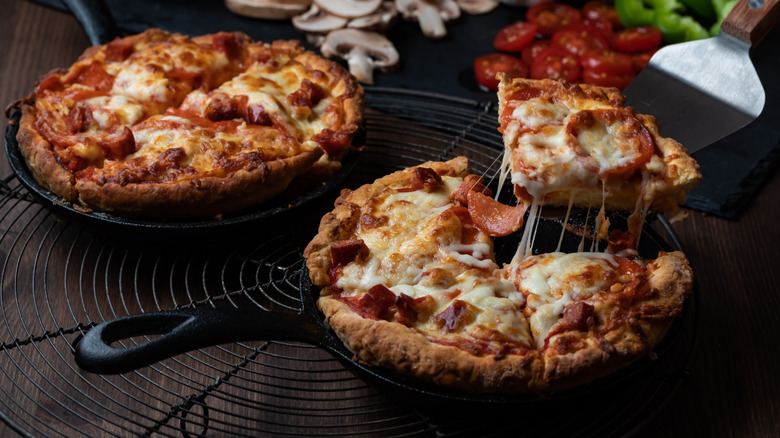
Though using a pizza stone, steel, or peel can certainly up your pizza game, there are ways to achieve similar outcomes even without fancy equipment. James King filled us in on the details. "If you're not using a stone or steel, you can still get great results by starting your pizza in a preheated cast iron skillet on the stovetop, then finishing it in the oven," he explained.
Genius, right? Because of its ability to evenly distribute and generate immense heat, a cast iron skillet works to crisp up the bottom of your pizza crust in a way similar to a pizza stone or peel. Of course, you'll want to keep your cast iron skillet oiled to prevent your pizza from sticking — thankfully, using cast iron regularly is the easiest trick for keeping it seasoned.
One word of caution: Always use an oven mitt when transferring your cast iron skillet from one place to another. Because the handles of a cast iron skillet can become scorching hot, safety is paramount, especially if you're used to cooking with pans that have heat-resistant handles. To stay safe, we recommend tossing a towel over the exposed handle of the skillet while it's on the stovetop and replacing the towel after pulling it from the oven when using this pizza-cooking method. For even more protection, consider purchasing something like this Lodge Silicone Hot Handle Holder – better to be safe than sorry, we always say.
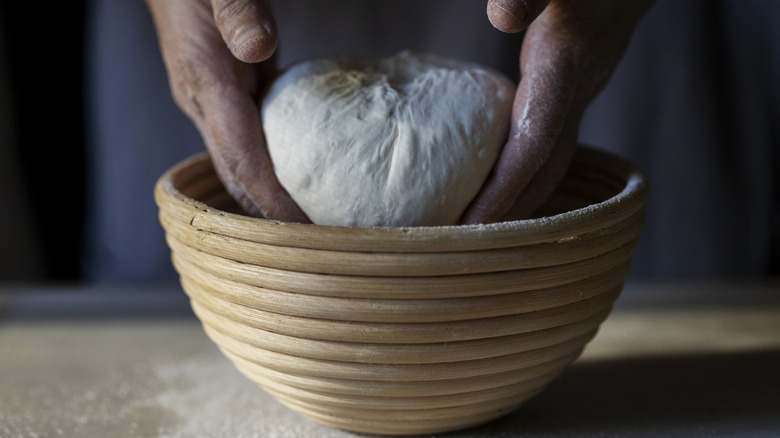
Attempting to stretch cold pizza dough
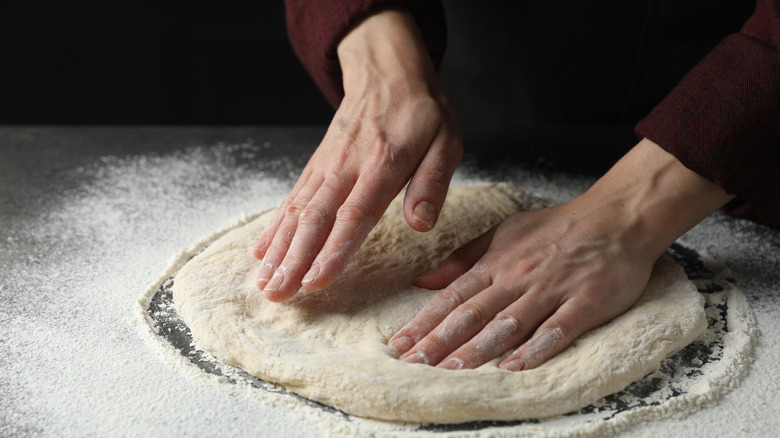
Shaping pizza dough to circular perfection isn't as easy as it seems. While we've all witnessed pros whipping large pizza rounds overhead, the rest of us are pounding dough over our countertops, hoping to eventually achieve that coveted circular shape. Thankfully, our pizza connoisseurs have an answer to this, too, though the remedy may not quite be what you think.
"If dough resists stretching, let it rest at room temperature for 30 to 60 minutes after removing from the fridge," Jeff Bucciarelli told us. "Flour your surface and the dough lightly. Press around the inside edge to form a crust, then gently stretch by rotating and using your thumbs to achieve your desired shape."
If you still find the dough difficult to stretch, you could always watch an online video tutorial to help you refine your technique; according to James King, it's a viable way to learn to handle your dough like an expert. Whatever you do, please don't reach for the rolling pin. Chef Bucciarelli warned that the rolling action can flatten out air bubbles, resulting in a crust void of those oh-so-satisfying artisan air bubbles.
Not paying attention to the type of flour used for pizza dough
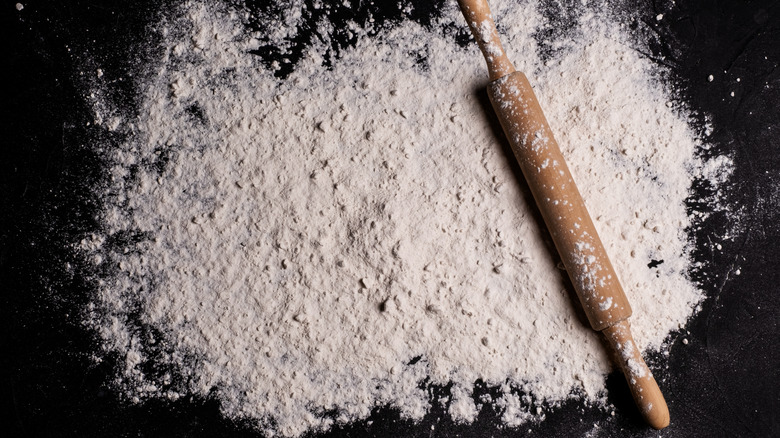
While it may be tempting to grab whatever flour you have stashed in your cupboard for your next homemade pizza, the truth is that differing flour types will yield vastly contrasting results. Whole wheat flour, for example, often produces a pizza that is heavy and dense, while a pizza made with white flour generally results in a comparatively lighter, fluffier crust. But that's not all — as our experts informed us, there are even more distinctions to be made between flour types, especially when it comes to making specific regional pizza types.
"For classic NYC-style pizza, we use a higher protein, unbleached flour," Mark Bello explained. "We specifically use King Arthur Bread Flour." James King agrees, but also added that Tipo 00 flour (such as this Polselli Tipo 00 Flour found on Amazon) is ideal for Neapolitan-style crust due to its fine texture and elasticity.
Using low-quality ingredients
Low-quality ingredients can be tempting, especially if they're readily available or sold at a lower price point. Even so, our chefs sternly warn against making the mistake of using cheap ingredients on pizza, as it'll likely cost you in terms of flavor in the end. "[Always] use quality ingredients," advised Mark Bello. "The extra investment in your flour, tomatoes, toppings, etc., pays for itself many times over in the taste of your pizza."
Not quite sure where to start? James King encourages aspiring at-home pizza makers to let creativity take the lead. "When experimenting with homemade pizza, you should start with ingredients you love and make sure they're fresh and high quality," he stated. "I lean traditional but enjoy exploring with unique cheeses and premium cured meats like prosciutto di Parma or Spanish jamón. There are no rules when it comes to toppings; have fun with it."
Overcomplicating your pizza sauce
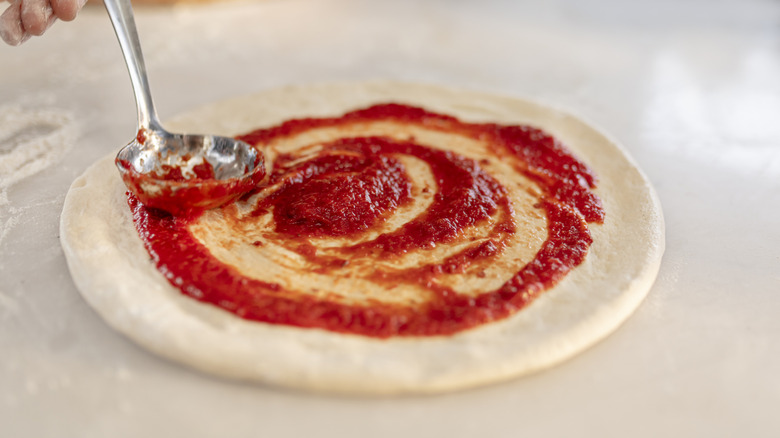
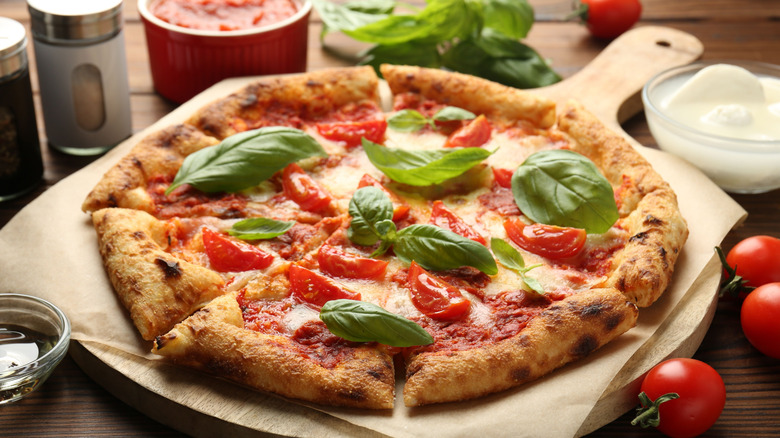
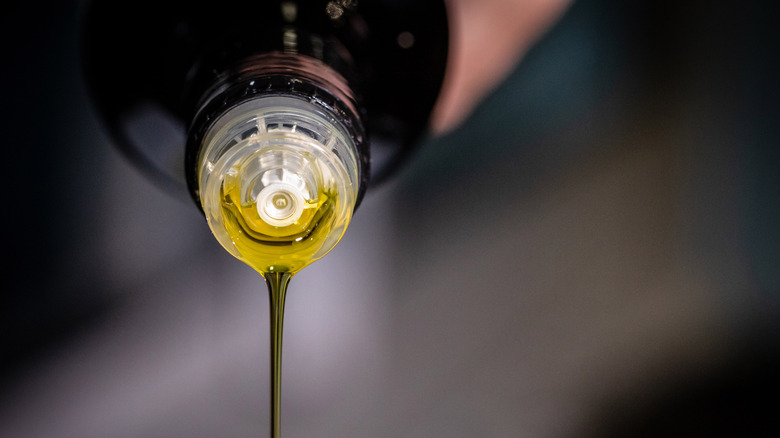
Though you may think an awesome pizza sauce requires more than standard ingredients to pull off, nothing could be further from the truth. Our chefs unanimously agree that keeping things simple is ideal. "To make a good pizza sauce, I suggest using high-quality tomatoes," James King told us. "I prefer San Marzano DOP (Denominazione d'Origine Protetta) tomatoes, kept simple with just salt and a couple of basil leaves." He added that topping your pizza with a drizzle of high-quality extra virgin olive oil can give it even more depth of flavor.
Jeff Bucciarelli concurs, suggesting a humble combination of whole peeled tomatoes, fresh garlic, and real herbs. "Don't precook your sauce," he advised. "Let the oven do the work."
Even Mark Bello's pizza sauce recipe used at the Pizza School NYC keeps with the same theme; according to him, pureed tomatoes, salt, garlic, and oregano are the only ingredients needed to make an amazing-tasting no-cook pizza sauce base to underpin all your favorite toppings. Who can argue with that?
Only proofing pizza dough for an hour or two
Many homemade pizza recipes we've run across require you to proof the dough only for an hour or two, if that. Imagine our surprise, then, when our chefs recommended a slower approach to the proofing process — one that admittedly takes a little longer than we would've hoped.
"If possible, follow a two-day process for proofing dough," James King recommended. "Start with a poolish (equal parts flour and water with a small amount of yeast), let it sit for 12 hours, then mix in the rest of the ingredients and refrigerate for 24 to 36 hours." Jeff Bucciarelli advised similarly, stating that a slow fermentation process (anywhere from 24 to 72 hours in the fridge) improves flavor while also yielding a lighter and airier crust.
Not willing to wait that long? We feel ya. In that case, you may wish to try an instant yeast instead. "For beginners, instant yeast is the most reliable," said Bucciarelli. "It's forgiving and doesn't require proofing in water before use." To utilize instant yeast in your next pie, simply add it as a part of your dry ingredients before adding the liquid components to the mix. Be sure to note any specifics in your pizza dough recipe when it comes to water temperature; although instant yeast doesn't require proofing, a water temperature of 120 to 130 degrees Fahrenheit is recommended for the best results.
Always pre-baking your pizza crust
A few homemade pizza recipes we've come across suggest part-baking your crust before adding toppings, but is the extra step needed? Maybe so — but maybe not. Though the method works to ensure the crust gets fully cooked without burning toppings, the act of pre-baking isn't always a necessary step. "I would only suggest pre-baking the pizza crust if your oven doesn't reach high temperatures or you're not using steels or stones," James King explained. "Otherwise, a properly timed full bake will give you the best results."
Other instances when pizza crust might benefit from pre-baking include when making certain gluten-free crusts, or a pizza that you plan to load with tons of toppings. Ultimately, whether or not you pre-bake is up to you, but according to our experts, the extra time spent doing so might not be worth the added effort.
Bear in mind that if you do choose to pre-bake, you should only do so for a few minutes. Otherwise, you may find your pizza crust hard enough to chip a tooth — and no one wants that, right?
Forgetting to coat your pizza pan with olive oil before baking
There's nothing worse than gearing up to enjoy a delicious homemade pizza only to realize you can't get the darn thing off the pan. After much labor, you'll likely be left with multiple torn and jagged pizza pieces; nothing like the neat little slices you get at your local pizzeria. Don't worry — Mark Bello offered some great advice. "Lightly grease your pan with some extra virgin olive oil before laying down your stretched dough," he suggested. "As for sticking to pizza peels, we prefer semolina flour over cornmeal to create the 'edible ball bearing effect' under your uncooked pizza in preparation for launching into the oven."
Of course, if you're using a plain ole baking sheet, parchment paper will work just as well. If you choose to go this route, we recommend building the pizza directly on parchment paper already affixed to a baking sheet. This eliminates the hassle of having to transfer the pizza from one surface to another, and the parchment paper allows you to easily release the pizza without needing to scrape up any stuck-on pieces. There are even some parchment paper options that are conveniently pre-cut into circular shapes; these InnoHHustle round parchment paper baking liners we discovered on Amazon are perfect for helping to ensure a neat and presentable slice every time.
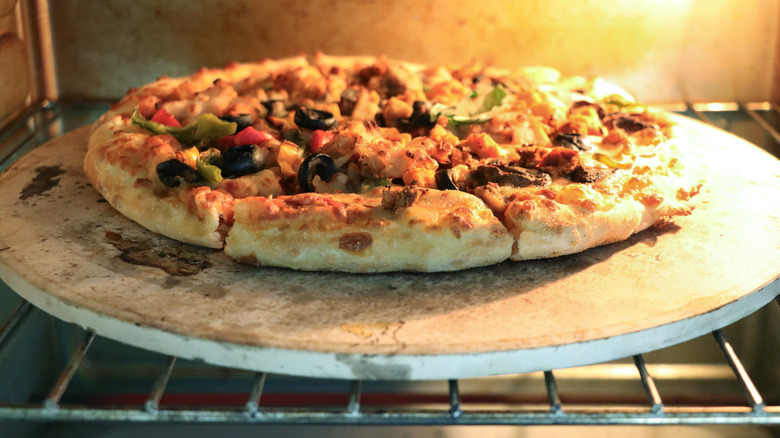
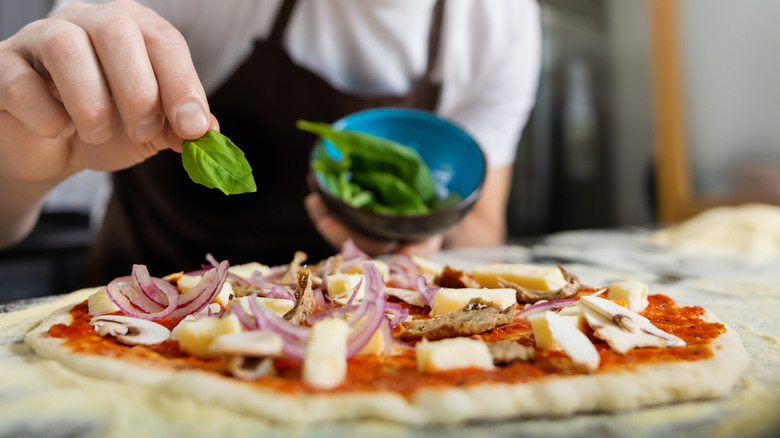
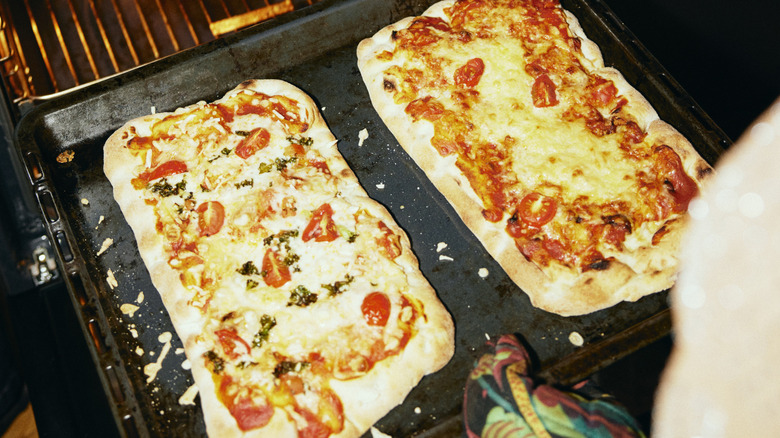
Overtopping your pizza
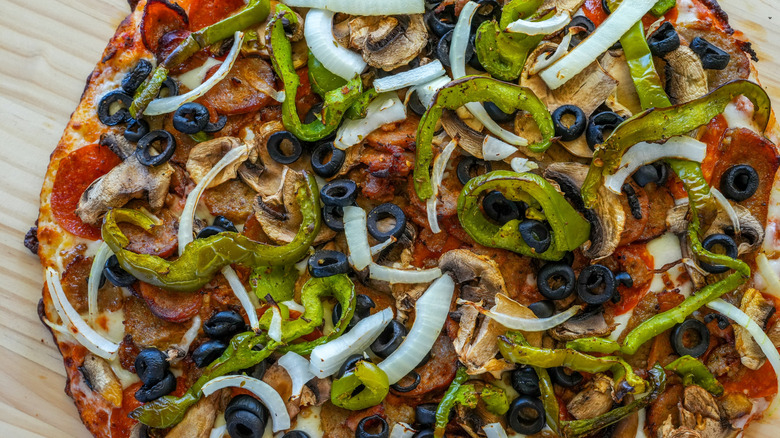
Loading your pizza with every wonderful topping you can think of certainly might sound like a good idea, but according to our experts, it might do more harm than good. "We follow the mantra 'less is more'," explained Mark Bello. "Use quality ingredients in moderation, and your pizza will be balanced with flavor and bake better than if it is buried under too many toppings. Overloading your pizza compromises the cooking of your crust. Too many toppings confuse your taste buds. "
We realize how disappointing this might be for some of you deluxe pizza fans, but there's still hope. Rather than loading your pizza down with handfuls of each topping, try using each sparingly and spacing them evenly. As for which ingredients you choose, the world is your oyster, but bear in mind that certain toppings, like mushrooms, might require special care.
Because mushrooms release moisture when cooked, it can sometimes be helpful to sauté them beforehand. Likewise, veggies that are firmer, like green peppers and onion, may benefit from a quick toss over heat before placing directly on top of your pizza. Not up for the extra steps? In that case, consider slicing your veggies as thinly as possible before placing and baking them over your pizza.
Using low-fat mozzarella
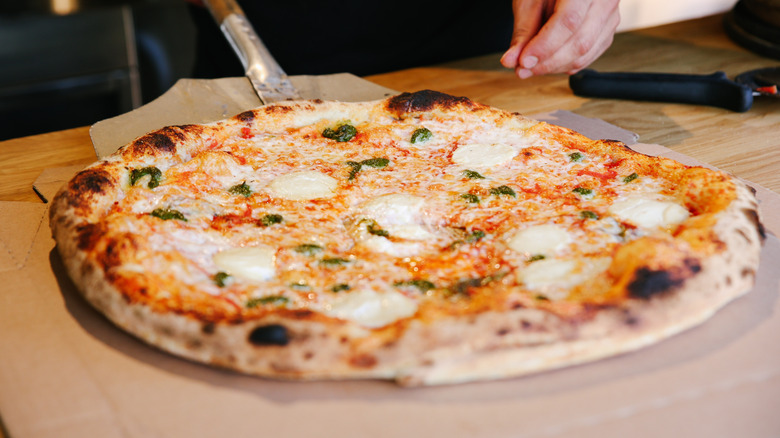
When it comes to cheese, our experts have spoken — mozzarella is generally the way to go. This familiar white cheese melts impeccably for the ultimate cheese pull, while also yielding creamy, milky, and mild flavor that pairs perfectly with a light crust, pizza sauce, and toppings.
Although mozzarella cheese is the prime choice for pizza according to pros, there are a few considerations to keep in mind when deciding which type to use. "For classic NYC-style [pizza], we use low-moisture whole milk shredded mozzarella," explained Mark Bello. "This is our preference over part-skim mozzarella as it melts better and doesn't brown/toughen before your crust, as part-skim mozzarella can tend to do when baked at home-oven temperatures. Again, 'less is more' so you can use less whole milk mozzarella over part-skim because of how it melts."
As for whether shredded or fresh mozzarella works best, feel free to use either, though you may find it easier to spread shredded cheese than fresh mozzarella. Also, be sure to keep an eye out for low-moisture mozzarella cheese blocks at the store. Yes, it will require more effort to grate the cheese, but according to some fans, nothing quite beats the satisfying flavor and texture of block-shredded cheese from home.