Sticky Toffee Sticky Buns Are A Big, Distracting Project—and That's Exactly The Point
A little over a year ago, I shared my recipe for my beloved Brown Butter Cinnamon Rolls on The Takeout. Since that fateful day I've been tagged in countless Instagram stories, Facebook posts, and whatever else people want to use to gloat about how they conquered a recipe that's not only unbelievably delicious, but also a massive pain in the ass. In fact, the first sentence of the recipe is, "My cinnamon rolls are a pain in the ass to make." It's extremely important that everyone understands the amount of time it requires. They're more than a recipe—they're a whole damn project, meant for those cold weekends when you're holed up inside, looking for an activity that yields extremely delicious results.
And here we are, twelve months later: a brand new October in a brand new world. That's why I'm here with a variation on those magnificent classic cinnamon buns, one that manages to be an even bigger pain in the ass to make, because in times like these, we need recipes that can double as weekend plans.
You absolutely must read this recipe all the way through before you begin, preferably two or three times. Take a note of all the blocks of time these sticky buns require and adjust your schedule accordingly. Pre-measure your ingredients, pay attention to what you're doing, and have faith! The only way to get good at making sticky buns is practice, so if your first batch isn't perfect, you'll just have to make them again... and again... and maybe a few dozen more times after that, just until you know for sure your sticky buns are as perfect as perfect gets. You're spending your time inside teaching yourself a valuable skill! Look at you, making the best out of a bad situation. I hope you're proud of yourself, because I damn sure am.

For the Dough:
Part A: Poolish
- 2/3 cup whole milk
- 2 Tbsp. date molasses
- 1 packet active dry yeast
- 125 g (1/4 cup) flour
- 40 g (approx. 1/4 cup unpacked) light brown sugar
- 3 Tbsp. date molasses
- 350 g (2 cups) flour
- 3/4 cup chopped dates
- 3/4 cup water
- 1/2 tsp. baking soda
- 2 eggs
- 10 Tbsp. (1 1/4 sticks) butter
- 1 1/2 tsp. kosher salt
Part B: Dry Ingredients
Part C: Date puree
Part D: The Rest
For the Date Filling:
- 1 cup chopped dates
- 1/2 cup water
- 1/2 tsp. baking soda
- 1/4 cup brown sugar
- 1/4 tsp. kosher salt
- 6 Tbsp. (3/4 stick) butter
- 1-2 Tbsp. brandy (optional)
For the Toffee Sauce:
- 1 cup brown sugar
- 1/4 cup water
- 1 Tbsp. light corn syrup
- 3/4 tsp. kosher salt
- 4 Tbsp. (1/2 stick) butter, cut into pieces
- 2/3 cup heavy cream
- 1-3 Tbsp. brandy (optional)
Step One: Make the poolish
Poolish is a yeasty pre-ferment that makes the dough into something pretty damn special. It's going to take a long time to do its thing, so start this at least 12-24 hours before you're hoping to actually eat the sticky buns. If you want them on Saturday morning, start making the poolish before you leave for work on Friday.
Put the ingredients in Part A—the milk, yeast, date molasses, and flour—into the bowl of a stand mixer, then stir it around with a spoon until they're all combined and goopy.
Next, pour Part B—brown sugar, then date molasses, then flour—right on top of the poolish. Don't stir! Just dump them in, in that order, then cover the bowl with a loose sheet of plastic wrap or a kitchen towel, and stash the bowl somewhere that's not too hot, but not too cold (I like putting it in the cold oven with the light on). Leave it there for at least two hours, up to 24.
Step Two: Make the date puree
This is Part C. In a large saucepan, bring the chopped dates and water to a boil, then reduce the heat to medium and stir in the baking soda, and cook while stirring gently for 3 minutes. Note that once you add the baking soda the mixture is going to foam up a lot, so if it threatens to spill out of the pan, move it on and off the heat as you cook it.
Put the date puree in a wire strainer set over a bowl, and let it sit for about 15 minutes until it turns into a thick black paste. Discard the excess liquid, and refrigerate the puree until you're ready to make the dough.
Step Three: Make the dough
Gather all the ingredients for Part D. Slice the butter into thin pats—about 1/16" each. Spread them around a bit on a plate so they can come to room temperature quickly; you want them to be pliable when you handle them, not melted. Crack the eggs into a measuring cup or small bowl, and add the salt.
Get the bowl of poolish and fit it into your stand mixer with the dough hook. Start the mixer on medium and let it run for a minute or two until the flour and poolish seem somewhat mixed together. It's going to be very dry and crumbly. Stop the mixer and use a silicone spatula or wooden spoon to bring up any bits of the poolish that are stuck to the bottom, then add the date puree (Part C) and set the mixer back on medium for another minute or so until the dough comes together somewhat.
With the mixer running, add an egg, count to 10, then add the other egg, and count to 10 again. Turn the mixer up to high for 1 minute, then stop it and scrape down the bottom and sides of the bowl. While holding onto the mixer to keep it from flying off the counter (it will try to do this), set the mixer to medium-high and beat the hell out of the dough until it turns into a tough ball that wraps itself around the dough hook—about 5 minutes.
Next, you're going to add the butter to the dough bit by bit. Stop the mixer, grab a few pats of butter, and push them into the dough—if you just toss the butter in while the mixer is running, it'll just get flung onto the side of the bowl while the dough spins round and round. Smoosh some pats of butter in, then run the mixer on medium for about 20 seconds until you can't see the butter anymore. Stop, smoosh another five or six pats in there, and repeat. Keep doing this, making sure you scrape the sides of the bowl every so often, until all the butter has been added, then just keep mixing it until you get a nice glossy ball. Cover the bowl with a sheet of plastic wrap or a dish towel, then let it sit (proof) at room temperature for an hour.
After an hour, the dough will have risen significantly, and it will be smooth, silky, and also quite soft. It needs another 2 hours of rest, this time in the fridge, to help it firm up a bit. Use your spatula or dough scraper to scoop up the dough to deflate it, then return it back to the bowl, cover with plastic, pop it into the fridge, and set your timer for 2 hours.
Step Four: Make the date filling
Just like you did earlier for the date paste: In a large saucepan, bring the dates and water to a boil, then reduce the heat, add the baking soda, and cook while stirring continuously until the mixture is thick—about 5 minutes. Add the brown sugar and stir until dissolved, then remove from the heat and add the butter, kosher salt, and brandy (if using). Once the butter is melted, pour the mixture into a bowl and refrigerate.
Step Five: Roll up your buns
You need to roll out your dough on a very well-floured counter or wooden board, so I suggest filling a small bowl with flour off to the side to keep dipping into as needed. This dough is soft, stretchy, just a bit sticky, and feels so luxurious that you'll want to make a blanket out of it. Don't stress out as you roll it—just let yourself become one with the dough. Also: remove the date filling from the refrigerator.
First rub a bit of flour on your board, your rolling pin, and your hands. Plop the dough out from the bowl, then knead and pat it around just a little bit so you get a nice rectangle. Roll it out a bit in one direction, then sprinkle the top with a wee bit of flour, lift up the dough, and flip it over. Giving it a flip each time you roll it out a little but to make sure it doesn't get stuck to the board, which is something you don't want to discover when it's time to roll. Keep rolling, stretching, and flipping the dough until you get an even rectangle that measures about 12" x 18". It's okay if it's not perfect.
Smear the date filling over the dough, then take the long end of the rectangle of dough and slowly roll it up from the bottom—if anything breaks apart, just pinch it back together. One rolled up, smooth it with your hands until you get a nice, even log. Wrap tightly in plastic wrap, then stick it in the freezer to firm up while you make the toffee.
Step Six: Make the toffee sauce and plop your buns down
In a large saucepan, stir together the brown sugar, water, corn syrup, butter, cream, and salt just until smooth, then bring to a boil. Reduce the heat to medium, simmer for 3-5 minutes until it becomes a golden amber. Remove from heat, then stir in brandy (if using); note that it will steam and bubble something fierce, so stand back from the pan a bit to stay safe.
Line a 9x13" baking pan with a few layers of heavy-duty aluminum foil, then pour in the toffee sauce. Let sit at room temperature until cool.
When your dough log is firm enough to slice (about 30 minutes or so), cut into 12 pieces and arrange cut-side down, four rows of three, in the toffee sauce. Cover with plastic wrap.
Here is where the method can diverge into two routes:
- If you'd like to bake the rolls immediately, let them sit (proof) at room temperature for 30 minutes.
- If you'd like to bake them the next morning, pop them in the refrigerator and allow them to slow-proof overnight. Pull them out to come to room temperature as you preheat the oven the following day.
Step Seven: Actually bake these damn sticky buns
Preheat the oven to 350 degrees Fahrenheit, then slide the rolls in for at least 35 minutes. Personally, I like my rolls a bit medium-rare (so to speak) in the middle, so at 40 minutes I pull them out and let them cool on the counter for another 10. If you like yours a bit more well done, bake them for another 5-10 minutes, until a toothpick inserted into the center of the buns pulls out clean.
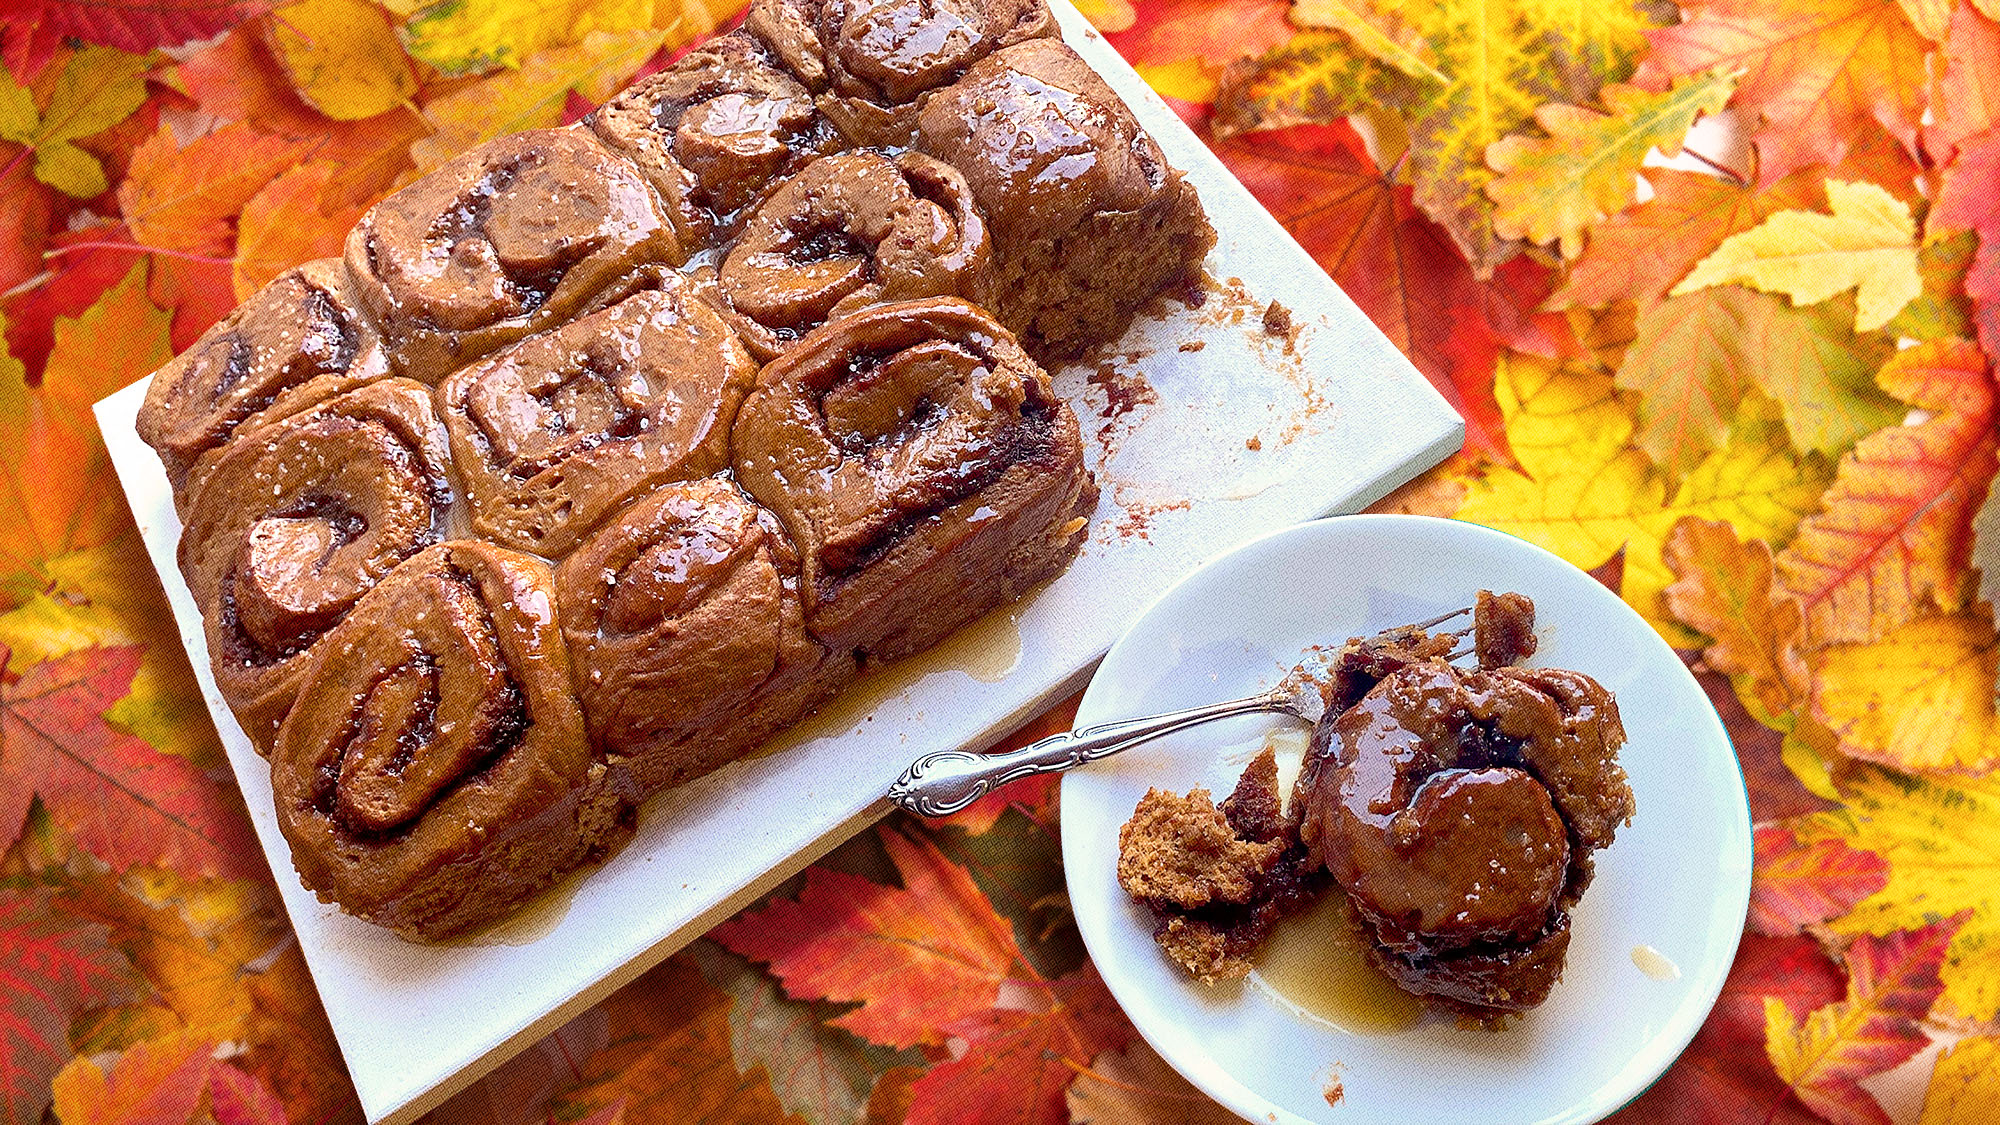
Let the buns cool for about 15 minutes; put a platter or large cutting board over the pan, then flip it. Pull up the pan, peel off the foil, and enjoy your sticky buns covered in toffee sauce.
Suggestion: If your sticky buns don't look pretty after you peel off the foil, cover them with chopped nuts or powdered sugar to cover them up. No one will ever know.