Portuguese Egg Tarts Are The Sexiest Thing You'll Ever Bake
We may receive a commission on purchases made from links.
Truthfully, I don't always enjoy baking. I always enjoy the result when I muster up the moxie to do it, especially since I baked professionally for well over a decade and am really, really, really good at it. When baking starts being a job, it stops being a joy. Life is cruel like that.
The exception to all this misery is working with doughs, my love of which will never die. Instructions on the page will only get you so far when making and rolling out dough, because the process is entirely reactive: You must listen to what the dough is telling you through the way it looks as it's coming together, the way it feels when you cradle it in your hands, the way it moves when you roll and shape it. It's an intimate process that you can only learn through practice, one that becomes meditative the better you get at it. And if you mess up while you're learning, who cares? Just because it's not perfect doesn't mean it doesn't taste good. There is no reason to be ashamed of mistakes when they are delicious mistakes.
Before I developed this recipe, I had never tried my hand at making Portuguese egg tarts, despite the fact that I love them so. It wasn't until I began my research that I realized I had never had a true, authentic Portuguese egg tart, and that is because of the dough: Though it is called puff pastry, it is not the puff pastry I have long been used to, with its cold butter and precarious temperature control and oh so much stress. This Portuguese puff has an entirely different technique, and I swear to you all that this dough is so much fun to make that I've already done it three times this week, just for kicks. My freezer is slowly filling up with the stuff, which is a good thing since I anticipate eating a lot of these egg tarts for the remainder of my days on earth. They're the kind of pastry that can make you see god and make life worth living.

The dough begins simply enough, with flour, water, and salt. It is sticky and threatens to cause trouble; it is a wild stallion that secretly desires to be tamed. Rolling it out on parchment will solve everything, keeping you from dusting on too much extra flour or cursing its very existence as you try to peel it off your rolling surface. The butter is room temperature and whipped until light; you needn't worry about beating a frigid butter block and praying it doesn't get too soft. If a bit of butter oozes out of the side, you can cover it with a sprinkle of flour and it will be as good as new; for a dough that is nothing short of a masterpiece when baked, it is remarkably forgiving. You are not at war with this dough—you are getting to know each other and building a relationship that will produce a beautiful, tasty baby, one that shall fill you with the type of love you thought could only exist in fairy tales.
The tricky part of making these tarts is not the dough, nor is it the custard. It's the oven. Traditionally the tarts are cooked in furiously hot bakery ovens, the kind that reach a temperature your oven can only dream of without an assist. To get the temperature you need, preheat the oven to 500 degrees with a heat-absorbing surface inside to rest the tarts on. This could be a pizza stone, a cast iron griddle, or, in my house, a Baking Steel (I have their griddle, which is pricey, but I assure you that it is worth every single penny and will last). If you have none of those things, a sturdy baking sheet will do.
Even if you're not a baker, do yourself a favor and attempt to make these tarts. This is one of the most extraordinary recipes that I have ever developed, and I have written well over a thousand in my time. Even if they're a disaster the first time around, you'll want to try your hand at them again. And again. And again. Seriously, I can't stop eating them, and I have no intention of trying to stop any time soon.

Pastel de Nata (en inglés: Portuguese Egg Tarts)
Makes 12 individual tarts
For the pastry:
- 1 3/4 cups all purpose flour
- 3/4 cup (1 1/2 sticks) unsalted butter
- 3/4 tsp. kosher salt
- 1/2-3/4 cup cold water
- 1 small lemon
- 1/2 cup water
- 3/4 cup sugar
- 1 small nub of nutmeg or 1 cinnamon stick
- 1 1/2 cups whole milk
- 1/2 tsp. kosher salt
- 1/2 cup all purpose flour
- 2 eggs
- 4 yolks
For the custard:
First, make the pastry
Add the flour and salt to the bowl of a stand mixer affixed with the paddle attachment and turn it on medium-low speed. Slowly pour in water a few tablespoons at a time until it makes a shaggy dough—you might not need all the water, so keep an eye on it! When you're certain there are no more dry flecks of flour in the dough, turn the speed up to medium-high and beat until the dough cleanly pulls away from the sides of the bowl, which will only take about a minute or two.
Lay out a large piece of plastic wrap on your counter, then plop the dough into the center of it. Use your hands to pat it into a rectangle about 1" thick; note that the dough will be a bit tacky, so if you find it sticking, sprinkle it with a tiny amount of flour. Wrap the dough rectangle entirely with plastic and set aside for at least 15 minutes to allow the gluten to relax.
Next, add the butter to the mixer bowl (no need to wash the bowl first). Using the paddle, beat the bejesus out of it on medium-high until it's smooth and creamy. You want the butter to be ultra whipped, to the consistency that would be ideal for schmearing across a piece of bread. We're going to be doing a lot of schmearing.
Lay a large sheet of parchment paper out on your countertop; rolling the dough out on parchment makes it easier to fold, especially as this is a sticky dough and you do not want to go crazy dusting it with flour. Do give your rolling pin a light flouring, though, and get to work rolling out the dough into some sort of rectangular shape that is evenly about 1/8" thick.
Now, the schmearing begins! Using the power of your mind, visualize two lines running horizontally across the dough, dividing it into three equal sections. Schmear a thin layer of butter on the bottom two sections. Think of it like a piece of toast: You don't want so much butter that you're eating fat globs of the stuff, but you don't want to go too light on it, either. Try to keep a 1/2" border around the edges of the dough unbuttered, but if you slip up, it's not the end of the world.
Next, the first fold. Use the parchment paper to lift up the unbuttered third and fold it right over the middle section. Then, lift the bottom third up and fold that over the middle. Pinch all the sides up to seal, give it a few nice pats to even the whole thing out, and rotate the dough 90 degrees.
Now, do that all again: Roll out into a large 1/8" thick rectangle, schmear some more butter over 2/3 of it, fold over the top, fold over the bottom, pinch and pat.
Once again, roll the dough out thinly into a rectangle—as thin as you can get it without freaking out and second-guessing your abilities. Schmear the remaining butter over the whole thing; if you've got a bit of leftover butter in the bowl, that's totally fine. Fold over a 1" section at the top and then, using the parchment paper to help you out, roll the whole thing up, jellyroll-style, into a log.
Dust your hands with a tiny amount of flour and gently roll the dough against the counter with your hands, working your way to the edges. Remember making snakes with Play-Doh when you were a kid? You're doing that, but with fancy laminated Portuguese dough. Roll it out until it's about 20" long, then roll it up in the parchment paper and twist the ends to seal like a big Tootsie Roll. Refrigerate the dough for at least two hours, but ideally overnight.
(Pro tip: There is nothing stopping you from making multiple batches of this laminated dough at a time and then storing them in the freezer for whenever the craving for egg tarts strikes. If you're going to pull out the mixer and make a mess, you might as well get as much mileage out of this whole to-do as possible. Wrapped tightly in plastic wrap and stored in a large zip-top freezer bag, the dough should stay good for at least six months or more.)
Many hours later...
Grab a 12-cup standard size muffin pan; fill a small bowl with ice water. Remove the dough from the fridge and, while it's cold, cut into 12 equal pieces. Place the pieces into the cups cut side down, so that the butter spiral is on the bottom of the pan. Dip your thumb in ice water and press down firmly on the center of each piece of dough, stretching it outwards to make a small cup shape. Then, dip all your fingers in the ice water, shake them off, and press the dough up the sides of the cup until you've created 12 thin pie shells that come up about 1/4" over the top. (If you end up a little bit short or a little bit tall, though, don't worry—it'll be fine.) If you need help visualizing the process, this video of tarts being made at Libson's famous Pastéis de Belém could be of help. Once you're done, stick it in the fridge to keep cold while you preheat the oven and make the custard.
Prepare the oven
Put a Baking Steel, cast iron griddle, pizza stone, or thick metal sheet pan on the top rack of the oven, and preheat to 500 degrees Fahrenheit.
Make the custard
Use a vegetable peeler to cut off a thick strip of lemon rind, then cut the lemon in half. Pour the water into a small saucepan, add a squirt of fresh lemon juice, and then stir in the sugar. Plop in the nutmeg nub/cinnamon stick, then use a wet pastry brush or paper towel to wipe any rough sugar crystals off the side of the pan. Cook over high heat until it comes to a boil, then cook for two minutes and remove from heat. Set aside on the back of the stove.
Put the milk and salt into a large saucepan over high heat. In a large bowl, whisk together the flour, eggs, and yolks until completely smooth. When the milk begins to simmer, slowly pour it into the eggs in a slow stream while whisking. Whisk in the sugar syrup, fish out the nutmeg and lemon peel, then pour the mixture back into the saucepan. Set a wire strainer over the large bowl, and put the saucepan back onto the stove over medium heat. Cook the custard while whisking vigorously until it thickens, then pour it into the wire strainer and use a rubber spatula to push through to ensure a smooth, lump-free custard.
Remove the muffin pan from the fridge. Using an ice cream scoop or quarter cup measuring cup, evenly divide the custard between the 12 crusts. Slide the pan onto the preheated stone/pan/whatevs., close the door, and walk away for 16 minutes. Promise yourself you won't look inside to peek, not even once, because if you do it'll let all the heat out and you don't want that.
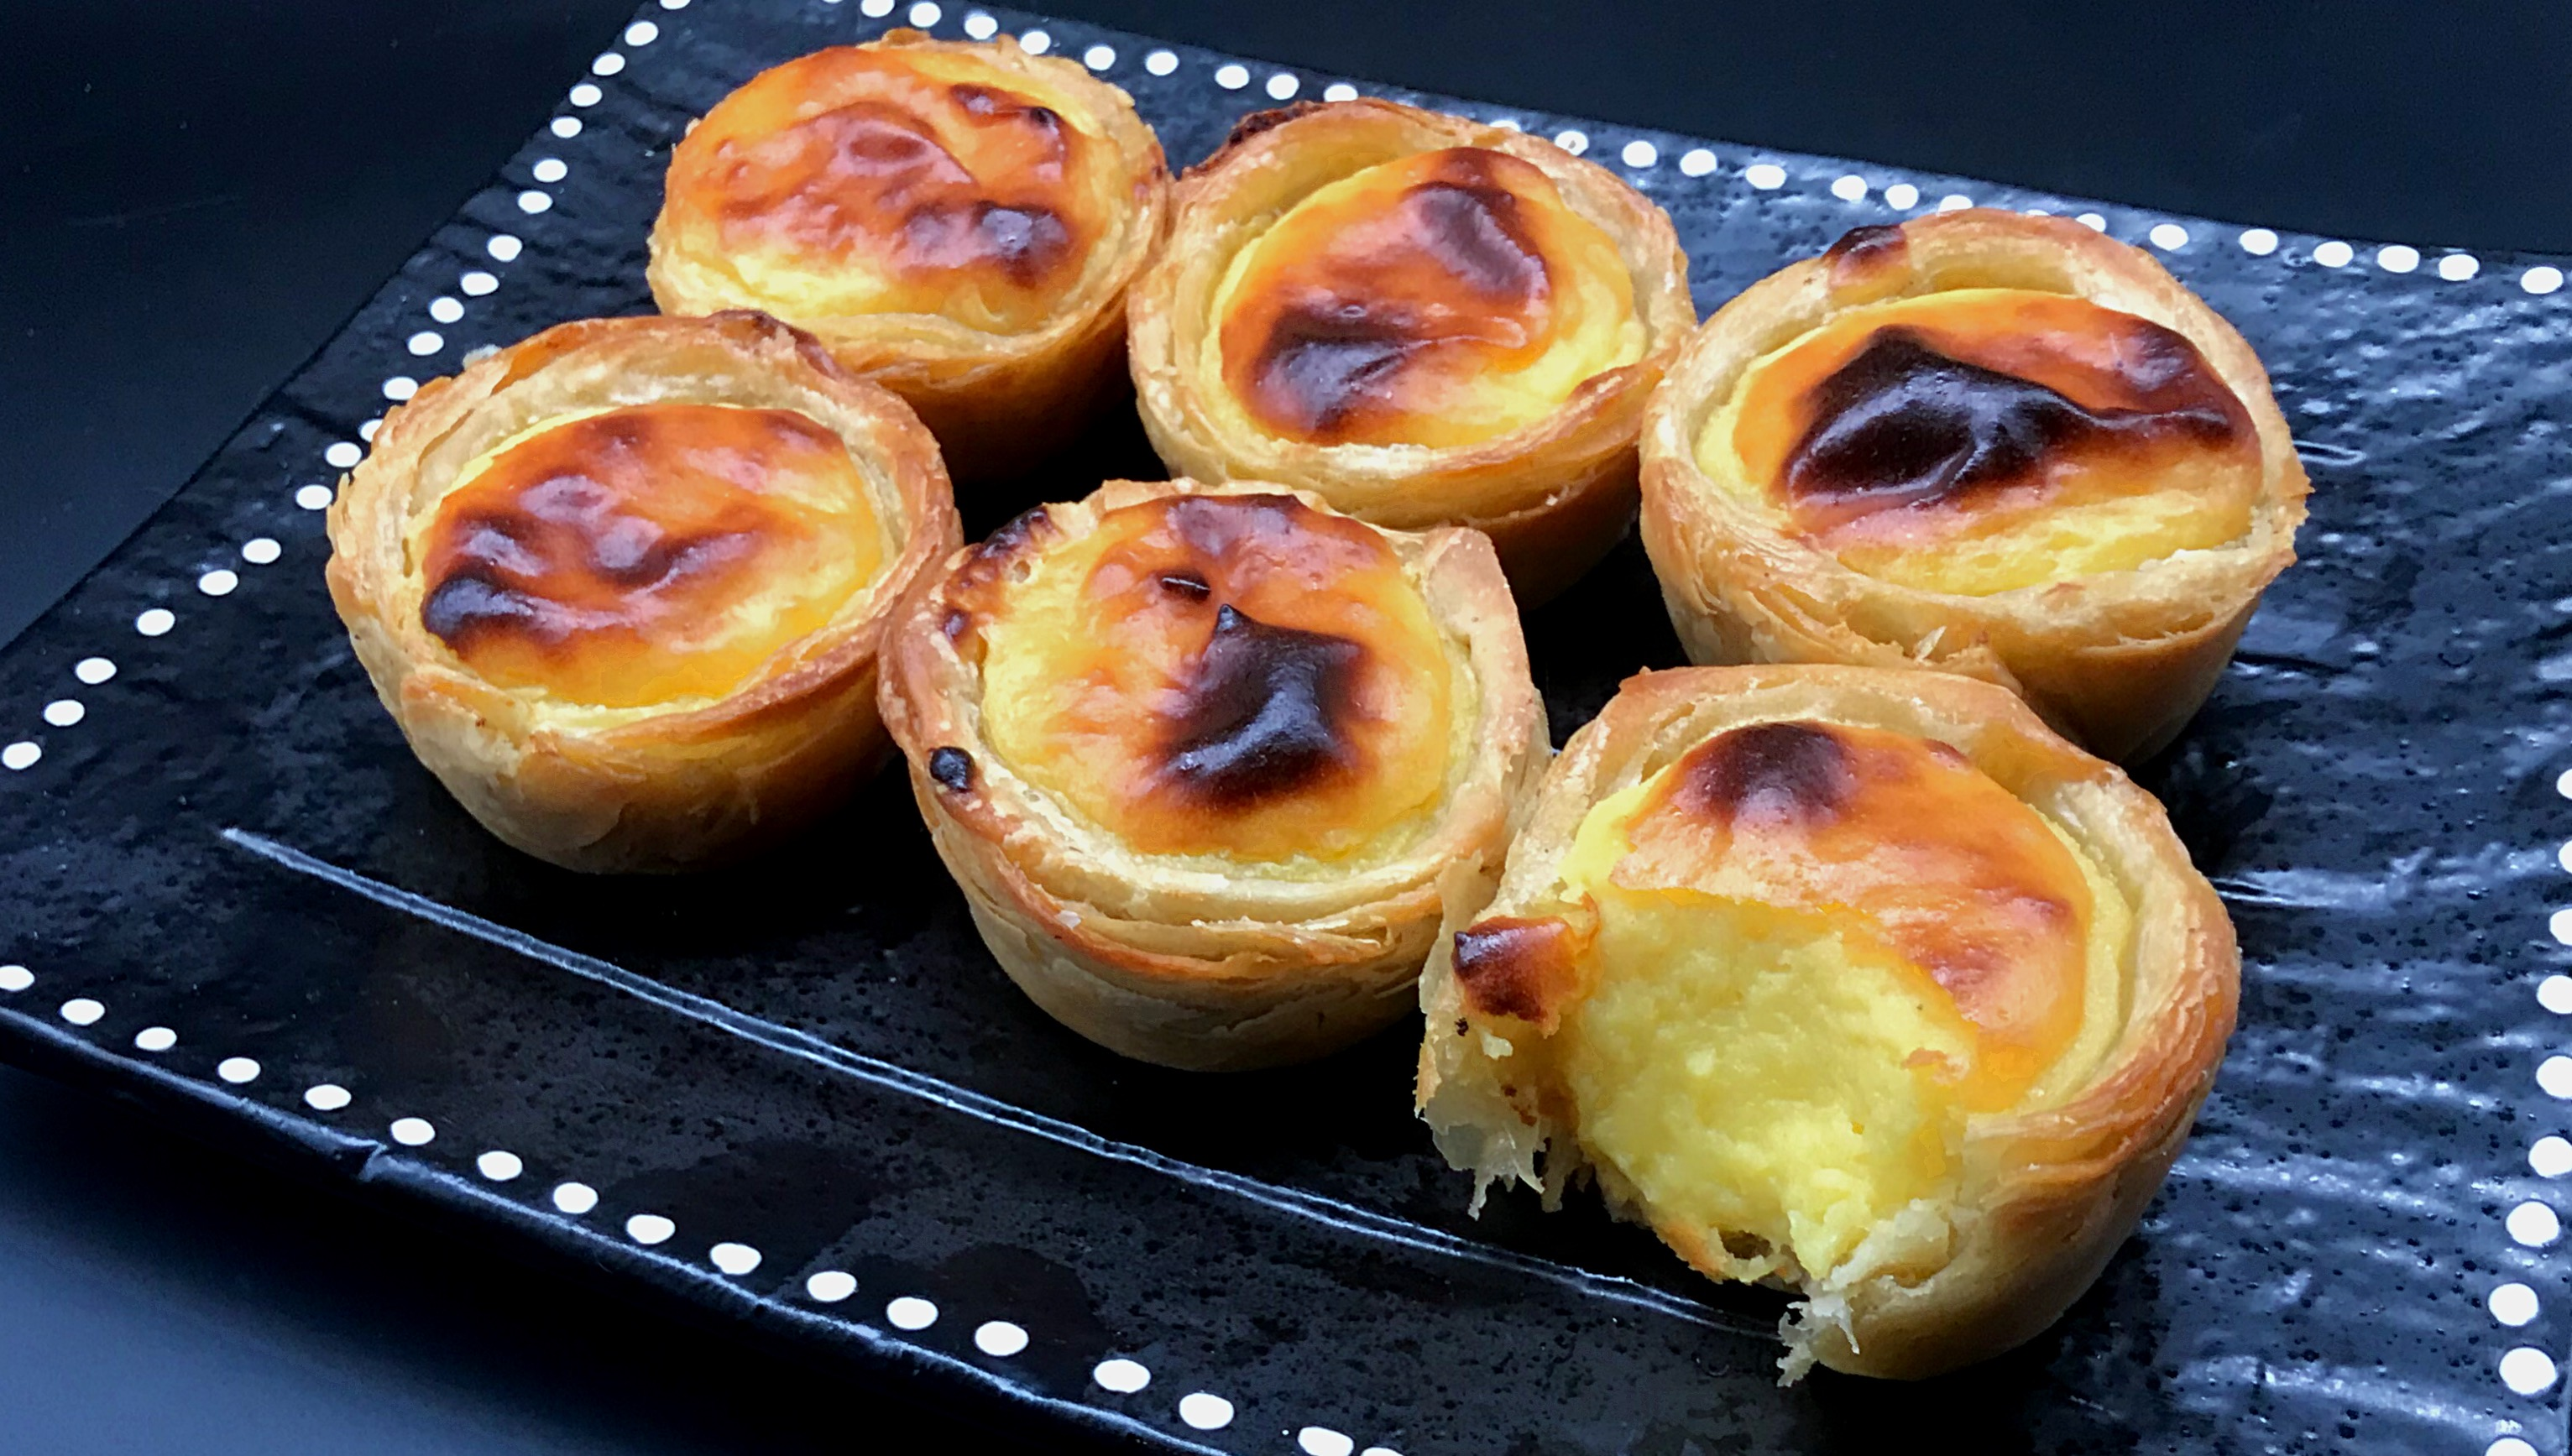
When the pastry has turned golden brown, pull the pan from the oven and allow to cool for a few minutes before unmolding the tarts with a butter knife. If you'd like the bottom of your tarts to be ultra crispy, once they've been unmolded you can use a metal spatula to slide them back into the oven directly onto the hot baking stone/sheet for about two minutes until they turn brown.
The tarts are wonderful when eaten hot, though try to wait at least 10 minutes for them to cool so you don't burn your tongue. They can be stored, and eaten, at room temperature. In Portugal, pasteis de nata are often served with a sprinkling of cinnamon and/or powdered sugar, but personally, I like mine plain. They're pretty perfect just as they are.