Reach Your Daily Saturated Fat Quota With Homemade Clotted Cream
Welcome to Biscuit Week, a special time set aside to cherish the most buttery and beloved of all quick breads.
Americans don't particularly like the word "clot" in their food, and understandably so. It's primarily used in regard to our physiology, often negatively. So clotted cream sounds like the worst of the dairy world: "I'll just have the clots, please." Yeeeesh.
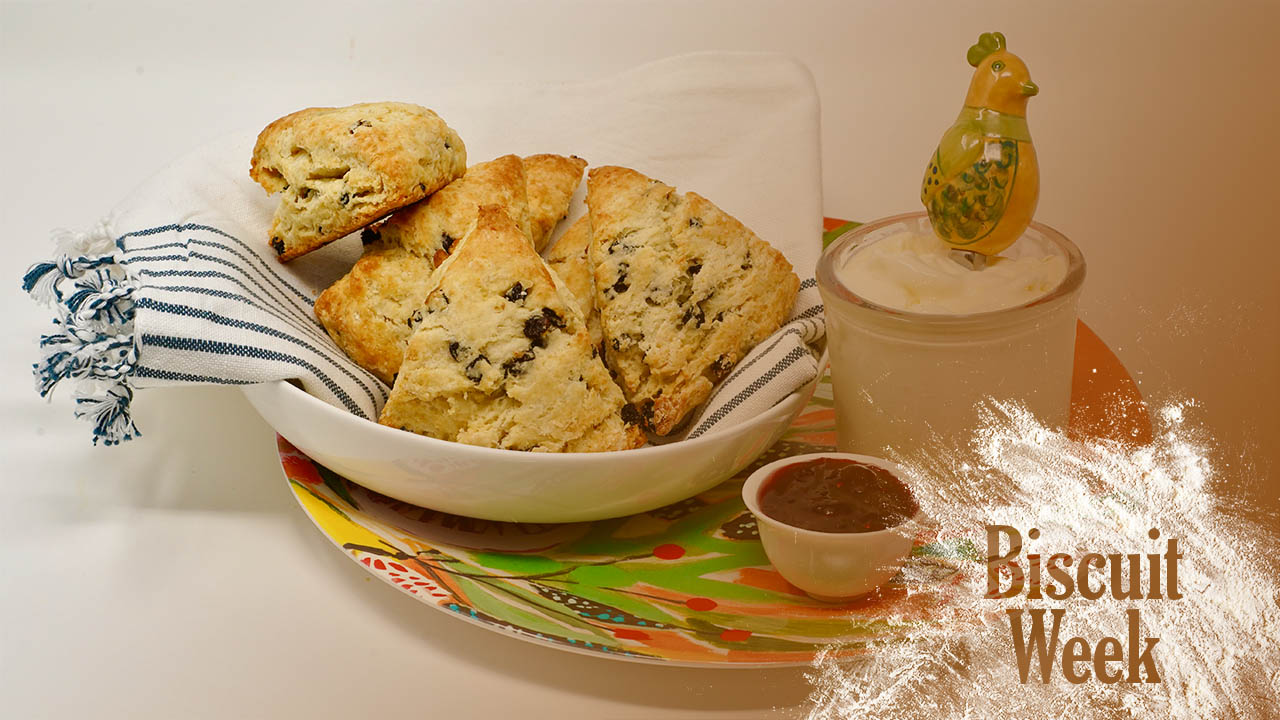
Luckily, clotted cream is usually paired with those anxiety-reducing words "scone" and "jam." I started making scones years before I discovered the expensive pocket-sized little jars of clotted cream sold at faraway British grocery stores, but afterward my life was transformed. Clotted cream is luxuriously thick and buttery with a mild nuttiness. No wonder it's good. It is, quite literally, all the fat, coaxed slowly out of the cream and skimmed off for your slathering pleasure. But what do you do if you can't find it or if there aren't any British tea shops nearby? You make it yourself.
Clotted cream making is time-consuming (think two days) and produces a small yield. But it's worth the trouble. You'll need a high quality non-ultra pasteurized cream to start with: the heating process in pasteurization kills off the microorganisms that aid in the "clotting" or coagulation. The clotting process is akin to making yogurt. First you heat it to proper temperature, then keep it at that constant temperature to ferment it.
The first time I made it, I got it wrong. I bought the fancy, expensive, non-ultra pasteurized cream for $8 and patiently let it cook for twelve hours, and then chilled it for another eight hours, then chilled it some more. It tasted right, but the texture was an embarrassment: gritty and liquidy in places, with hard yellow chunks. Would it serve as hardscrabble clotted cream in a peasant cottage? Sure. But not on my watch. Not when I was so looking forward to having my own vat of silky clotted cream to use with abandon.
I had used a flimsy metal 8x8-inch pan, and that was a mistake. It didn't have the consistent heat retention necessary. Frustratingly, I had read accounts of people's grandmas making clotted cream in in the far corners of their wood-burning ovens. There's no way that maintains a consistent temperature, and yet they had delicious clotted cream, and I didn't. That's some druid-level magic right there.
I got antsy. And I was reading too much Cook's Illustrated, so I naturally looked to the America's Test Kitchen team to fix my life. I followed a supremely easy no-cook clotted cream recipe from The Science of Good Cooking. You just mix heavy cream and buttermilk and let it sit on the counter. It seemed too good to be true! And it was!
The America's Test Kitchen version was easy, sure—a lazy man's version of clotted cream, if that lazy man wanted to eat sour cream on his scones instead of legitimate clotted cream. Its texture was too slack, and the buttermilk tang too prominent. It missed the whole point of pure, creamy dairy luxury.
I went back to rustic and slow, and started again. This time, I used a heavy stoneware casserole dish with a two-inch depth of fancy cream (yet another $8) and left it in a 180-degree oven for 12 hours. Then I chilled it for 12 hours and chilled it again to firm up even further. It was perfect. I paired it with homemade cream scones, and my slightly tart strawberry compote.
It cost me more than $24 to arrive at this perfect clotted cream, but it was worth every penny and calorie. Would I make homemade clotted cream again? In a heartbeat—provided I have a heartbeat left, since I consumed more cream than a barnyard cat this week.

Clotted Cream
Makes about 1 cup
- 1 quart of high quality full-fat heavy cream, not ultra-pasteurized (I used Kalona SuperNatural brand from Whole Foods)
Heat your oven to 180 degrees Fahrenheit. Pour your cream into a heavy ceramic or glass baking dish. Any dish 8x8 inches or larger works, as long as your cream comes 2-3 inches up the sides.
Bake the cream undisturbed for 12 hours, until the top looks smooth and dry. It may be yellowish or lightly toasted looking at the end. This is okay. The finished cream needn't be pure white: a yellow or deep ecru is perfectly fine.
Remove the baking dish from the oven, cool, and then chill it in the fridge for 8-12 hours. Make sure you wrap it well in plastic to prevent food smells from seeping into the cream.
Scrape off the top layer of thickened cream, separating it from the remaining watery whey below. You can stir the thickened cream vigorously if it seems a bit liquidy. It will thicken further with more chilling, between one and four hours. Do not put it in the freezer at this stage to speed up the process, as ice crystals will form.
(The whey can be used in scones in place of milk, buttermilk, or cream. Or you can drink it straight and feel like Miss Muffet).
Spread the clotted cream on freshly made scones or biscuits, with a dollop of sweet-tart compote or jam. Leftover clotted cream will keep for up to 10 days in the fridge, or you can freeze it.