This Baked Chicken Kiev Will Save You A Trip To Costco
If you grew up on the bulk store-bought version, you'll be glad to know you can make it at home.
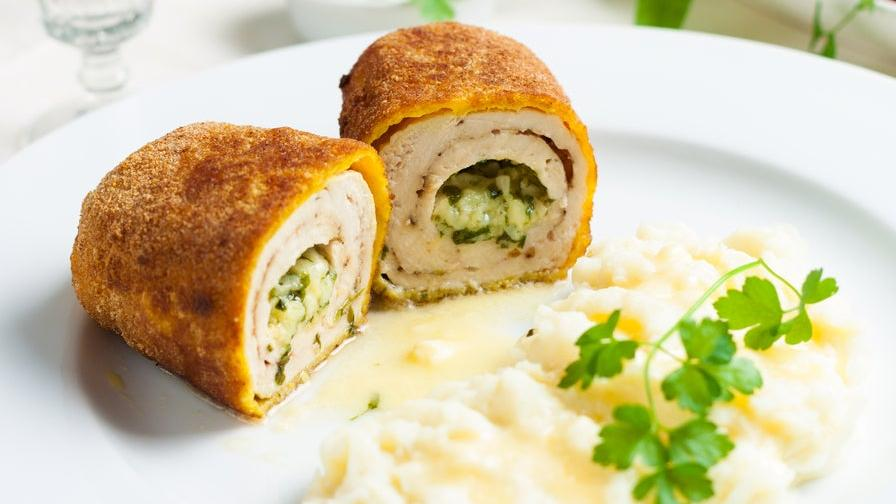
Frozen dinners eaten off of paper plates in front of the TV were common in my house, and since I lived with a melange of siblings, grandparents, aunts, and uncles, easy meals that could be purchased by the dozen were key. My favorite bulk-purchased frozen dinner? Chicken Kiev, a gussied-up chicken breast stuffed with garlic butter and herbs.
While this may sound exceptionally fancy for an elementary schooler to be enamored with, bear in mind that chicken Kiev is essentially a giant, slightly more sophisticated chicken nugget. Purchased by the case from Price Club, they came individually wrapped in plastic; all you had to do was pop it in the oven (or microwave, if you didn't care about an optimally crispy exterior) and then try not to burn yourself when scalding hot butter came flooding out the moment you stuck a fork in it. Chicken Kiev is a versatile dish, one that that pairs just as well with ketchup and a pudding cup as it does with a crisp green salad and a dry white wine.
As a child, I could not conceive of any other way to produce chicken Kiev than in some huge factory, the kind that Mark Sommers would showcase on Unwrapped. How else could you make chicken that shape? How did the butter get in there? I accepted it as an unsolvable mystery, ate it on a weekly basis until I went to college, and then, probably because I no longer subsisted on Price Club fare (RIP, my beloved), I promptly forgot about my beloved frozen dinner.
On a recent winter evening, desperately craving comfort food, images of molten butter and crispy chicken unexpectedly flooded back into my mind. I proposed the possibility to my husband: Chicken Kiev for dinner? I got a blank stare. He'd never heard of it. I immediately knew I had to rectify that situation, but I also had absolutely no intention of trekking from my apartment in Brooklyn to the nearest Costco to procure the frozen version. I'd have to dive into the internet and unravel the mystery for myself.
As it turns out, chicken Kiev is not difficult to make at home. It's essentially just a stuffed chicken breast that's rolled up and breaded before being either baked or fried. It does involve a number of steps, so batch-prepping more than you plan to eat in one sitting and stocking your freezer with future Kievs is highly recommended.
Once you master the technique, you'll realize that you can experiment with fillings; a ham-and-cheese-stuffed version, a sort of Kiev'd cordon bleu, was popular in my house. And on those nights when you need dinner to be both comforting and almost zero-effort, it's hard to beat pulling a few of these out of the freezer and popping them right into the oven.

Baked Chicken Kiev
Serves 4
Note: This recipe may seem complex, but none of the individual steps are particularly difficult. Since it is a bit of a process, it's worth doubling (or even tripling) this recipe and stocking your freezer.
- 4 boneless skinless chicken breasts
- 180 g butter, softened
- ½ bunch parsley, finely chopped
- 4 garlic gloves, minced or grated
- 2 eggs
- ½ cup flour
- 2 cups panko bread crumbs
- 3-4 Tbsp. olive oil
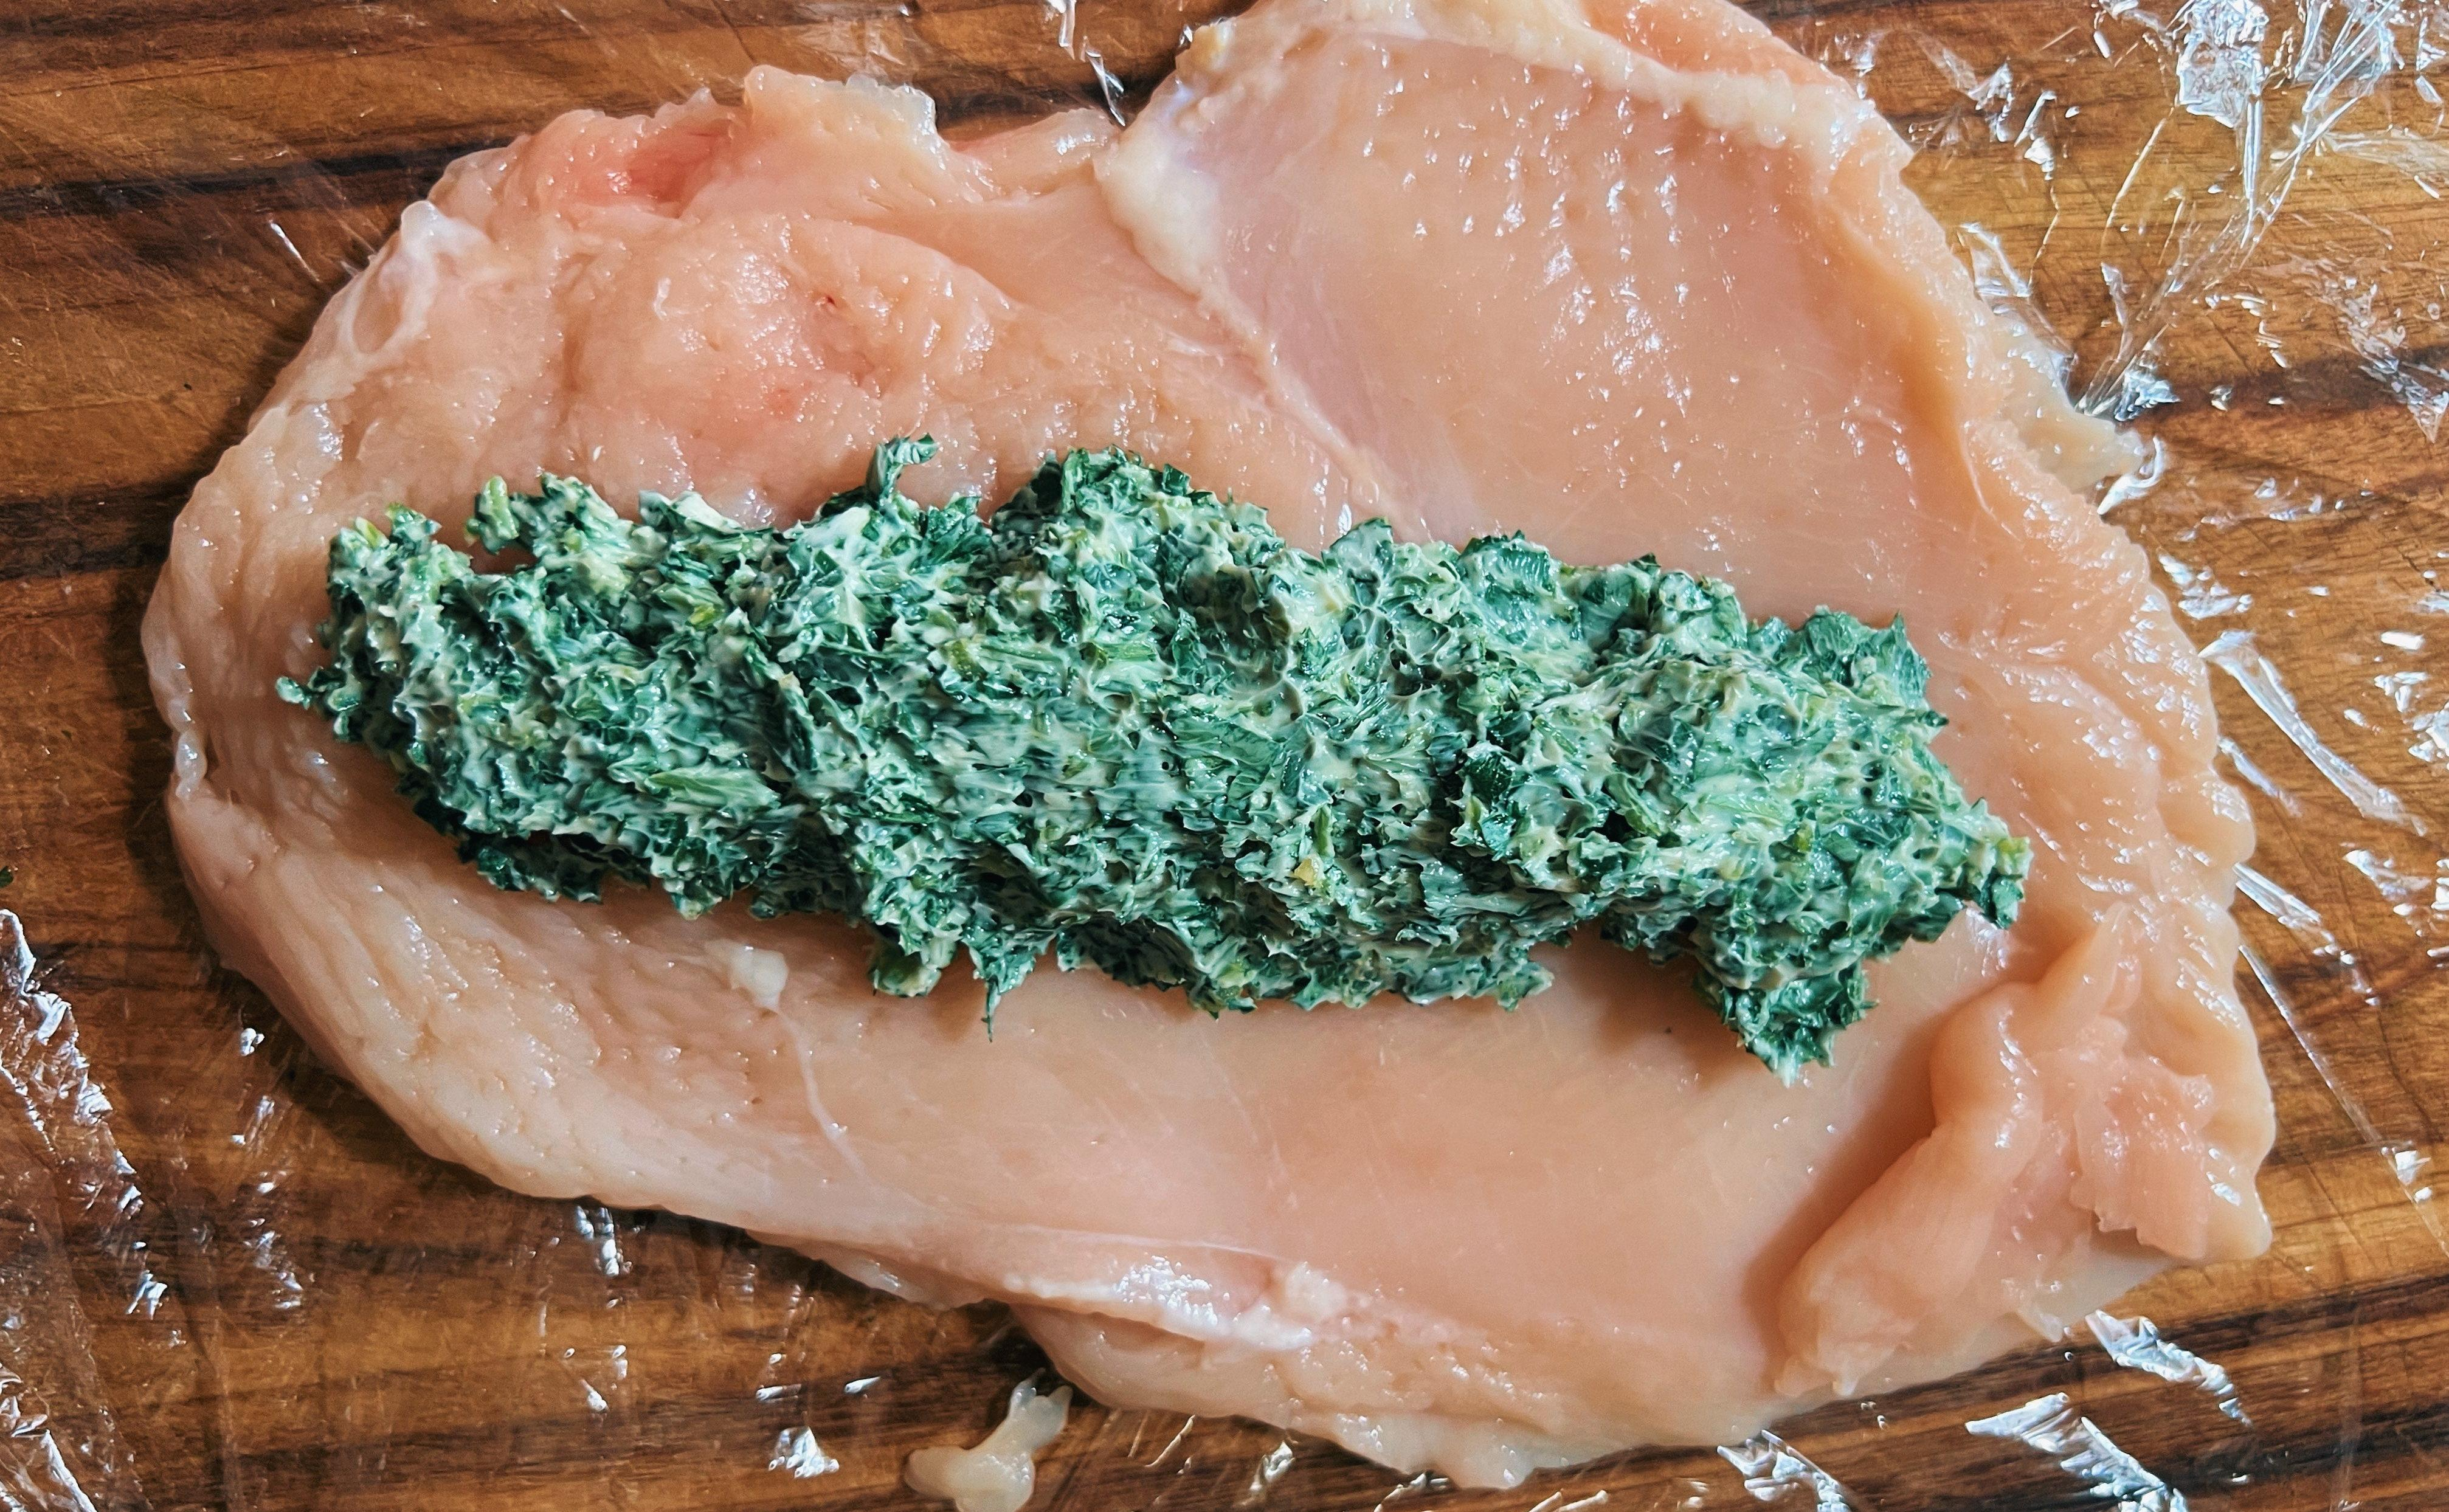
Take each chicken breast and lay it flat between two sheets of parchment paper or two pieces of plastic wrap. Pound until very thin. (You can use either a meat tenderizer or a rolling pin for this step; I prefer a meat tenderizer.) Set flattened chicken breasts aside.
In a small bowl, mix together softened butter with chopped parsley and grated garlic. Spread about 3 tablespoons of the butter mixture evenly across one side of each chicken breast, leaving about an inch around the edge.
Roll each breast into a log shape, tucking in the edges so it's well sealed. Wrap each log tightly in plastic wrap and freeze for at least 20 minutes.
While the chicken is freezing, toast the panko bread crumbs and olive oil in a skillet over medium heat, until the breadcrumbs are golden brown and smell toasty. This step allows you to skip deep-frying and bake your chicken Kiev, while still getting the color and texture of the fried version.

Whisk two eggs in a shallow bowl. Place flour on a plate and season generously with salt and pepper. Pour the toasted panko crumbs onto a second plate.
Unwrap each frozen chicken log and dredge first in flour, then in egg, then in panko. Using a fresh piece of plastic wrap, wrap tightly and return to the freezer for at least 30 minutes.
To cook:
- Preheat oven to 400 degrees Fahrenheit.
- Unwrap the chicken Kiev and place on a wire rack fitted over a baking sheet. Pierce the top of each one several times with a fork or paring knife; this allows steam to escape so your chicken doesn't explode.
- Bake for 30-45 minutes, or until the internal temperature reaches 150 degrees Fahrenheit on an instant-read thermometer. (If your chicken has been frozen for more than 6 hours, this may take closer to an hour.)